


You don’t want to bombard your user two minutes after they’ve left the checkout page or as soon as they've signed up.
Therefore, Delay comes as a great feature in creating email sequences.
Here’s how you can set delays while creating automation in FunnelKit Automations.
Step 1: Add delay from the node
Click on the blue (+) icon and then select Delay.

Step 2: Specify the delay time
Click on After a delay to start sending your automated emails after a certain period of time.
Here are the delay options provided in FunnelKit Automations:
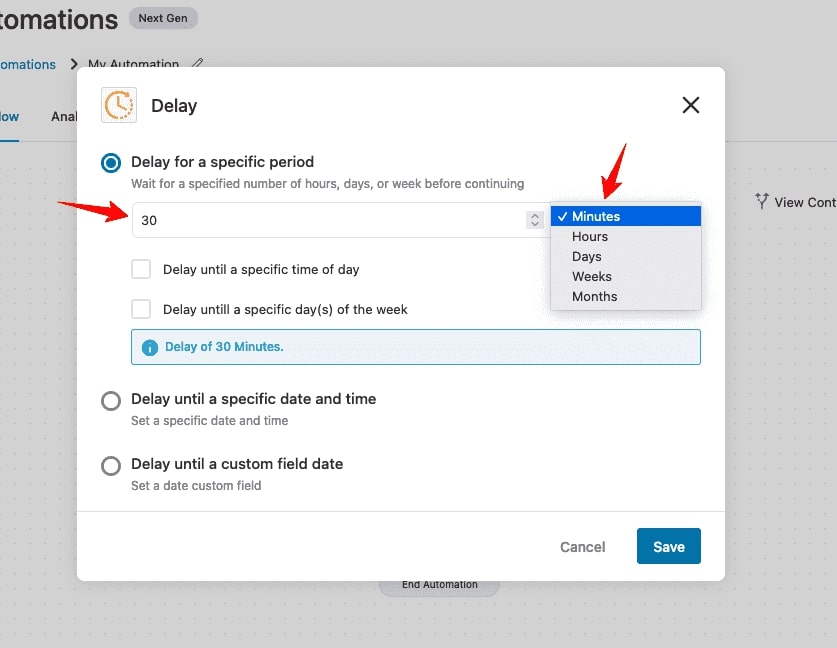
Delay For a Specific Period
Set the delay of your steps in minutes, hours, days, weeks, or months.
You can also specify a delay until a specific time of the day or specific days of the week.
Let’s understand them in detail.
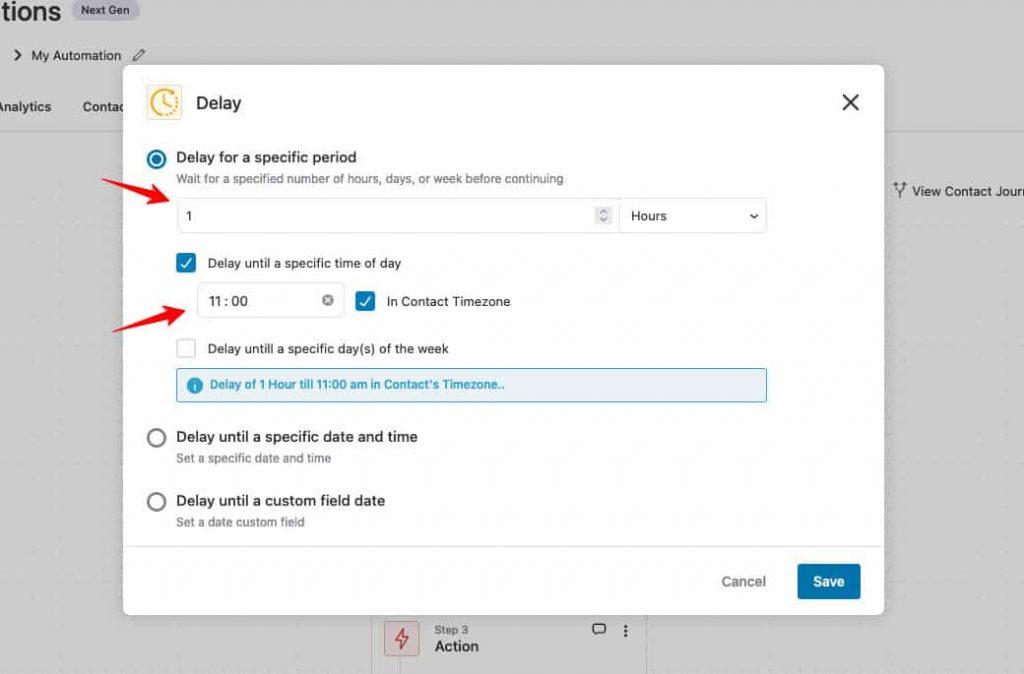
Delay until a specific time of day
You can set a delay for a specific time.
Furthermore, you can even specify the delay in the contact’s timezone.
For example, we have delayed the following automation for 1 hour till 11:00 AM in the contact’s timezone.
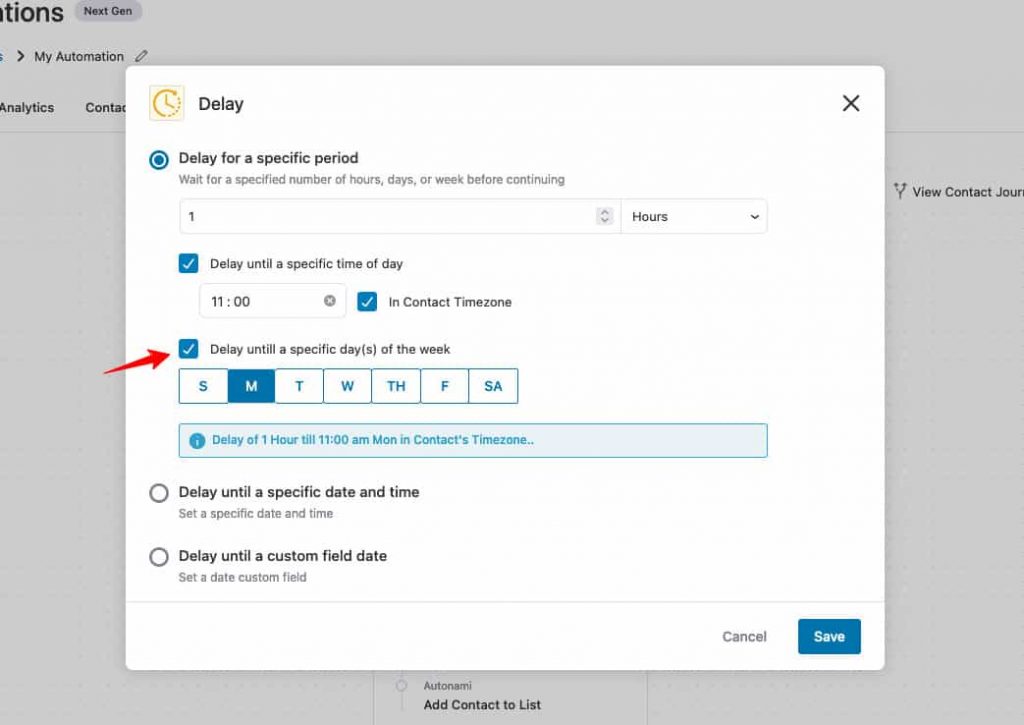
Delay until a specific day(s) of the week
Specify the delay until a specific day of the week.
For example, we have specified the delay until Monday at 11:00 AM in the contact’s timezone.
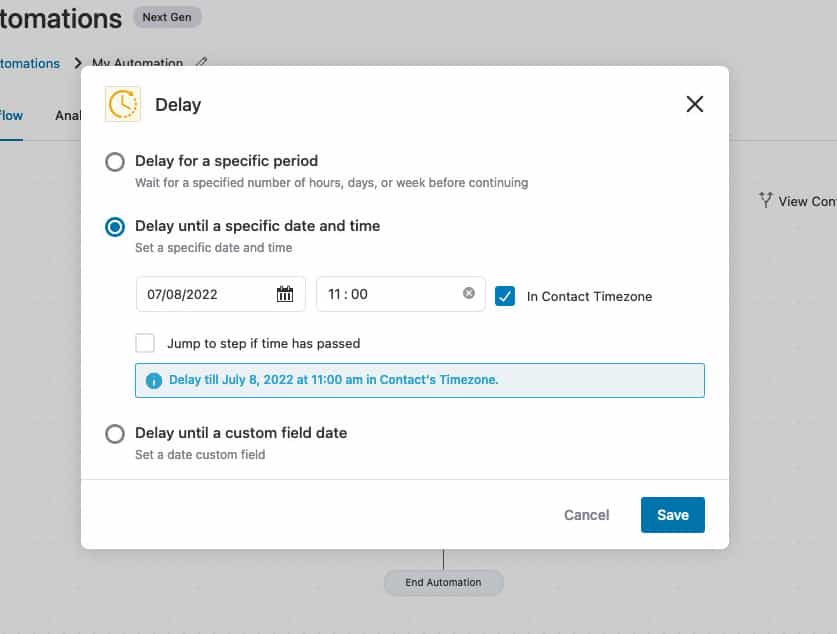
Delay Until a Specific Date and Time
Delay the next step until the date and time you specify here.
For example, we have specified the delay for a particular date and time in the contact’s timezone.
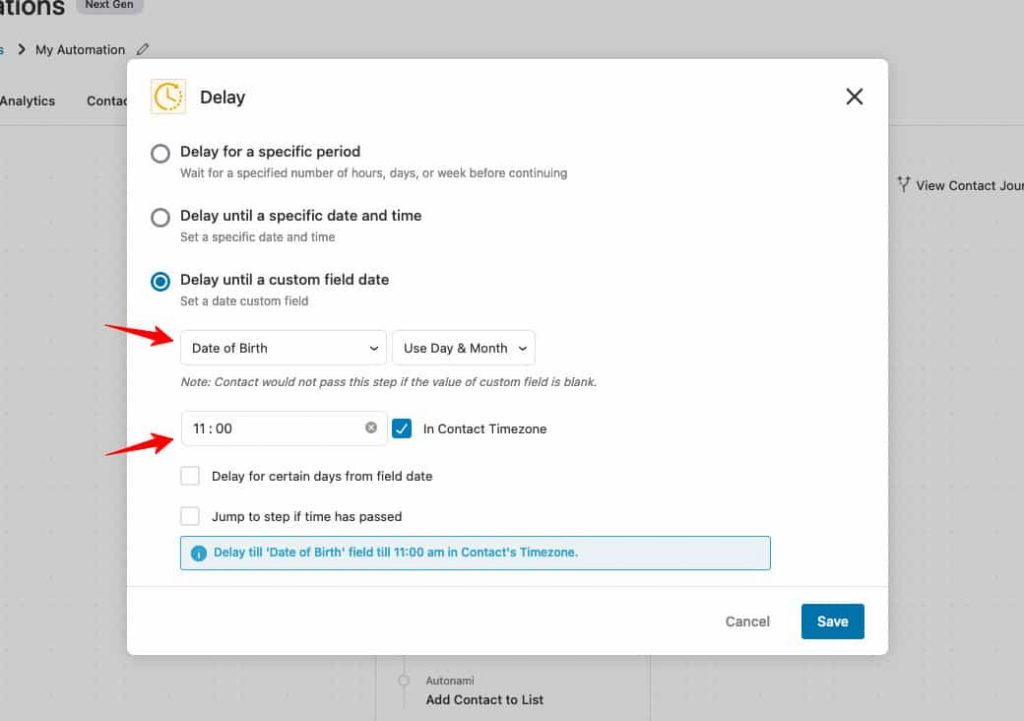
Delay Until a Custom Field Date
Set the delay based on a custom field such as date of birth, appointment date, etc.
You just need to select the custom field and specify the time here.
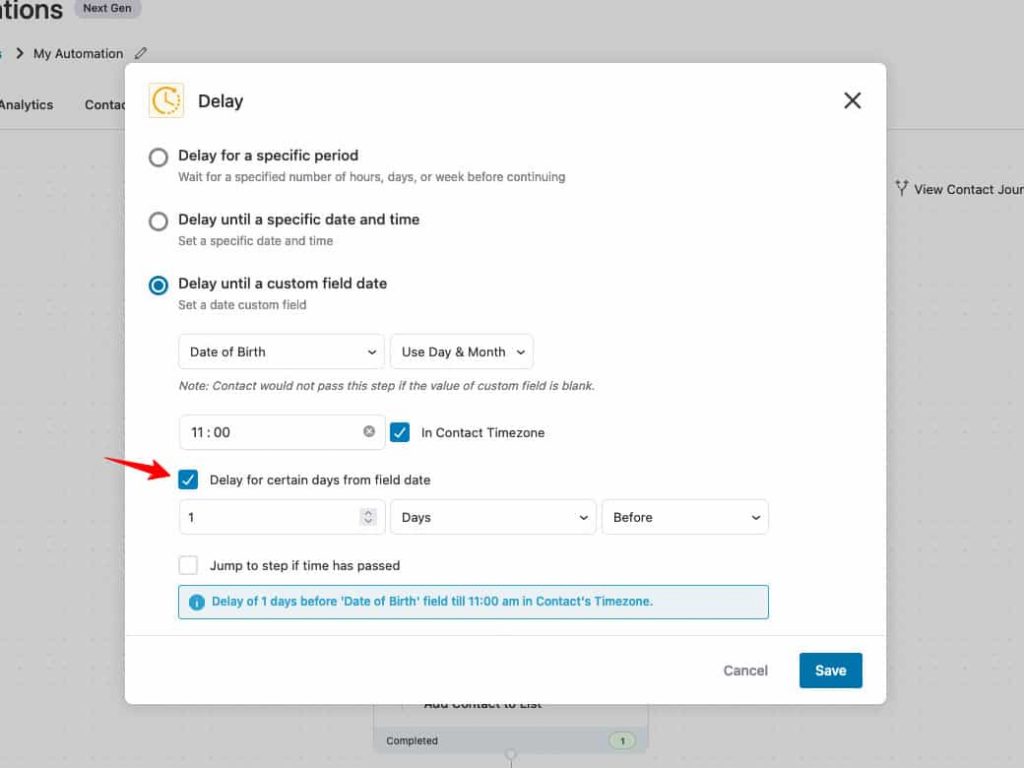
You can configure the following additional options such as delay for certain days from the field date and jump to a specific step if the time has passed.
Let’s go through these options.
Delay for certain days from the field date
Set the delay for certain days from the custom field date you set.
Here we have specified the delay of 1 day before the contact’s date of birth till 11:00 AM in their timezone.
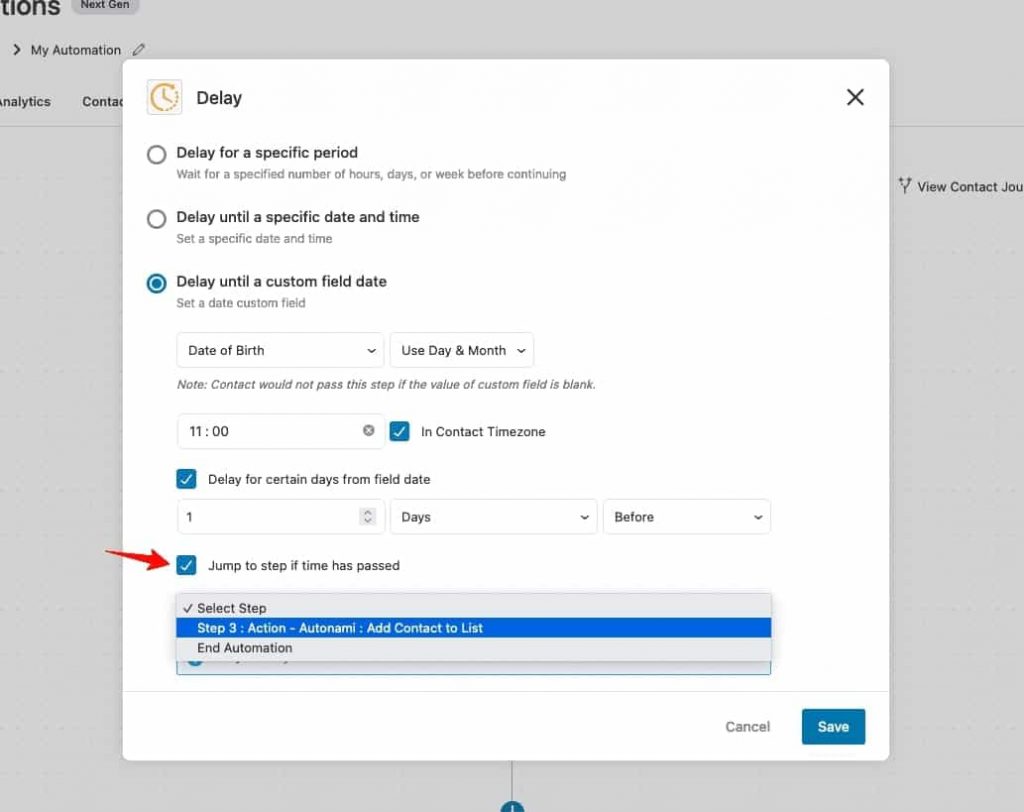
Jump to step if time has passed
You can jump to a specific step/node if this time gets passed.
Here we have skipped to ‘Step 3’ of this automation if the specified time passes.
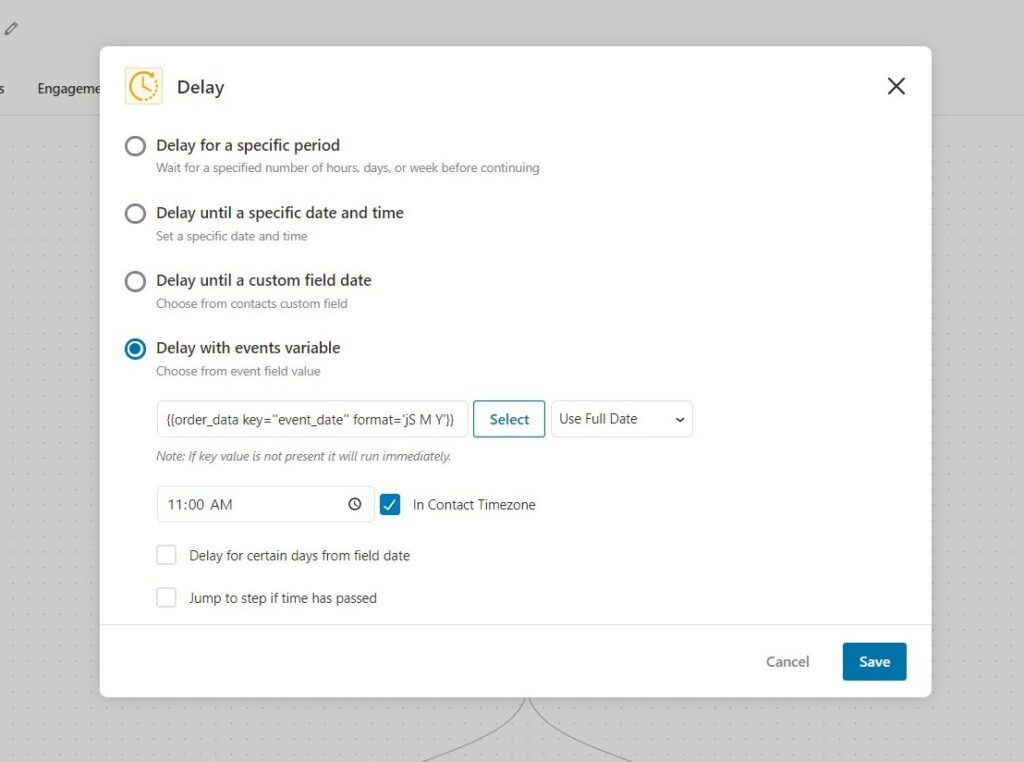
Delay With Events Variable
Set the delay by choosing from a field value of an event.
Let's say you use a third-party shipping plugin that provides shipping dates and other info. Using this delay option, you can make your customer wait until the day of shipping and send them a shipping confirmation email.
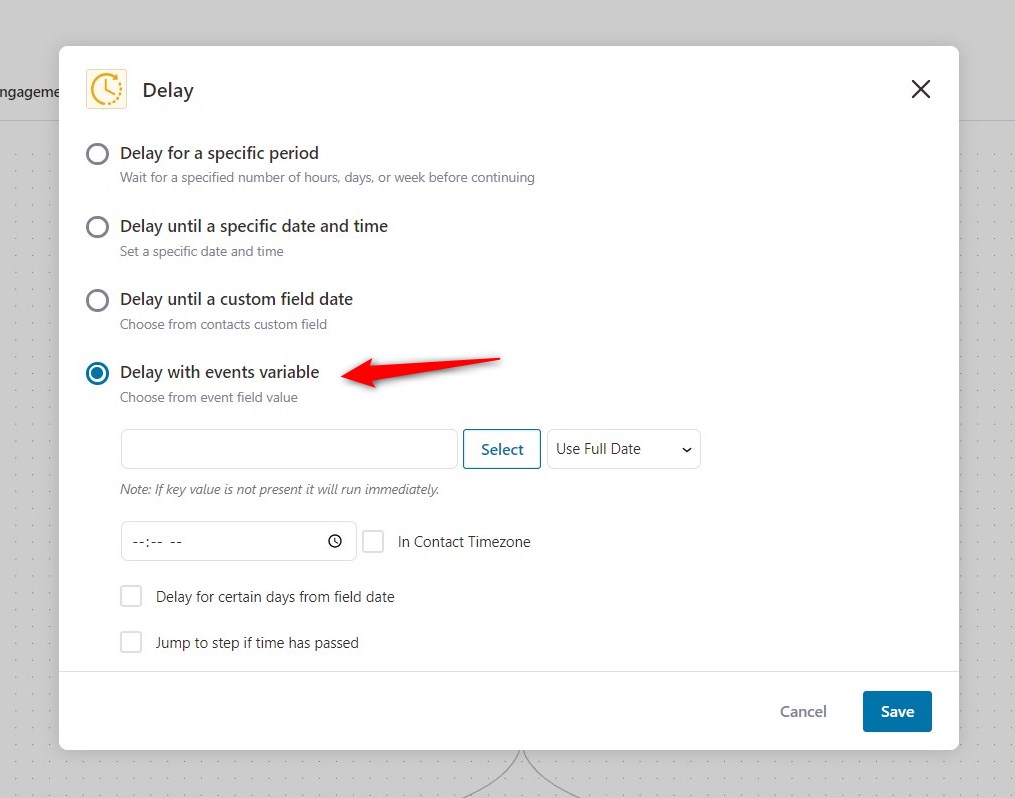
Click on Select and then choose the meta key within the order data merge tag.

Now, hit the Select button to set this delay data here.
Once done, click on Save to lock all your changes.
Once you hit Save, the specified delay will get added to your sequence.
This is how you can set delays within your automation.