


Margin and Padding, though seem very similar, are very different in practice.
Margin defines the space between two modules on the page. But Padding sets the gap between the border and the text or image within.
See how changing a margin would affect a page:
You can see how changing the margin ratio shifted the checkout form module away from the checkout form module.
And how changing the padding would affect the page:
Here changing the padding moved the text and image in the checkout form away from the border.
How to change Margin or Padding of your form
It's very easy to adjust the margin and padding ratios in Divi. Here is how you do it:
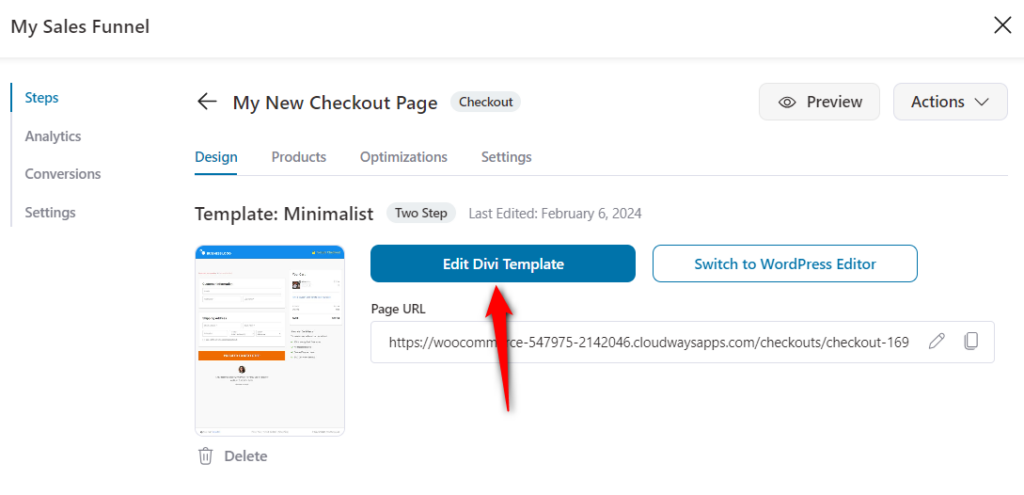
Step 1: Edit the checkout page
Click on the Edit Divi Template button to start customizing your WooCommerce checkout page.
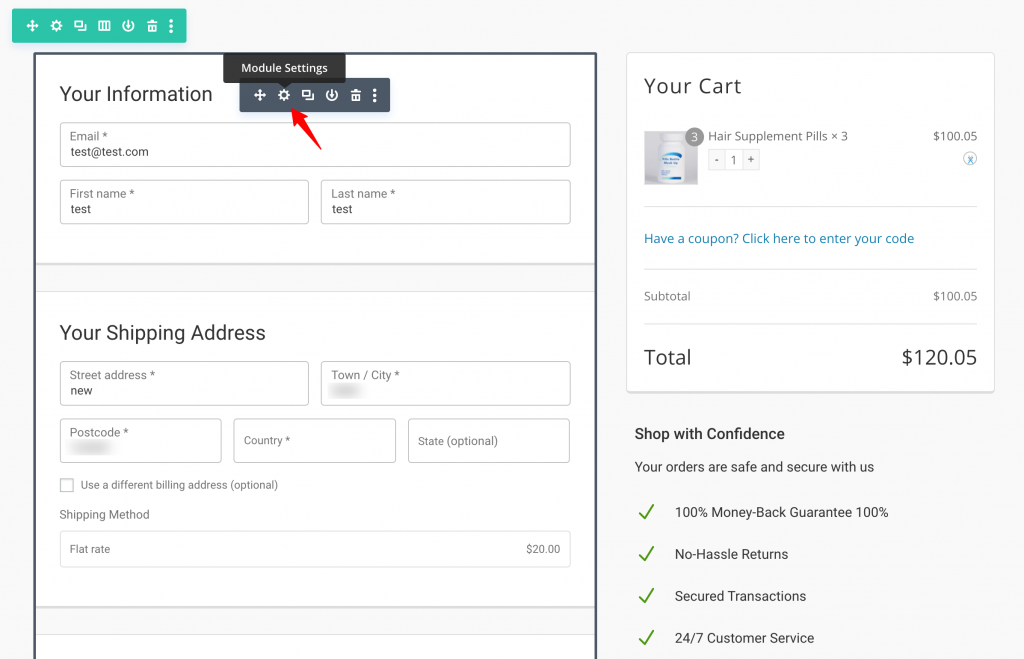
Step 2: Click on the module you wish to edit
Click on any module on the page and select the cogwheel icon to open settings.
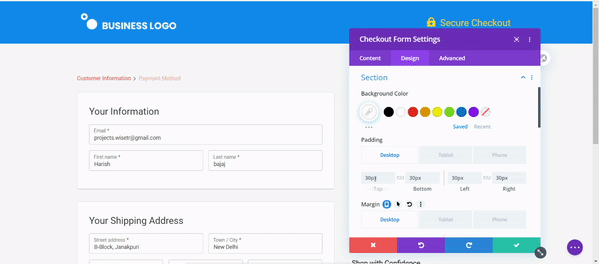
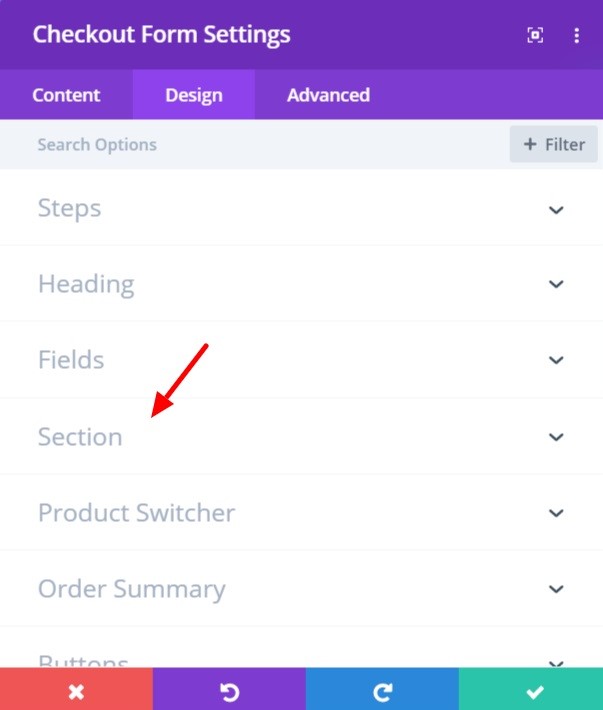
Step 3: Click on the ‘Section’ option under the ‘Design’
To set the spacing between modules, or between a module and the copy within, click on Section under the Design tab.
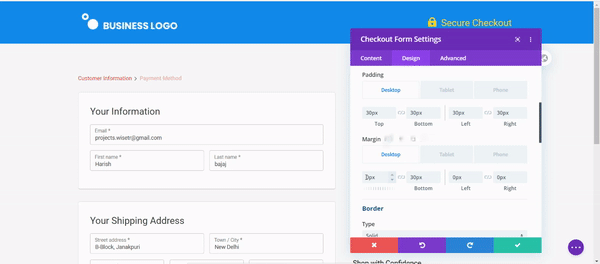
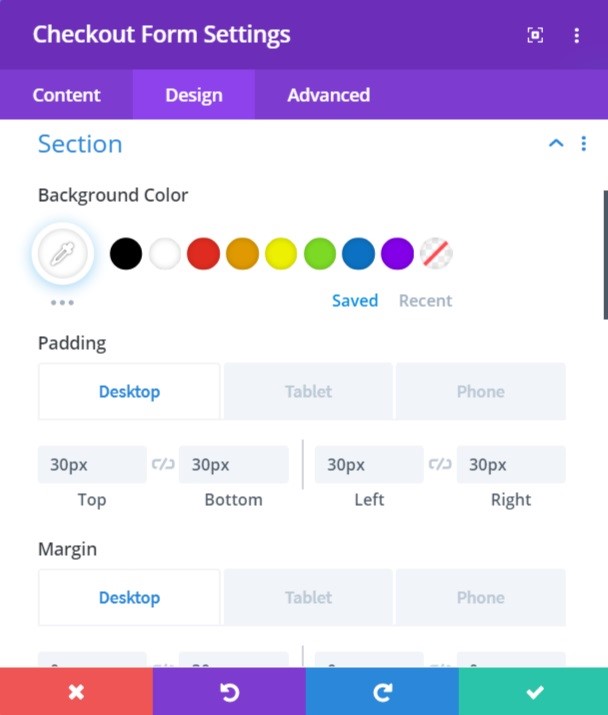
Step 4: Change the Margin and Padding
Under Section, you’ll find the options to alter the margin and padding options - top, bottom, right, and left.
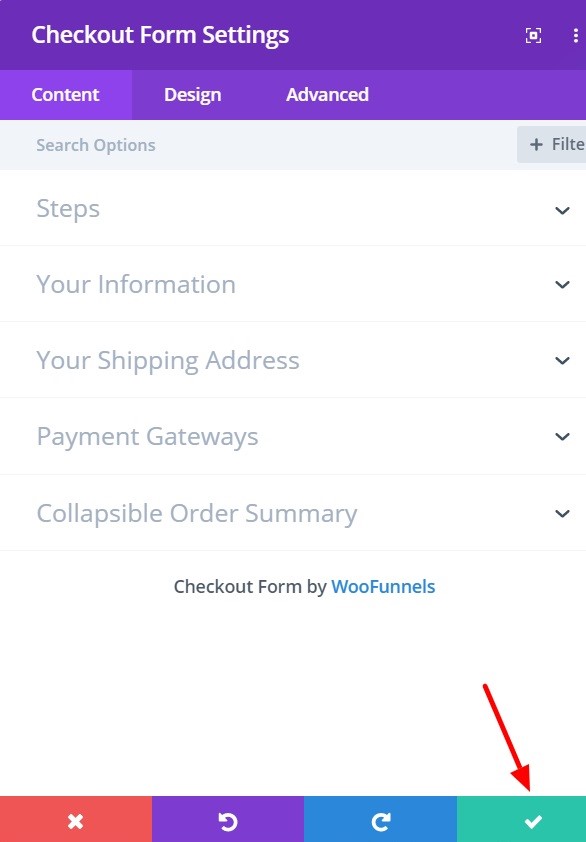
Step 5: Click on the green tick (✓) to save
Once you’re done editing, click on the green-colored tick (✓) icon on the bottom right of the settings window to save the changes made.
With the layout and spacing in place now, save the edits, and you’re good to go!