


In this section, you’ll learn how to create your first one-click upsell offer with FunnelKit Funnel Builder.
Follow along.
Step 1: Add a New Upsell
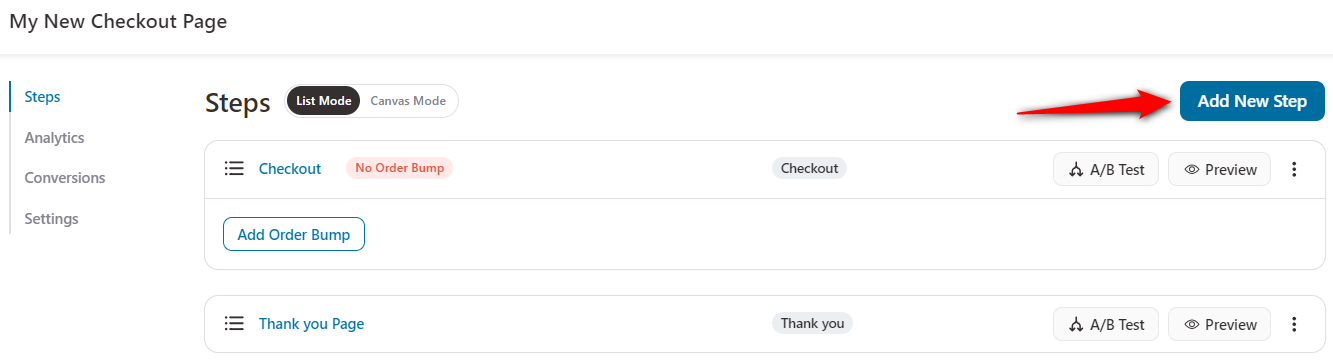
In your funnel, click on the Add New Step button.
Choose One Click Upsells Offers and you'll see all the upsell templates.
Choose your favorite page builder and click on the template you want to import.
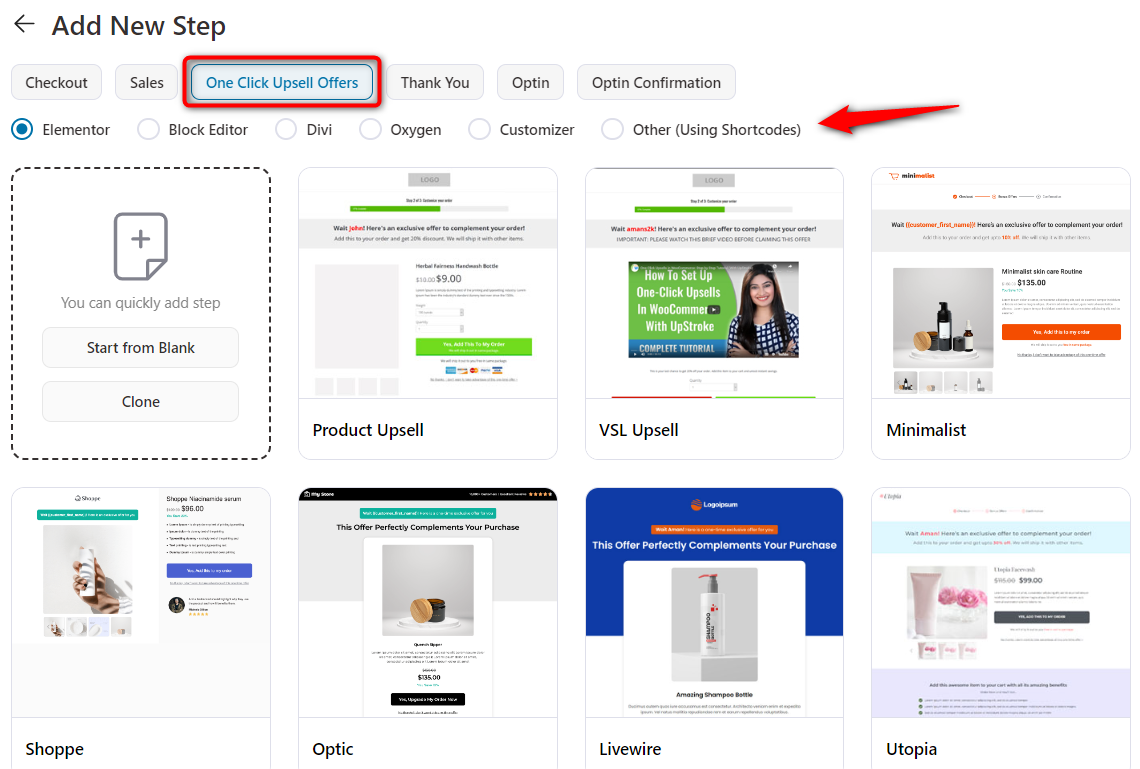
You'll be able to preview the full template.
Once you're happy with the template, click on Import This Template and enter the name for your upsell page.
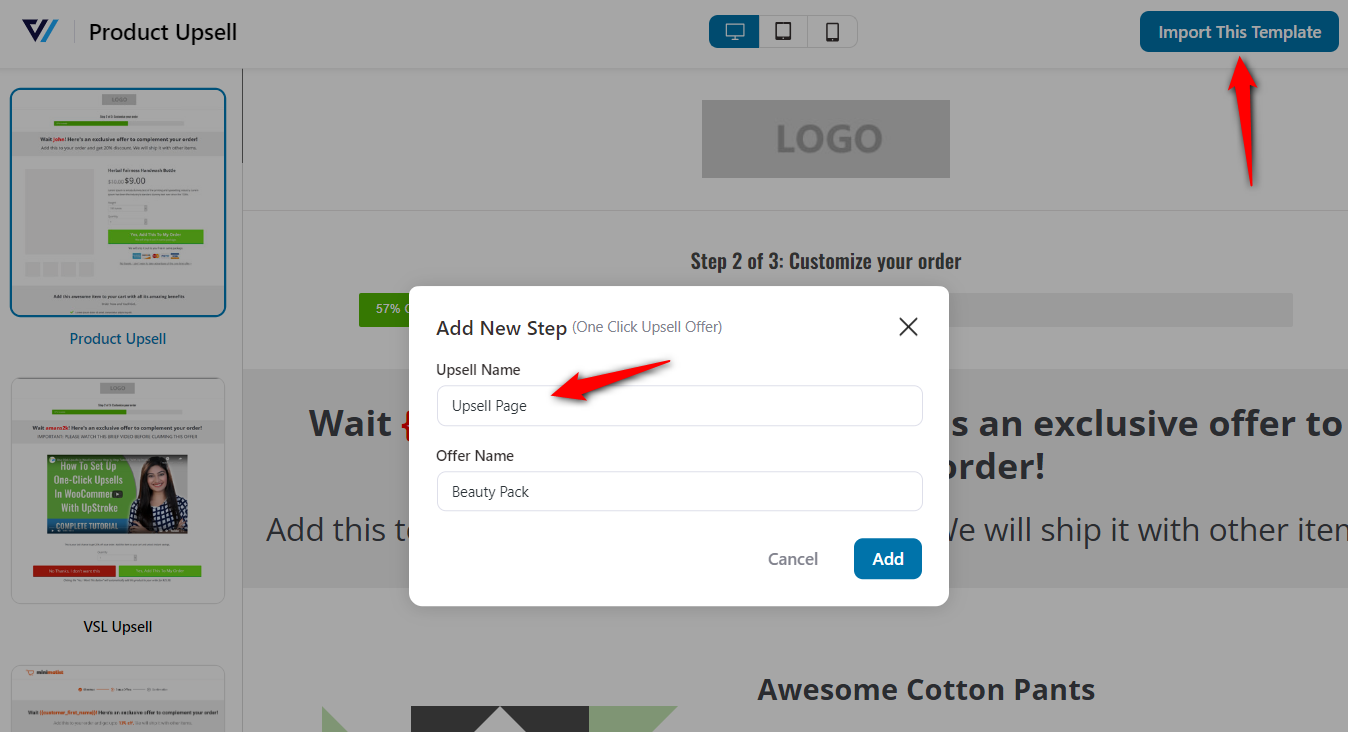
Your upsell page will be added to your funnel.
Step 2: Add your first upsell offer
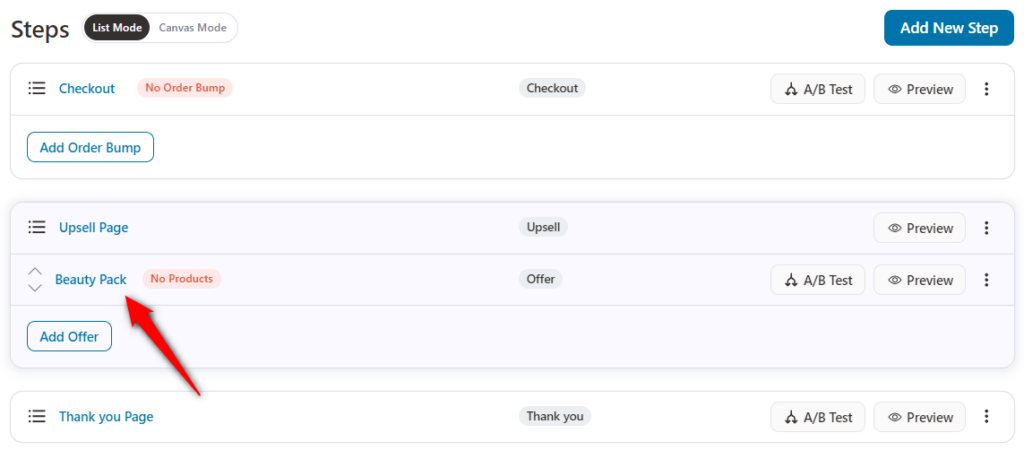
Click on the upsell name to set up your compelling offer.
Now, you’ll see four tabs to set up your upsell offer - Design, Products, and Settings.
On the Products tab, add a new offer in the funnel by naming it and then adding product(s) under the offer.
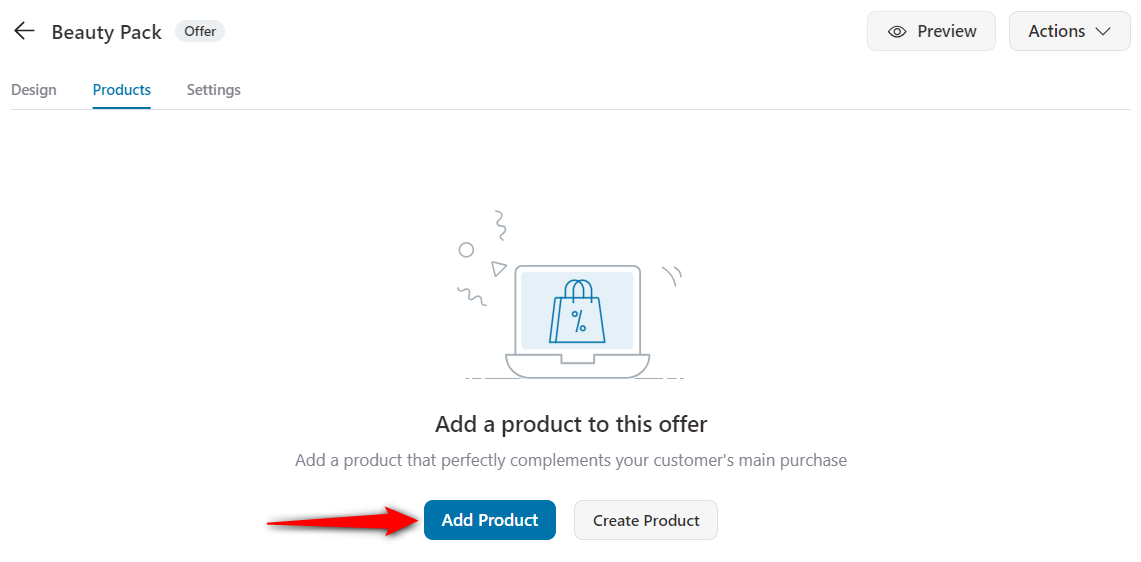
Add the product that you want to upsell. For that, click on the ‘Add Product’ button.
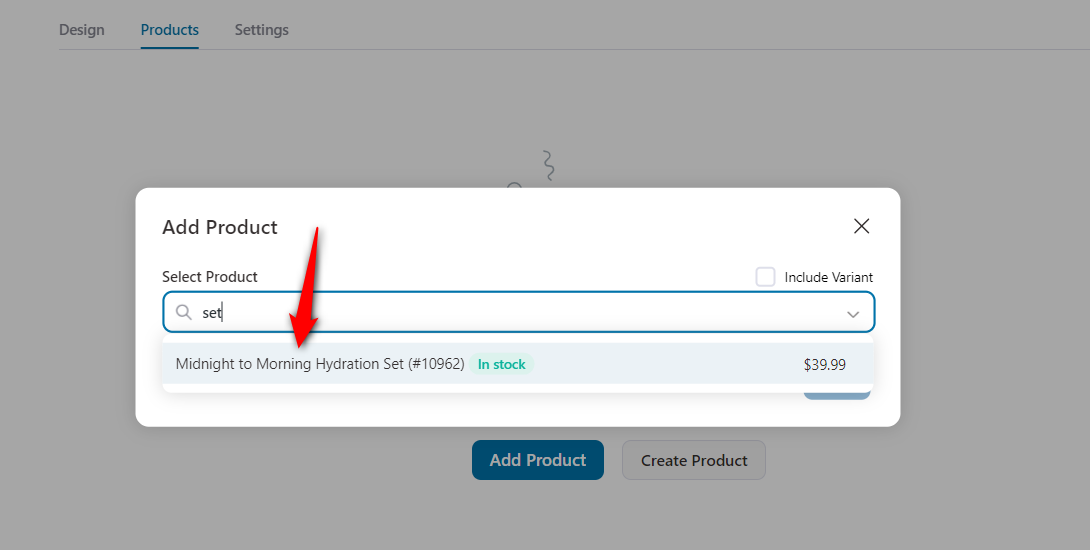
Here you can add a new product:
You’ll see the product has been added to the offer.
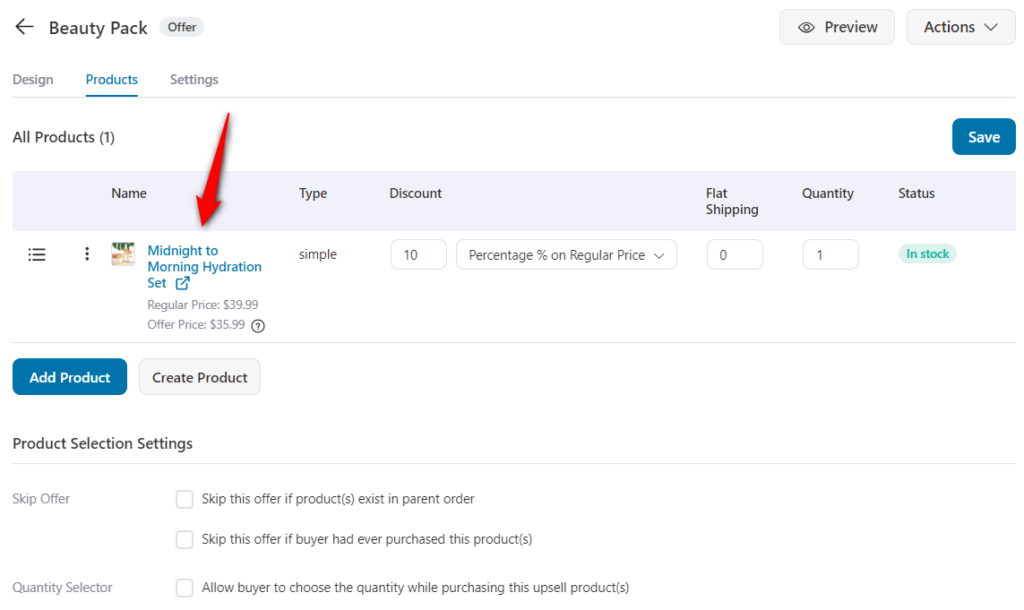
Additionally, you can set the discount price, quantity, and flat shipping rate for this product.
Save the offer and make the funnel live by clicking on the toggle button.
Step 3: Customize your Upsell page
Next, go to the ‘Design’ tab.
As we have already imported the upsell template, we can now customize it here.
You get several options to design the offer:
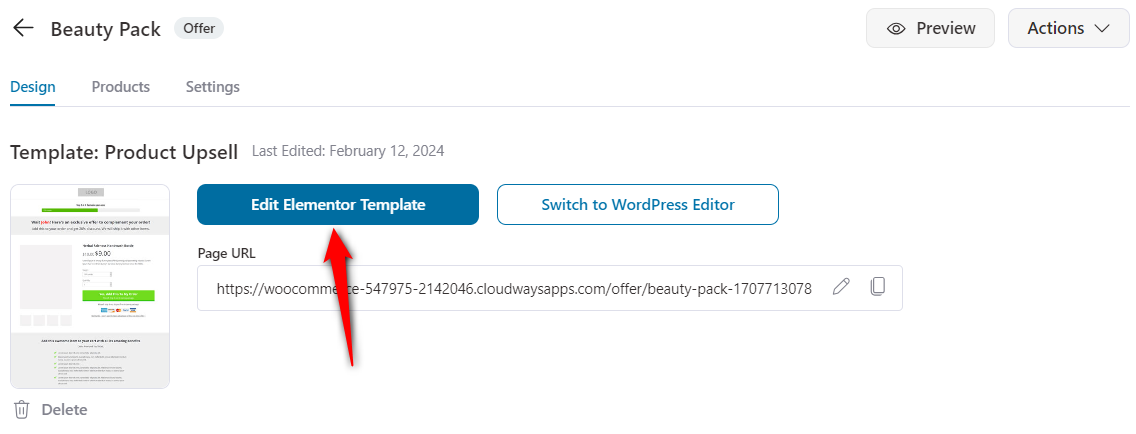
You can either use popular page builders like Elementor, Divi, Gutenberg, Oxygen, or the in-built Customizer or create a custom page using shortcodes with any page builder.
FunnelKit has a deep integration with Gutenberg, Elementor, Divi, and Oxygen.
Go here to know more about designing your upsell pages.
Step 4: Add a Rule
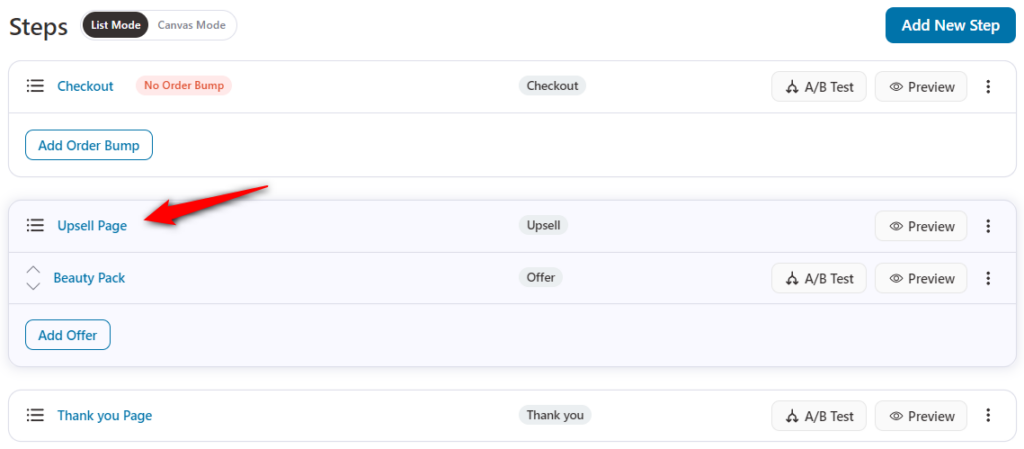
Go back to the funnel and click on the upsell page.
When the set condition is met, the upsell funnel gets triggered.
Now select a rule here.
You have two options to set up the rules: Target Products and the other is Advanced Rules.
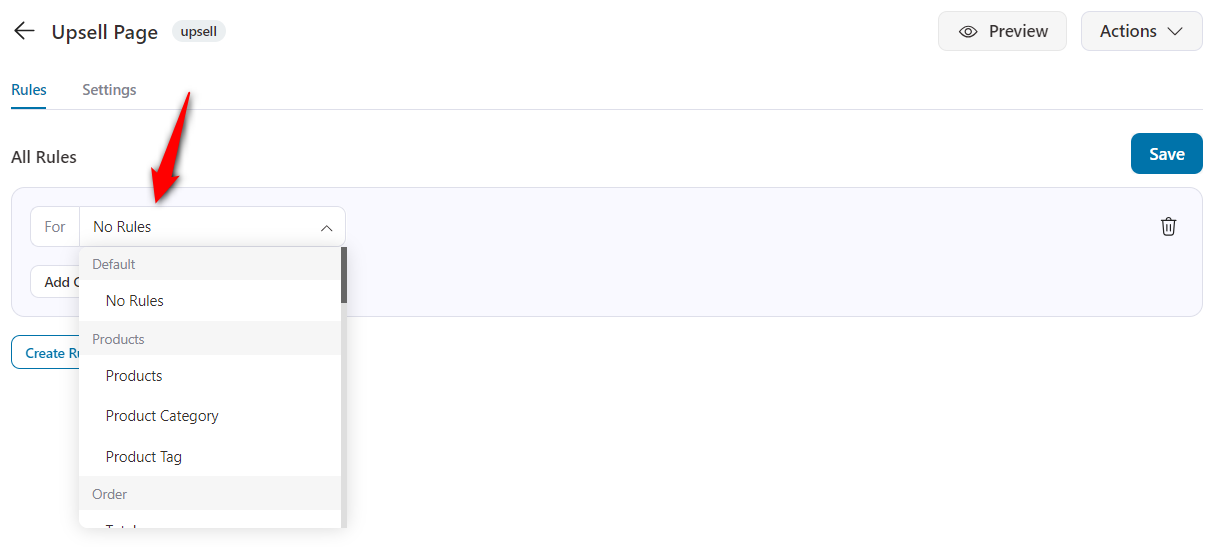
Target Products - A set of rules that are associated with the main product the prospects are buying.
Advanced Rules - A set of rules associated with the buyer, order, location, and more.
You can even add multiple rules in conjunction using the 'And' and 'or' functionality.
Once done, hit the ‘Save Changes’ button.
Step 5: Test your Upsell offer
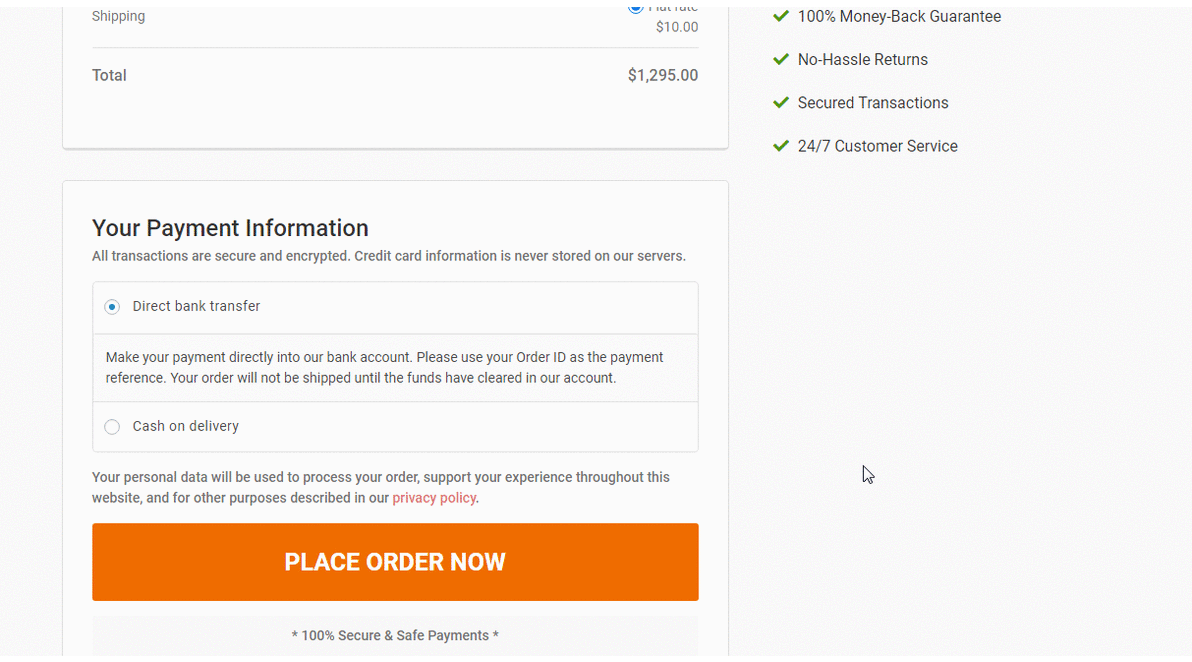
Before going live with your first upsell offer, please test it out.
Launch the funnel and go through the conventional checkout flow. Make sure you meet the rules for the funnel that you’ve set.
And you’ll be able to see your one-click upsell after clicking on ‘place order’ on the checkout page.
When you accept the offer, the upsell item will get added to your order.
After that, you'll be redirected to the Thank You page.
There you go! You've successfully set up your first one-click upsell offer for your WooCommerce store.