Gone are the days of blind mass emailing!
The new way allows you to segment your contacts dynamically and send relevant email broadcast campaigns.
With our latest launch of FunnelKit Automations 2.0, all of this has become a reality.
One of our most talked-about features for this automation engine is its ability to send segmented broadcast campaigns to the users.
In this post we will learn how to create an email broadcast for your WooCommerce Store from within WordPress, using FunnelKit Automations.
So without any more delay, let's get onto it!
Contents
A Broadcast campaign is a one-off announcement-based message that can be sent to your entire email list, or a portion of it, at the same time.
It sends out mass messaging that saves time and efforts of contacting each contact individually.
Think of newsletters, product launches, flash sales, and promotional announcements. These are all examples of email broadcasts.
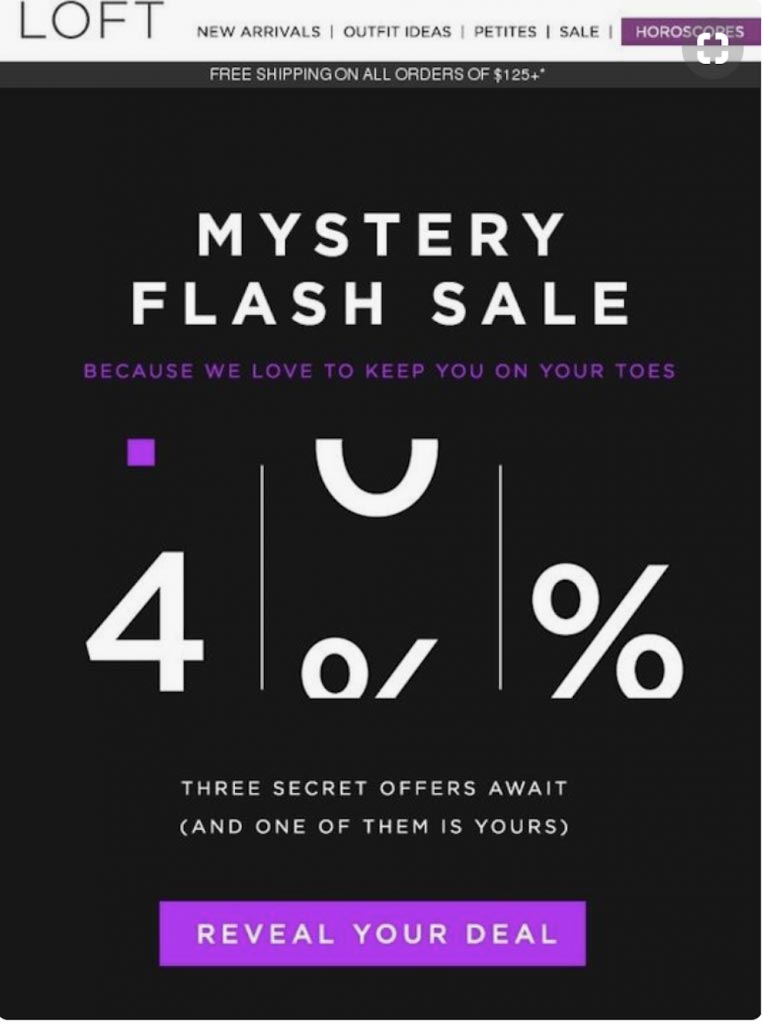
Broadcast emails usually convey a time-sensitive message that is only valid for the short term.
While Email Broadcasts are scheduled to be sent to your contacts on a specific date and time, they do not depend on any particular user behaviour to be triggered.
On the other hand, an Automated Email highly depends on the behaviour of the user. These campaigns are triggered by a specific behavioral action undertaken by a lead or customer.
For example - signing up for a lead magnet, abandoning a cart, buying a particular product, using a specific discount code, and so on.
So a broadcast email helps to stay in touch with the contacts, keep them updated, and keep the connection warm, while an automated email is a chain reaction to a user's behaviour.
Segmentation is simply sorting your contacts into smaller groups based on shared information or qualities. It allows you to categorically target specific groups of people when sending out emails.
When you send out an email, you want your contacts to open it, read its content, and perform the desired action. But all of that will only be possible if they find the contents of the email relevant.
To ensure that your contacts engage with the content of the email, segmentation of contacts is required.
According to a study by MailChimp, segmented campaigns boost up open rates by 14.31% and click-through rates by over 100%!!
Now, if these numbers don't convince you to segment your contacts, we don’t know what will.
The most common way to segment your contacts that any CRM uses is with lists and tags. But over time, as your contact list keeps growing, these lists and tags become very cumbersome to manage.
FunnelKit Automations allows you X number of dynamic segmentation possibilities - all with a few clicks!
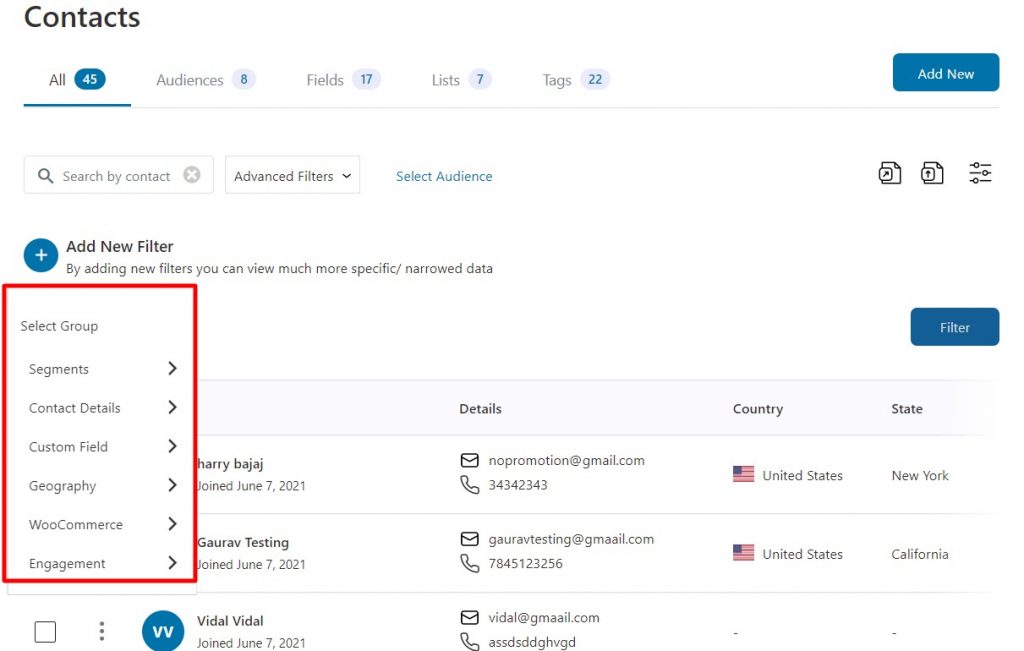
You can segment users based on:
It is even possible to apply more than one condition on the contact list and filter them out. For example, you have the ability to target specific contacts who have purchase Hair Serum X and live in the United States.
Pretty detailed, right?
FunnelKit Automations also has a really handy feature called Audiences. Save the applied segments to your contact list as an Audience and reach out to those selected contacts with ease for any future marketing campaigns.
There are two ways you can create and save an Audience.
The first is to go into Contacts > Audiences and create a new audience from there. And the other is to save one while segmenting users whenever you're creating a broadcast.
Both the methods work in a similar manner, but here we will show you how to create an audience in Contacts.
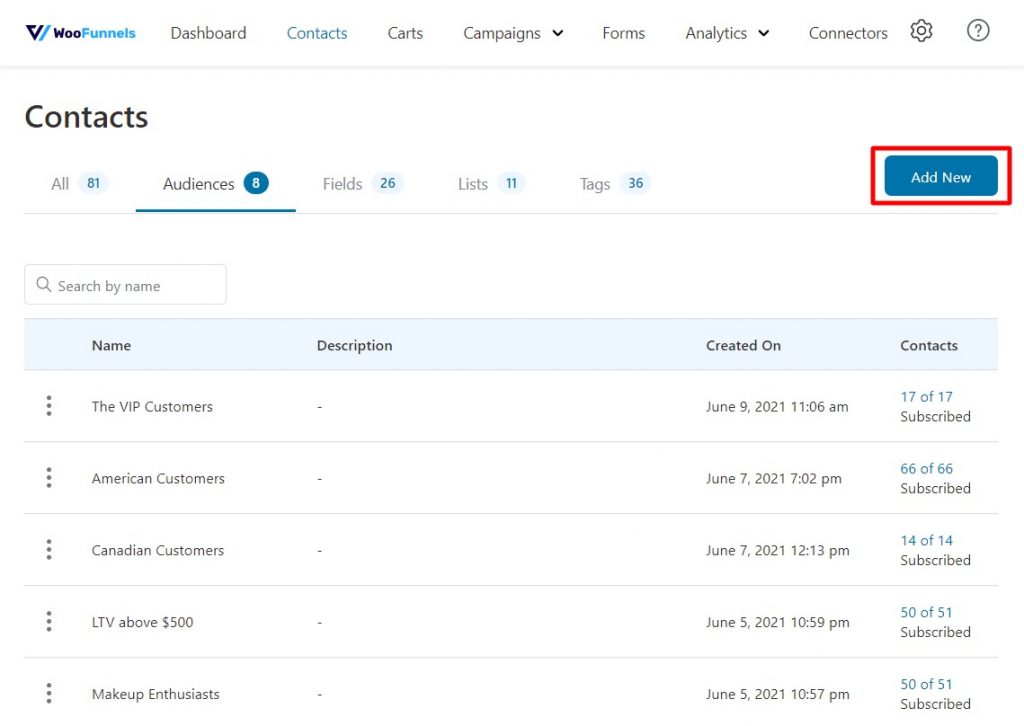
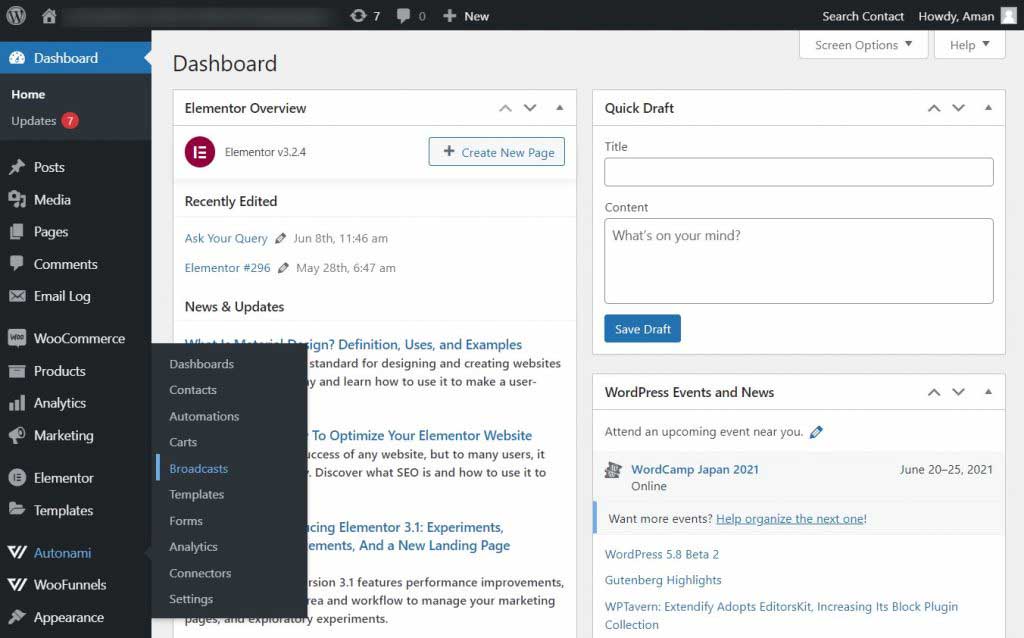
First, go to FunnelKit Automations > Contacts from the WordPress Menu. Then click on Add New.
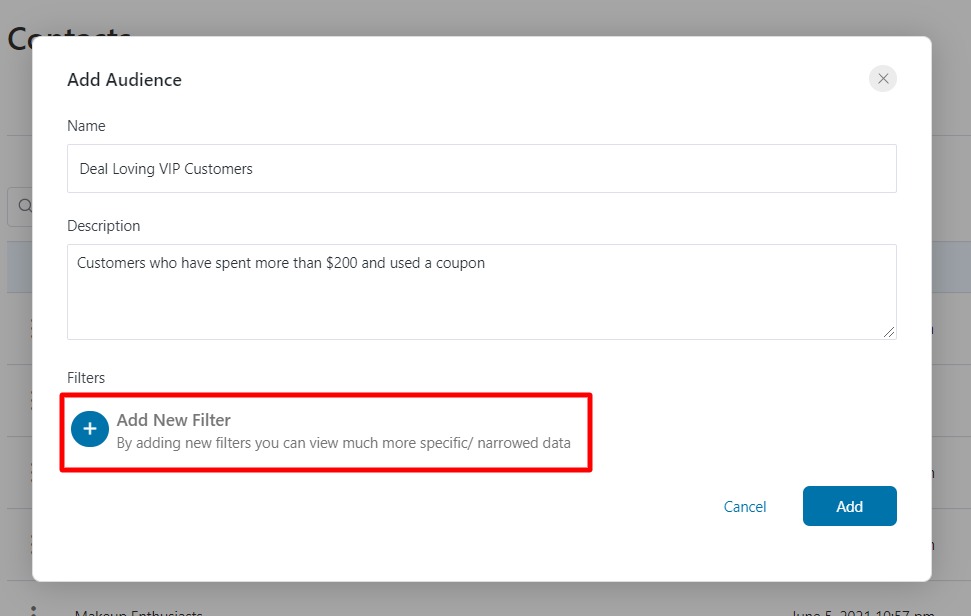
Name the audience and write a short description explaining it. Here we will create a VIP list, so we name this audience as Deal Loving VIP Customers and add a description for the same.
Next, click on Add New Filter to define the conditions for the contacts in this audience.
Each filter option is added after much thought and offers multiple functional segmentation possibilities.
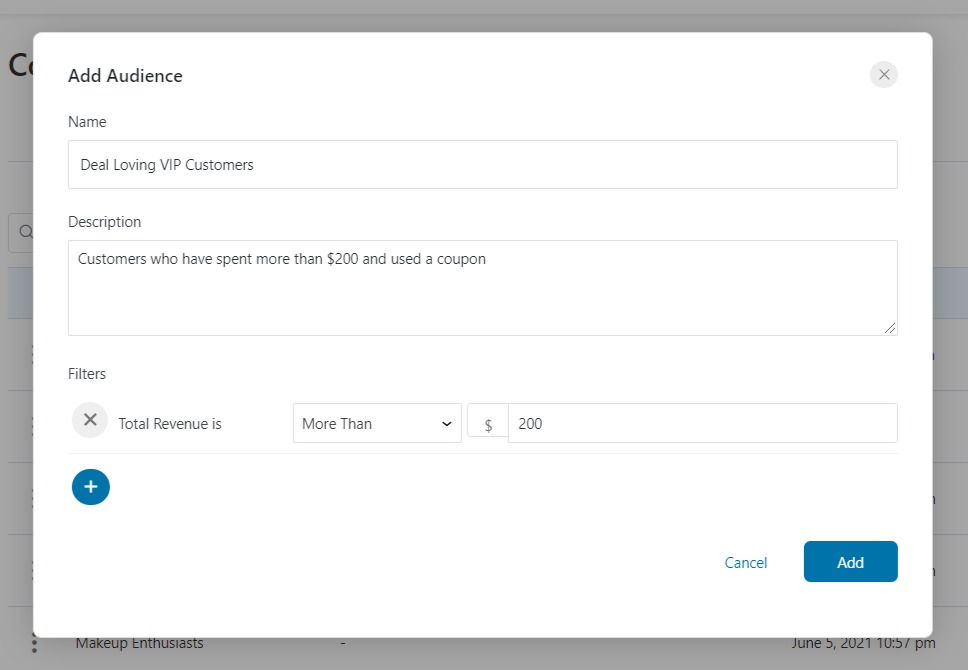
We will choose the first filter to be WooCommerce > Total Revenue to be more than $200.
Then the second filter we'd apply to this audience is WooCommerce > Has Used Coupon.
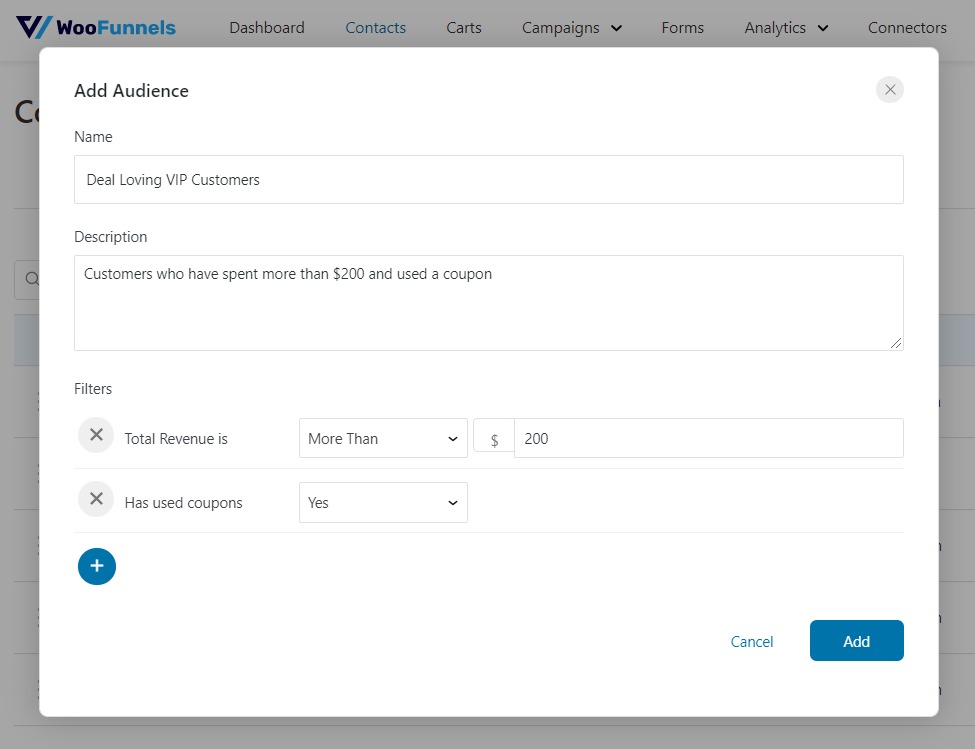
Click on the Add button to save the audience.
Now you can just use this saved audience to send email broadcasts to these selected contacts. There is no need to keep applying filters again and again.
Now that we have an idea of what exactly email broadcasts are and how important they are for your WooCommerce store, let's learn how you can set one up in FunnelKit Automations.
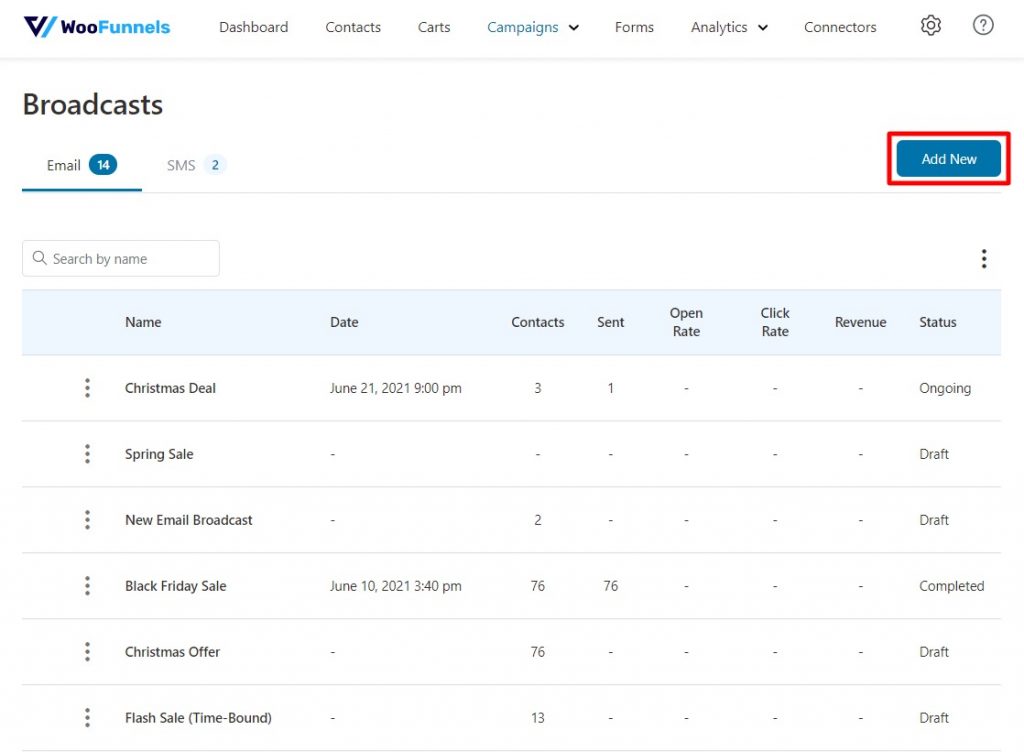
First, go to Broadcasts under FunnelKit Automations from the WordPress menu.
Ensure that you're on Email broadcasts and not SMS. Then, click on Add New.
Name the Automation and click Add.
Next, select if you wish to send a standard broadcast or A/B Test the emails.
Here we chose to have a Standard email broadcast.
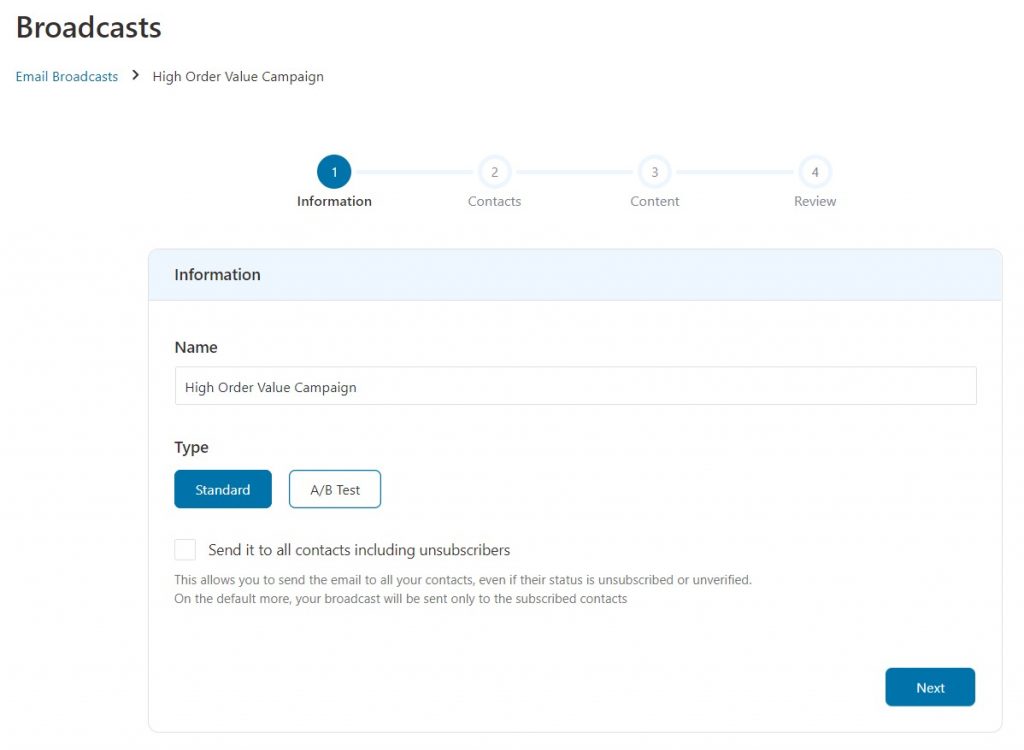
Just below the Type of Broadcast, choose if you wish the broadcast email to be sent to all of your contacts - even if they are tagged "Unsubscribed" or "Unverified".
This is best enables when you're reaching out to the users regarding some policy change, or updating them on a security and privacy matter.
In the next step, you can either select all contacts to send the campaign to or segment your contacts to select just the relevant ones for this broadcast.
To segment the contacts, you can do one of two things:
Here we will choose an audience to filter the contacts and send the email broadcast to. Click on Select Audience to open the list of pre-saved audiences.
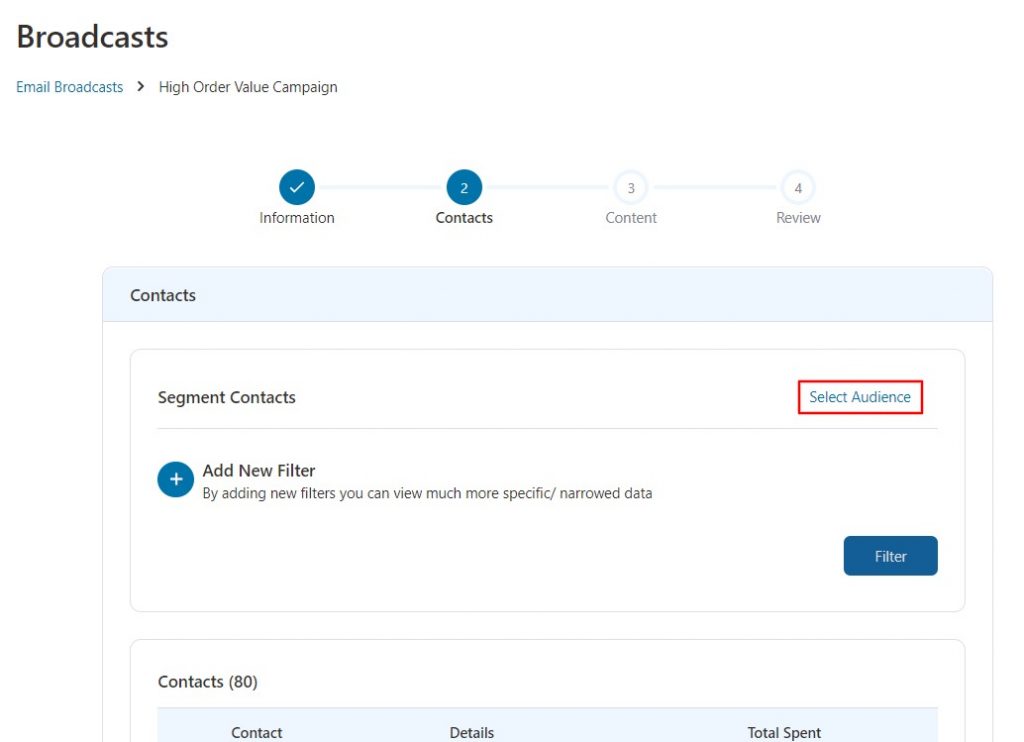
Select the audience you want to use from the list provided.
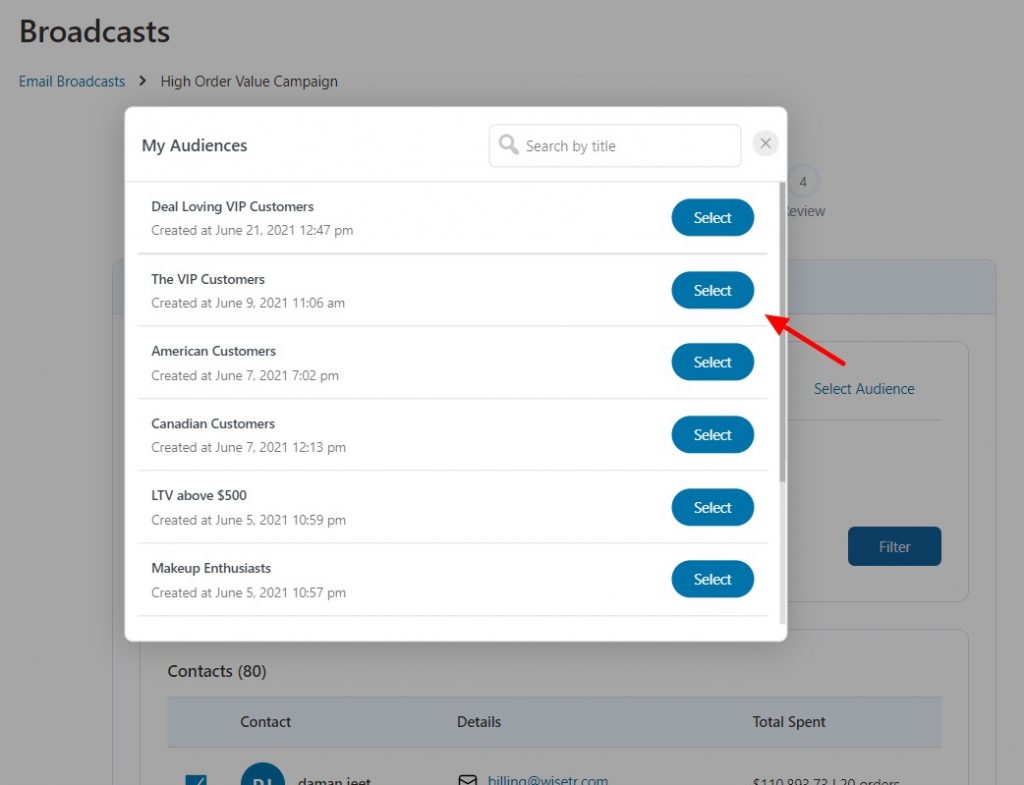
This audience filters out your contacts and only displays the ones that match the audience's conditions.
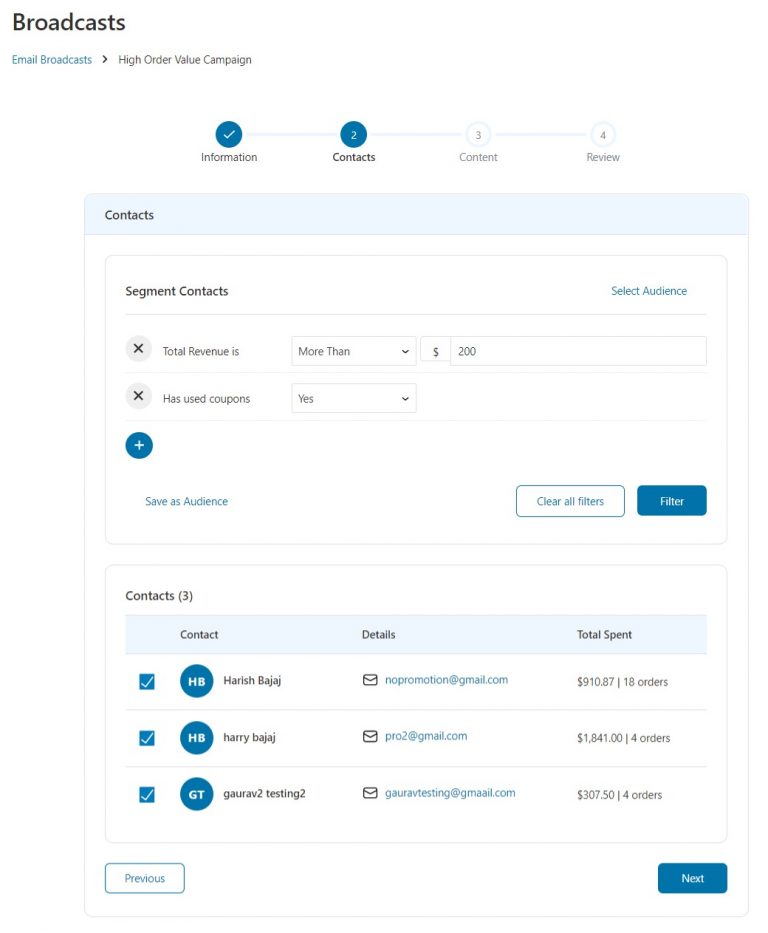
Click on Next to move to the next step after the segmentation is complete.
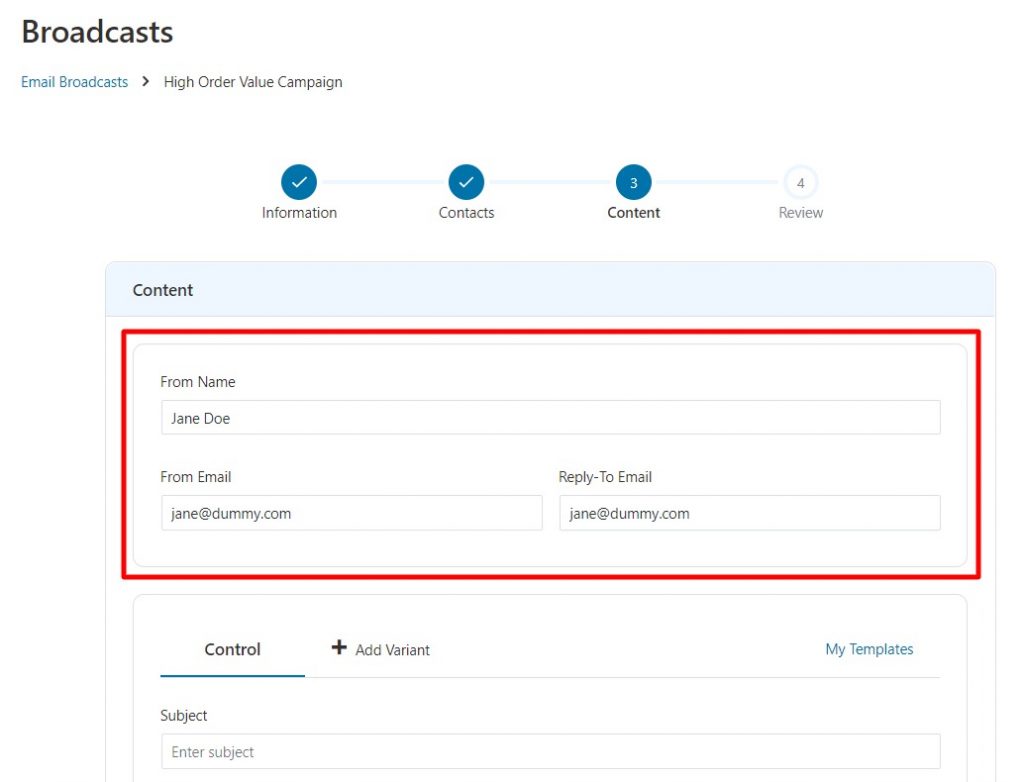
In this section, we define how the email appears when received by the users.
First, add the email address and name from which the emails will be sent. Also, mention the reply-to email address as well.
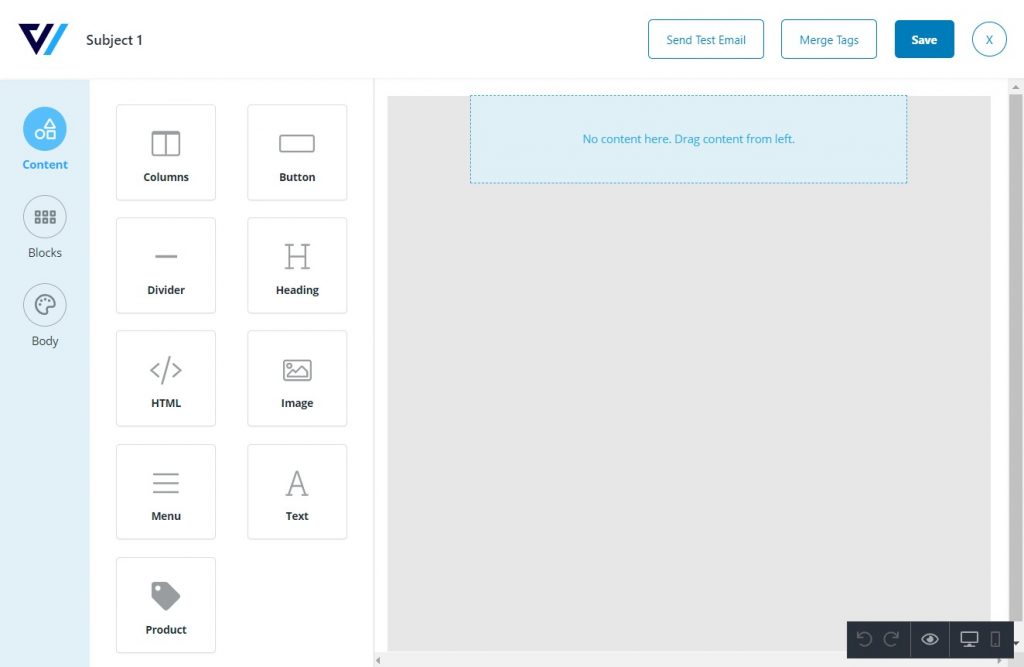
Below this section is where you design the actual content of your email broadcast.
Write down the subject of the email and a preview text. Then choose if you wish to write the email in Text or HTML format. You can even design emails using FunnelKit Automations's in-build Drag & Drop email builder.
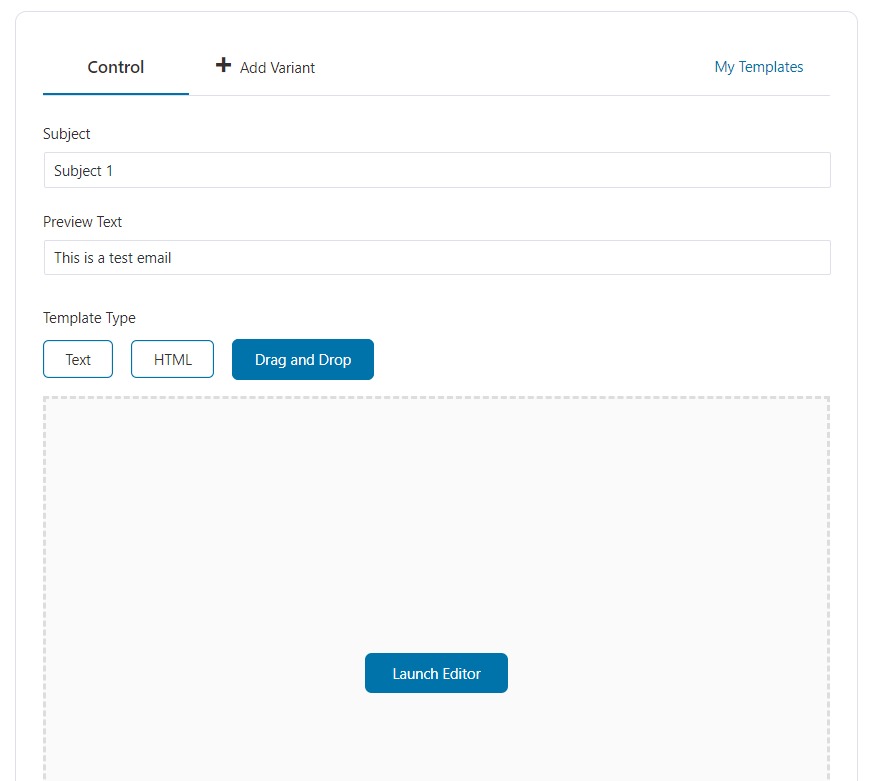
Today, we will design the email using the Drag & Drop email builder. Just click on the Launch Editor button to open the email editor.
Design mobile-responsive emails with the email builder. So no matter what device is used to open these emails, they appear just as good and optimized.
Drag any of the contents - like menu, heading, button, image, etc - to the workspace and customize them to make the email look attractive and on-brand.
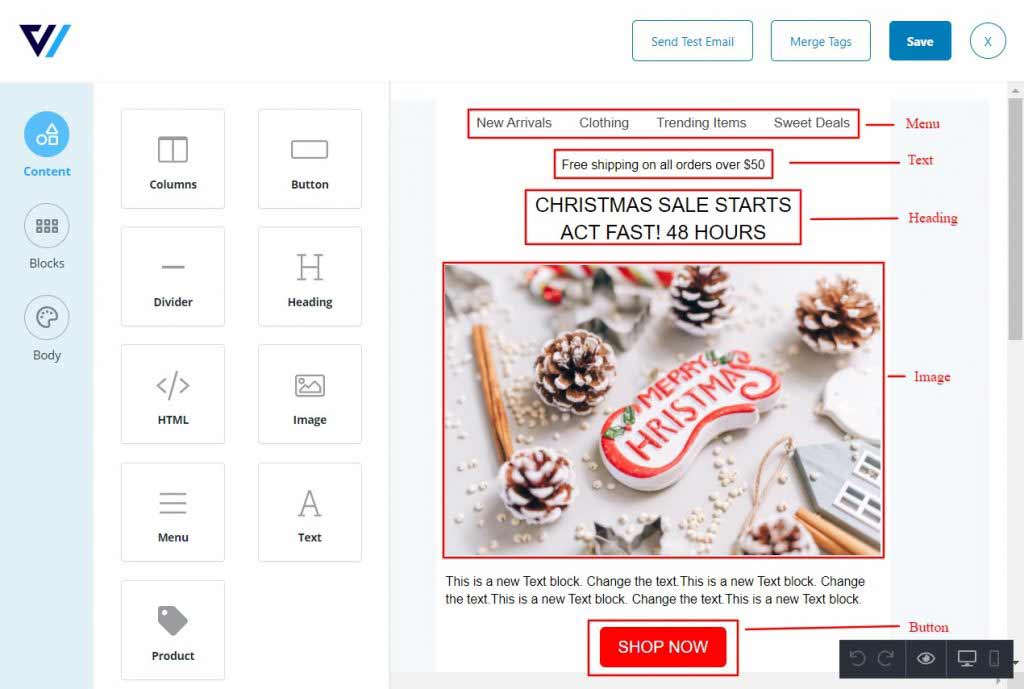
You can even add a product with a CTA button to the email, so as to directly guide the contacts from your email broadcast to the checkout page.
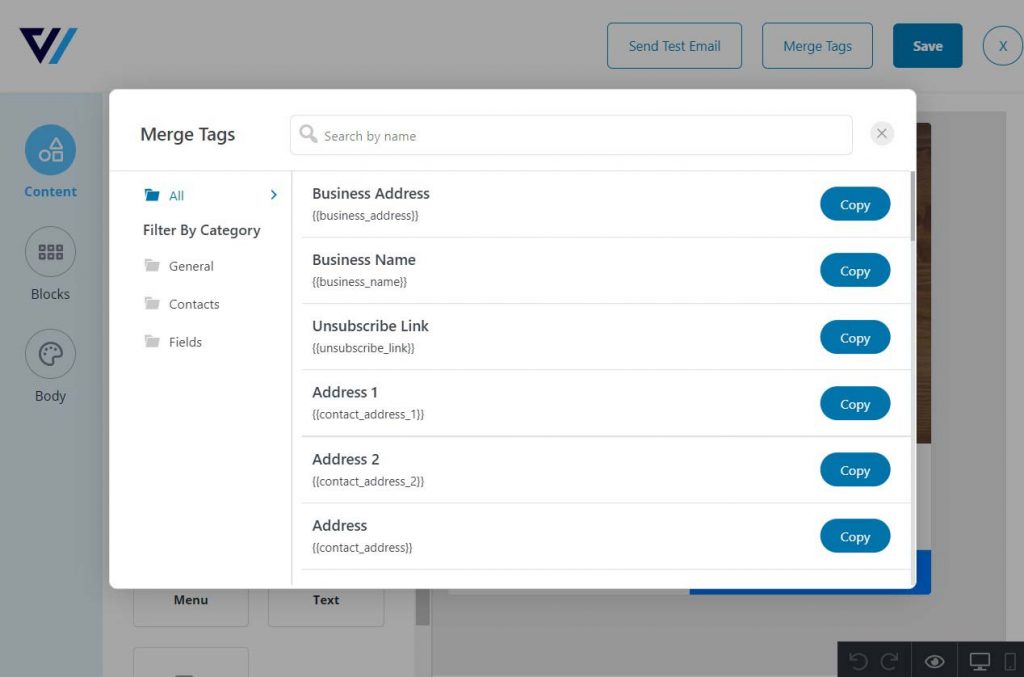
You can personalize the email copy using the Merge Tags like - their name, their location, last order purchased, and so on.
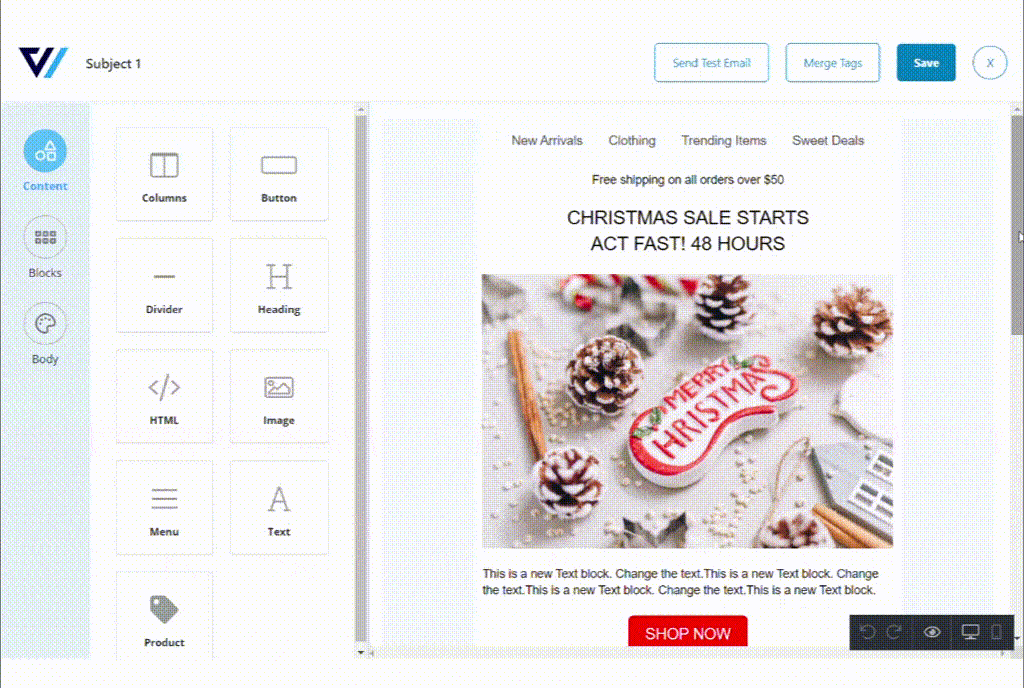
Send yourself a test mail to review the final product. Click on Save to lock in the changes made.
👉 Learn more about the Drag & Drop email builder here.
In order to use the same email design again in the future, save it as a template. Just click on the Save As Template button at the bottom of the email building space.
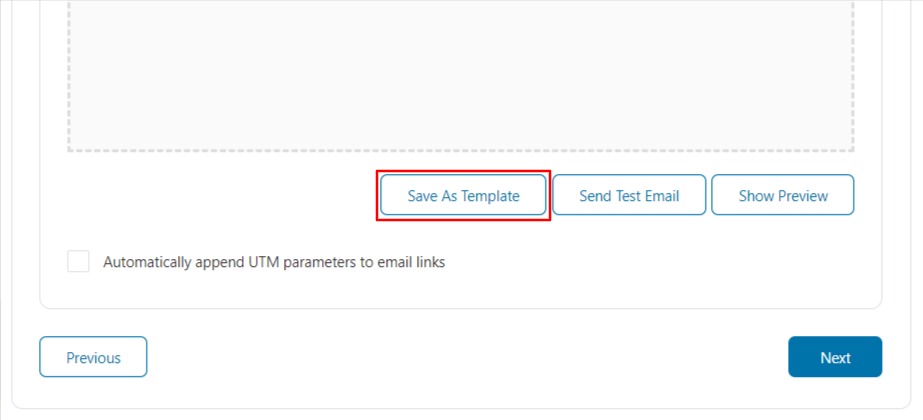
Then click on My Template to use this design for a future email broadcast.

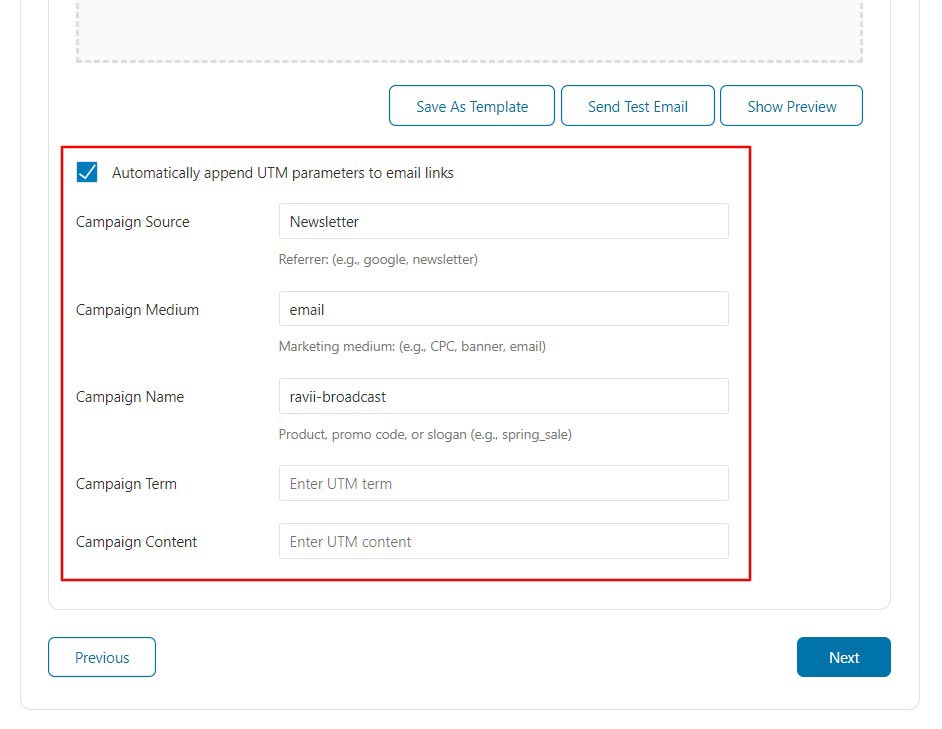
Lastly, enable the UTM parameters to track your email performance before moving on to the final step.
The final step in designing this email broadcast is to review all that you've defined for the campaign.
From the title of the broadcast to the targeted contacts and the email content being sent - all can be reviewed at this stage.
If anything needs to be changed, then you can do so by clicking on the Previous step.
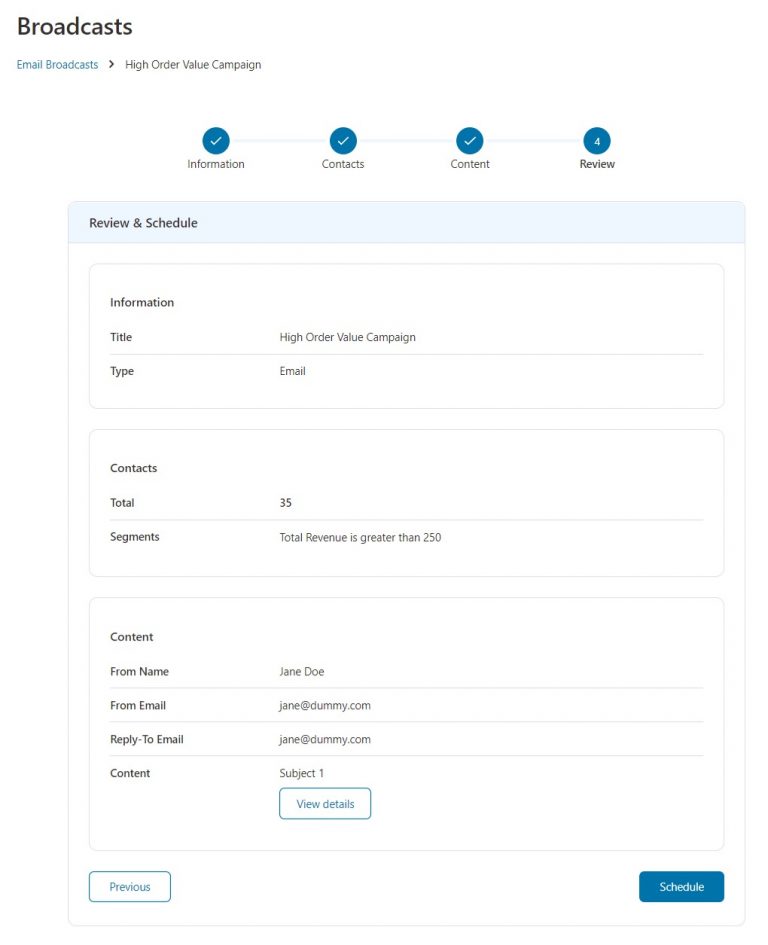
When you are ready to send it to the contacts, click on Schedule.
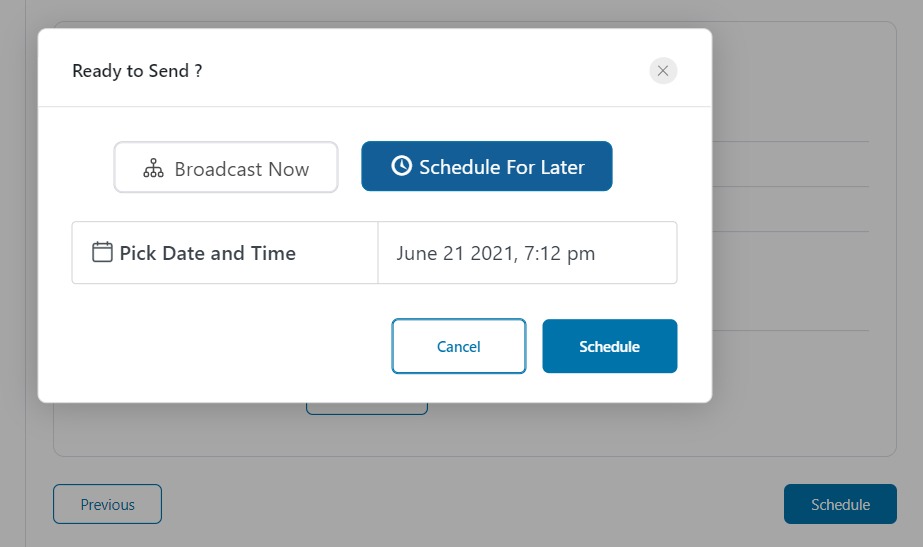
Select if you want to send the broadcast immediately or schedule it for a later time.
And that's it! That's how you can design an email broadcast campaign in FunnelKit Automations by following 5 simple steps.
FunnelKit Automations allows you to not just split test the content of the email broadcast but also the subject line and preview text.
You create a whole new email broadcast to send to a portion of your contacts.
Let's look a some of FunnelKit Automations's A/B Test features that can help you change your broadcast game.
It is very easy to A/B Test your email broadcast campaigns with FunnelKit Automations. Just click on the + Add Variant button to add another email to the same campaign.
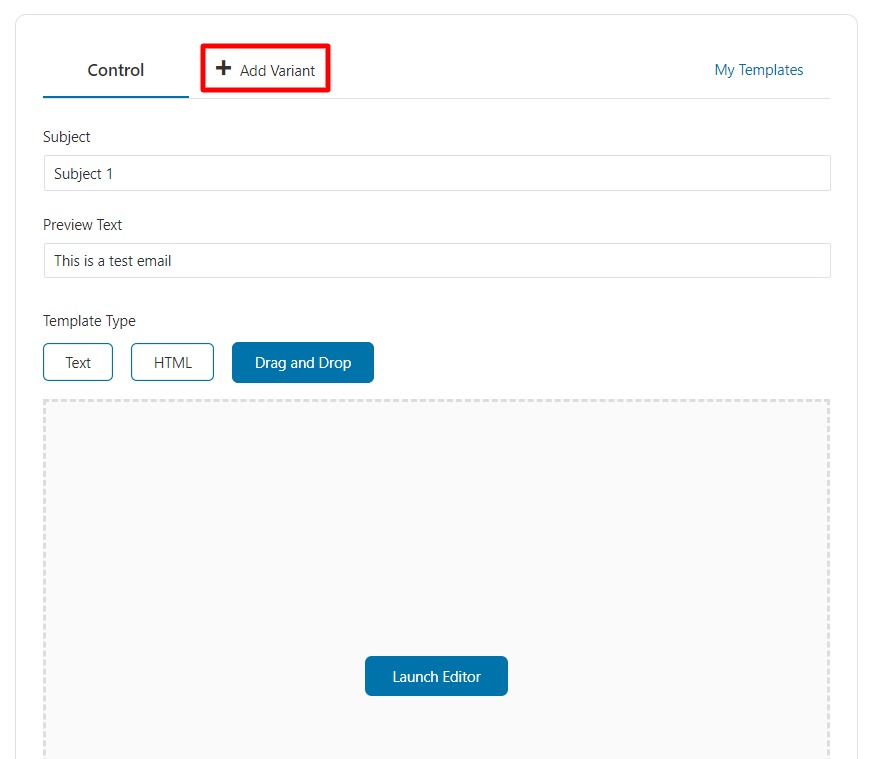
Design this email variant just as you did the control email broadcast.

Note: The first email in an A/B Test campaign is always considered the "Control" email, and the other variants are tested against it to judge which receives a better response.
Smart sending is another neat feature of FunnelKit Automations that allows you to control the delivery of email variants to your contacts.
Only a percentage of your contacts are sent the emails initially, then after a specified duration, whichever email receives the most opens is sent to the rest of the list.
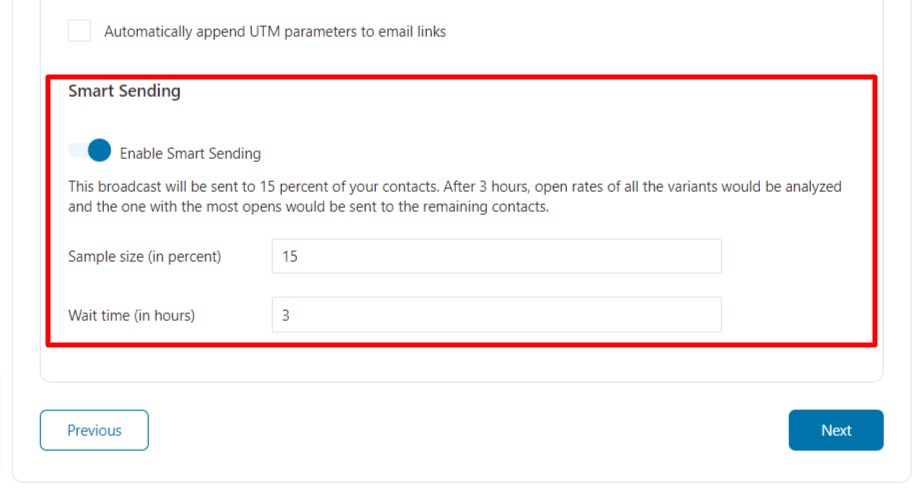
This enables you to send the best version of your broadcast to most of the contact lists and observe better results.
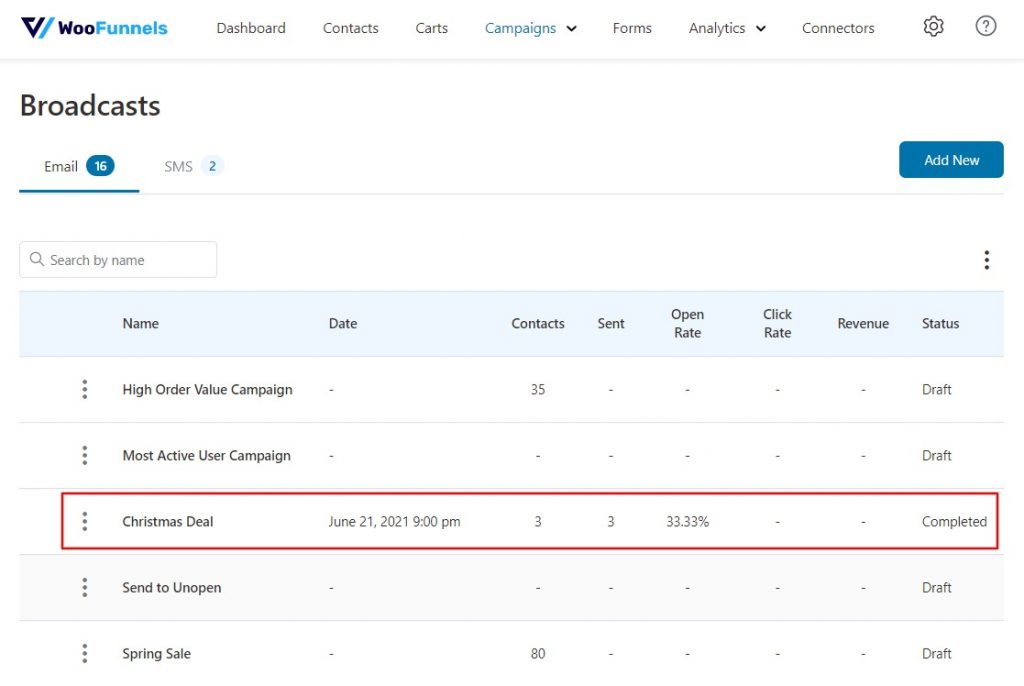
You can review and track the progress of your sent email broadcasts in FunnelKit Automations. Go to FunnelKit Automations > Broadcasts and click on the completed broadcast name you wish to study.
Here you can see an overview of the number of contacts the broadcast is sent to, open rates, click rates, and the number of Unsubscribes at the very top.
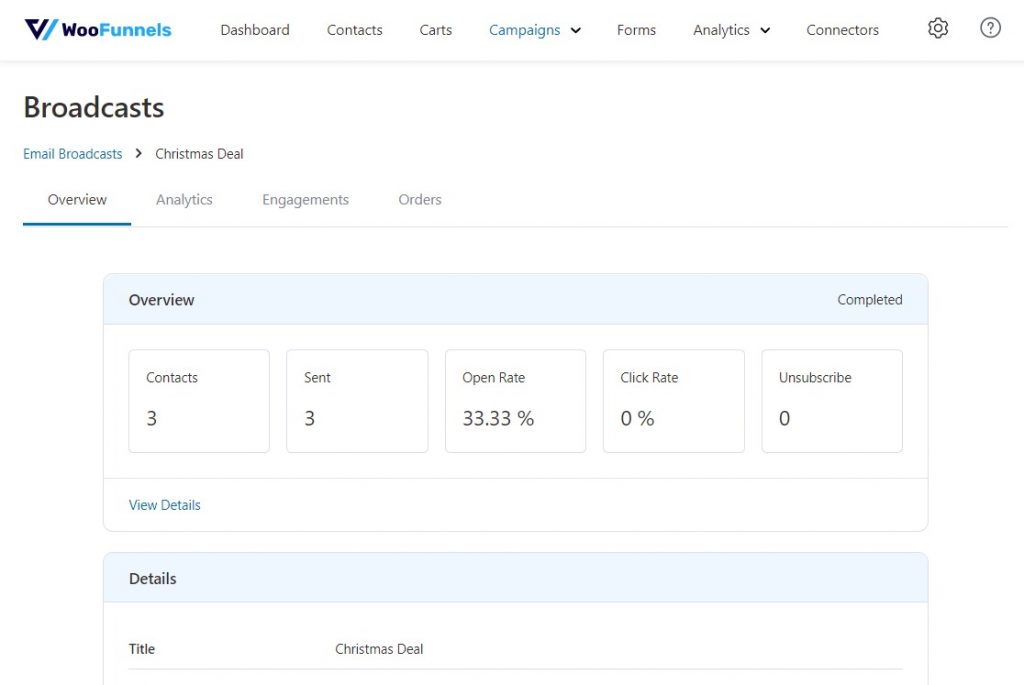
And at the bottom of the page, there is an Actions section that allows you to resend the broadcast to all those contacts who have not opened their emails yet.
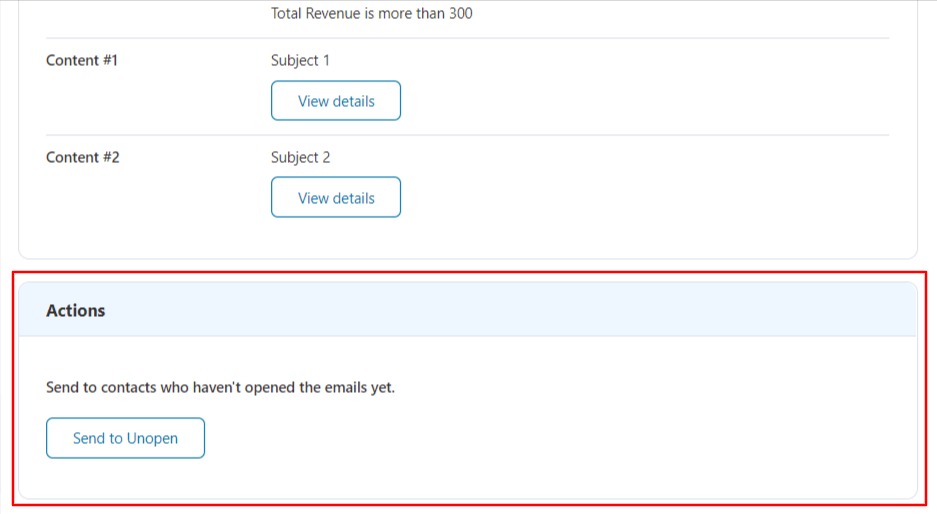
Just click on the Send to Unopen button and resend the email broadcast to maximize your visibility and conversions.
Email broadcasts ensure that the intended information is delivered to all your contacts in one go.
You can even save audiences by sending targeted emails to already segmented contacts to save time and effort from doing it again.
With FunnelKit Automations, you get to personalize the emails you send using merge tags and even send the better variant of your emails to the majority of your contacts - all based on the customer information received.
Now that you've seen yourself that designing an email broadcast is not as daunting of a task as everyone made it out to be, we are sure you'd be itching to try and create one for your WooCommerce store immediately.
So don't hold back anymore, and get your hands on the first-ever WooCommerce-based CRM, FunnelKit Automations today!