Do you want to replace your default WooCommerce checkout page with a custom global checkout?
If your store serves multi-category products, a custom-designed global checkout will enhance the checkout experience of your shoppers.
This way, they can just come, add items to the cart and complete their purchase from a standard store checkout page.
Even though WooCommerce has a dedicated checkout, it isn’t designed to convert.
The default Checkout looks bland, isn't mobile-optimized, and lacks elements that drive conversions.
Therefore, a custom high-converting checkout built for the storefront would be a game changer for you.
In this post, you’ll understand the importance of global checkout and how you can build one in your WooCommerce store.
Watch this mini masterclass to create a high-converting WooCommerce checkout page with 20 proven tips from expert:
Contents
A global checkout is a standard checkout page that a shopper sees after adding items to their cart and proceeds to buy them.
It’s the final step in the buying process, where customers review their order, enter their payment details, choose a payment method and complete their purchase.
A global checkout is quite important for an eCommerce store that sells multi-category products. This way, you have one standard checkout instead of separate product-specific checkouts.
Having a custom-built checkout instead of the default WooCommerce checkout ensures that all your customer’s questions are answered and they don’t feel anxious at any step of the checkout process.
This is what makes your checkout page get high conversions and more sales.
Global checkout applies to all the products on the website.
The default WooCommerce checkout meets the basic necessities of a checkout page but doesn’t allow the users to have any control over their purchase once they get to the checkout page.
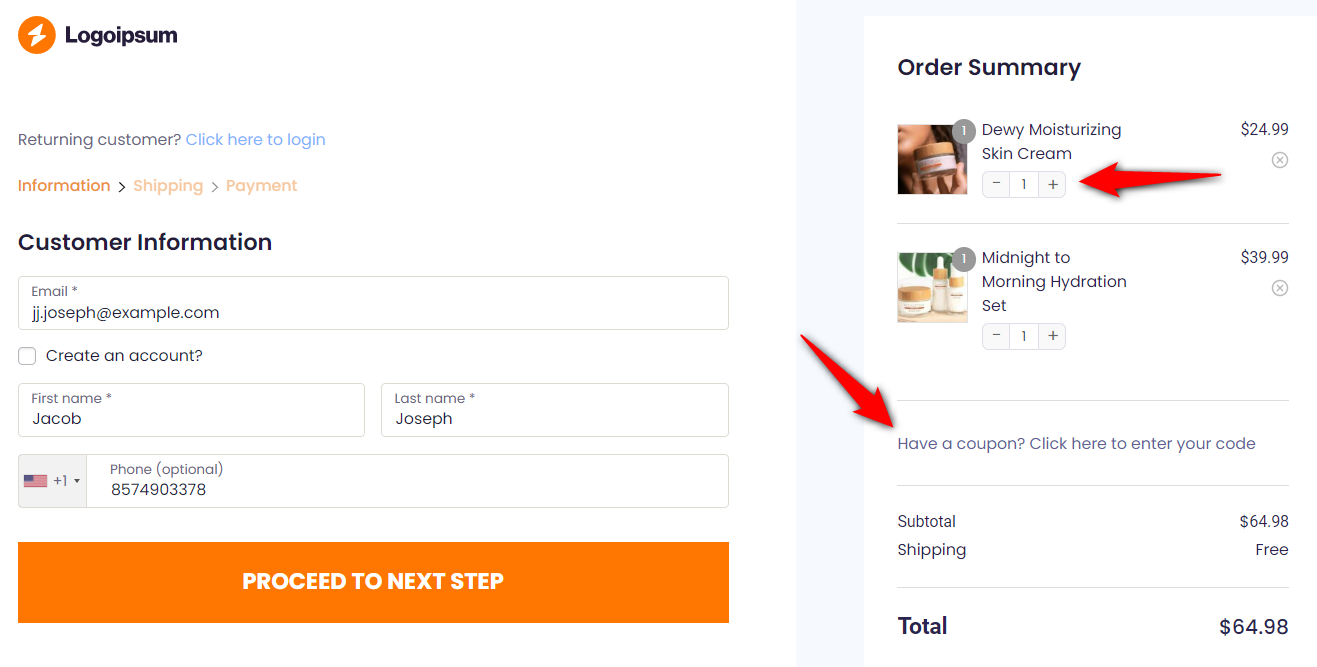
To give the best experience to your customers, you need to give them complete control over the checkout process.
Make sure they are able to view the product images to confirm about buying the right items.
Also, they are able to adjust the quantity of the products, delete the products if necessary, and apply coupon codes right at checkout.
Furthermore, your global checkout should have elements that drive conversions.
Testimonials displayed on the page also strengthen the claims of your items. Bullet points about why they should buy from you and a guarantee seal just drive the point home even more.
You should also use trust seals or badges to make sure your checkout page offers secured payment processing and ordering system.

Optimized global checkouts offer a collapsible order summary section that saves space on the screen (especially on mobile devices) for other details and form fields to be shown.
You can create and customize a Global checkout page for your WooCommerce store easily with FunnelKit’s Funnel Builder.
Funnel Builder from FunnelKit is the leading sales funnel builder for WordPress. It allows you to create high-converting pages for your sales funnels, such as opt-in and opt-in confirmation pages, sales pages, checkouts, one-click upsells or downsells, thank you pages, and more.
Not just that, here are a few reasons why FunnelKit is our answer to creating a global checkout in WooCommerce:
Please note that FunnelKit’s Funnel Builder is available both in free (lite) and premium versions. Here, we’ll be using the Pro version to create our store checkout.
To get a copy of the FunnelKit, click on the button below -
👉 Refer to this guide on installing and activating the FunnelKit Funnel Builder on your WordPress website.
Now that we have chosen our tool, follow the steps below to create and customize your global checkout page.
Adding a store checkout will replace the default WooCommerce checkout page.
Go to FunnelKit ⇨ Store Checkout from the WordPress dashboard.
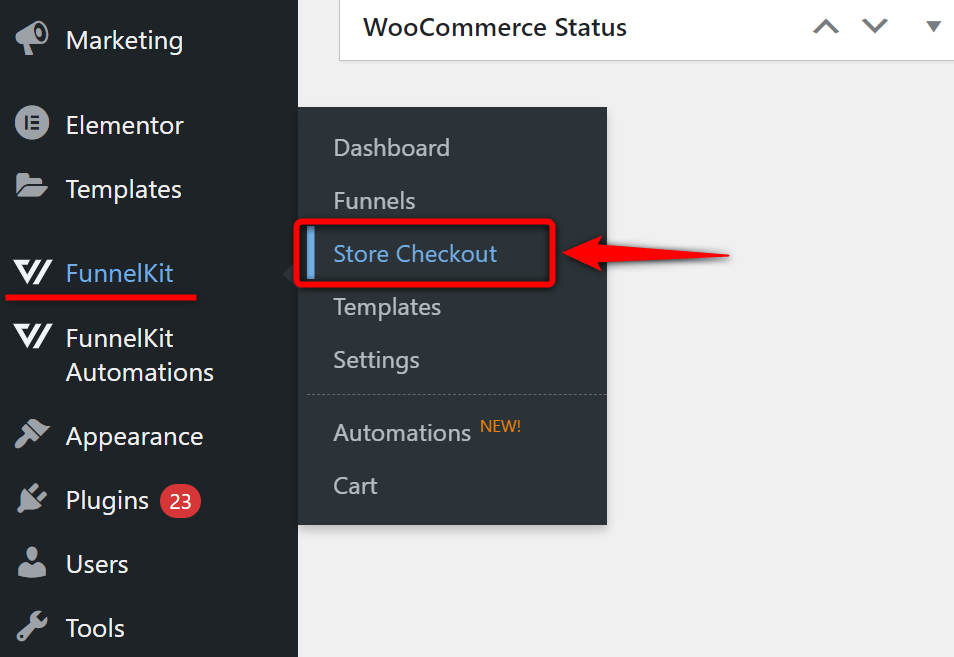
Next, click the ‘Create Store Checkout’ button.
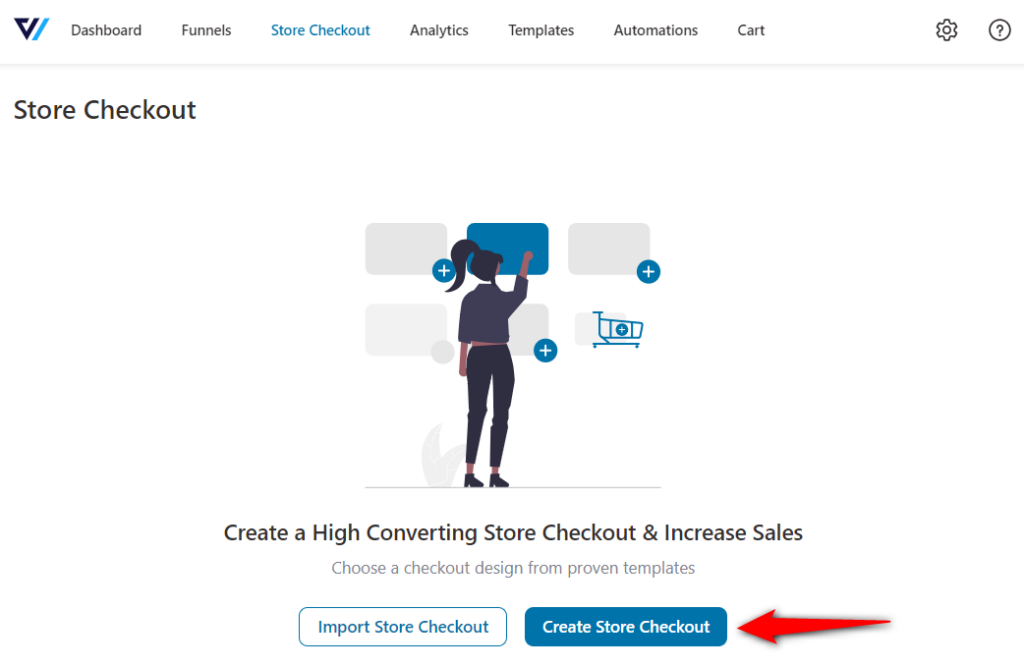
You'll be directed to import your global checkout templates.
Please note that 2-step signifies that the particular template will import two pages - a Checkout and Thank You page. While the 3-step template will import an additional One-Click Upsell page.
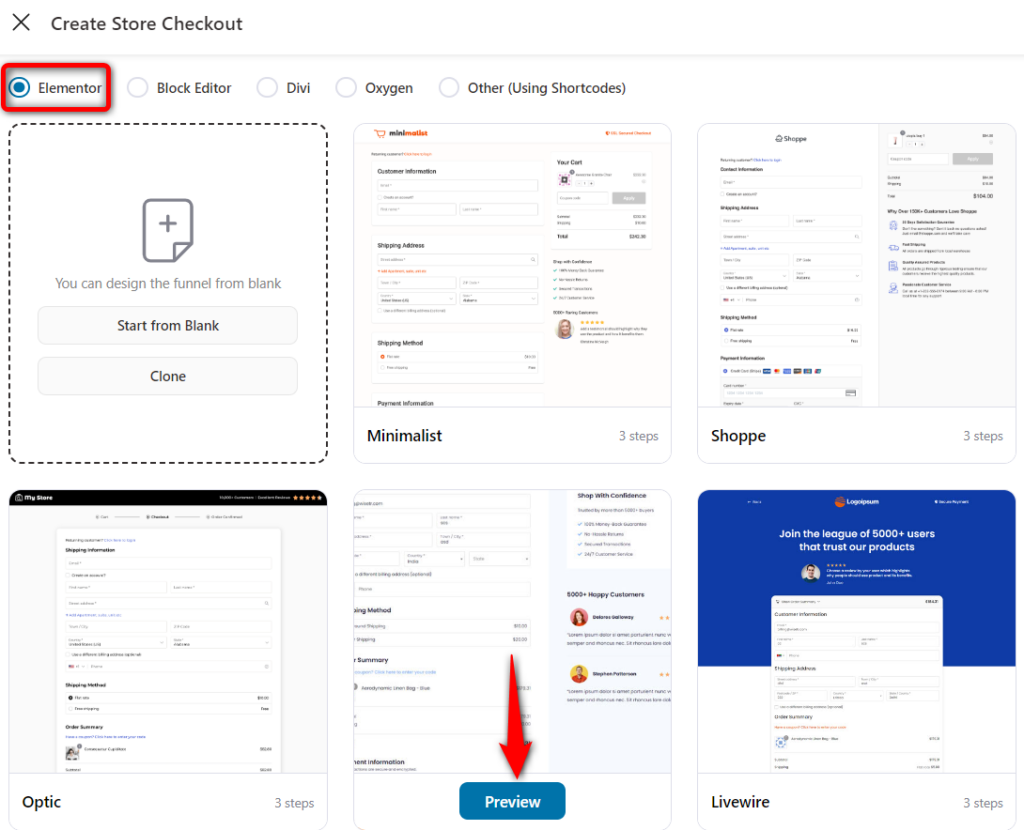
As mentioned earlier, Funnel Builder deeply integrates with popular page-building tools such as Elementor, Divi, Oxygen, and Gutenberg.
If you want to use other page builders such as Thrive, Beaver, or any other, choose Others and create it with the help of shortcodes.
Select the page builder and click on 'Preview' on the template you want to import.
Next, make sure to choose the number of steps you want on your global checkout page and import the template.
Then, name your store checkout.
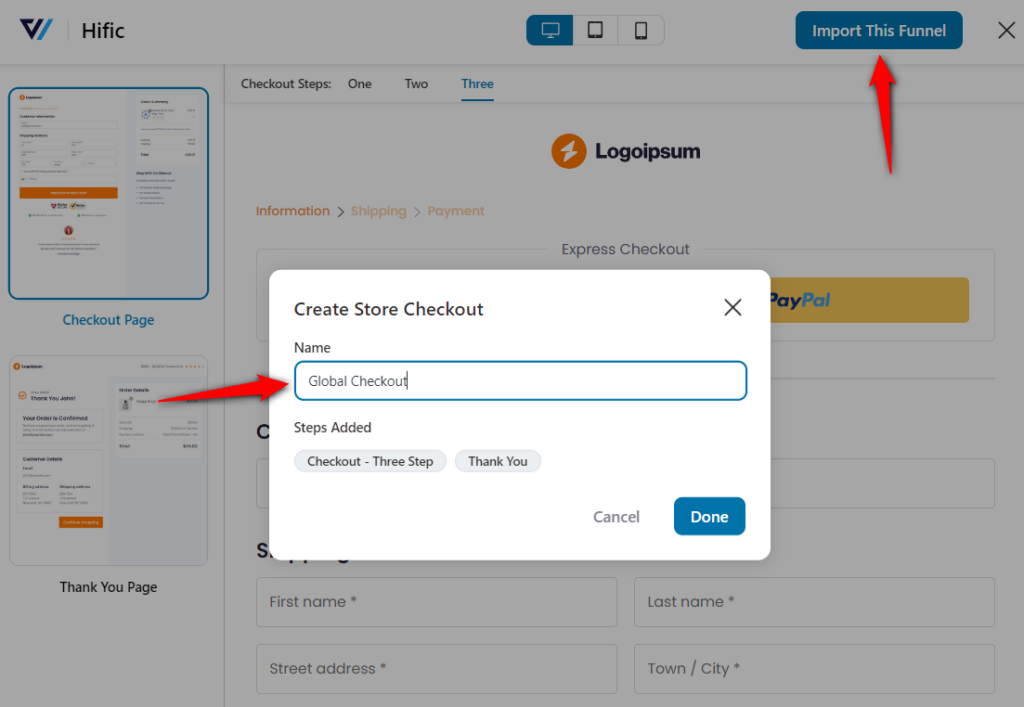
Clicking on ‘Add’ will import your store checkout.
Now, we will customize the look and feel of our store checkout.
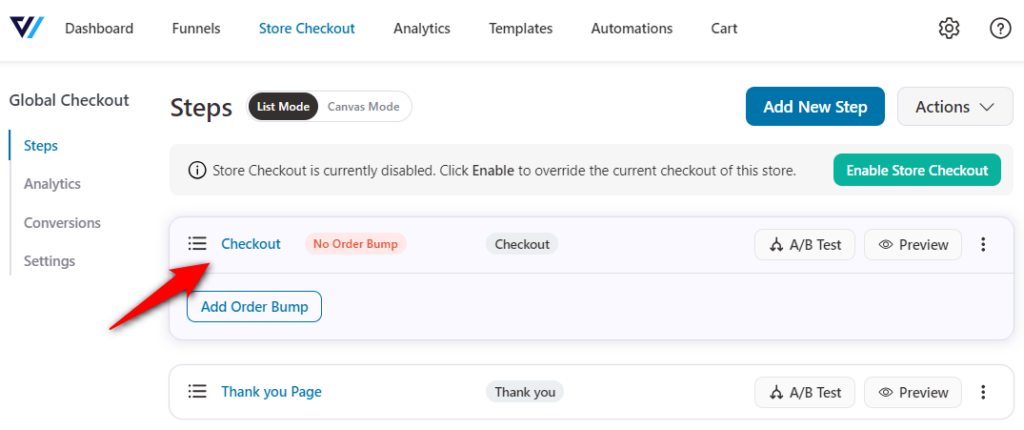
Hit 'Edit' next to your checkout page.
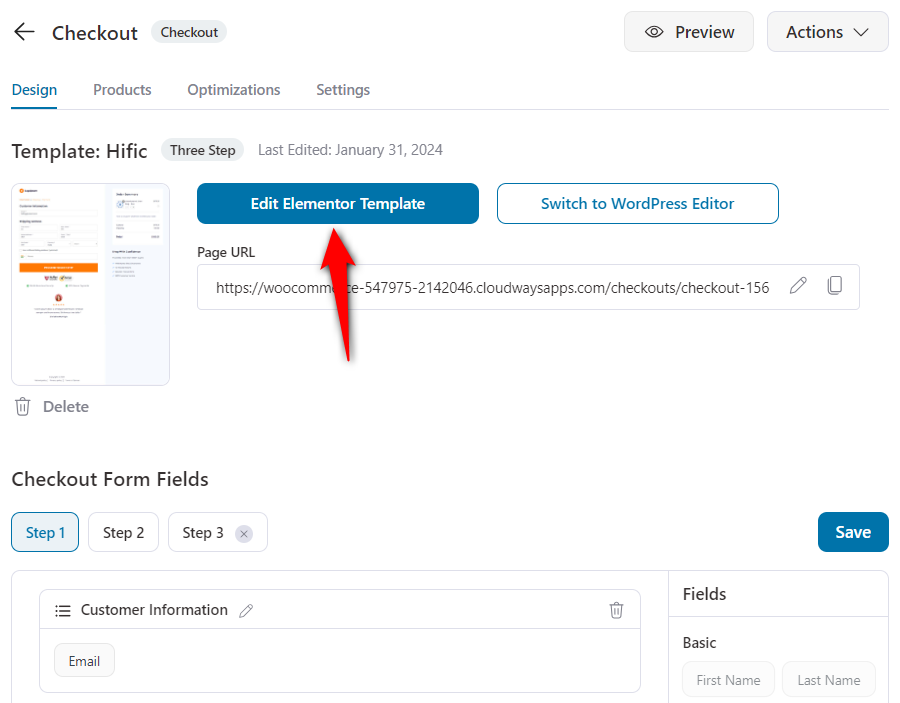
On the Design tab, click on the ‘Edit Elementor Template’ button to customize the page with Elementor.
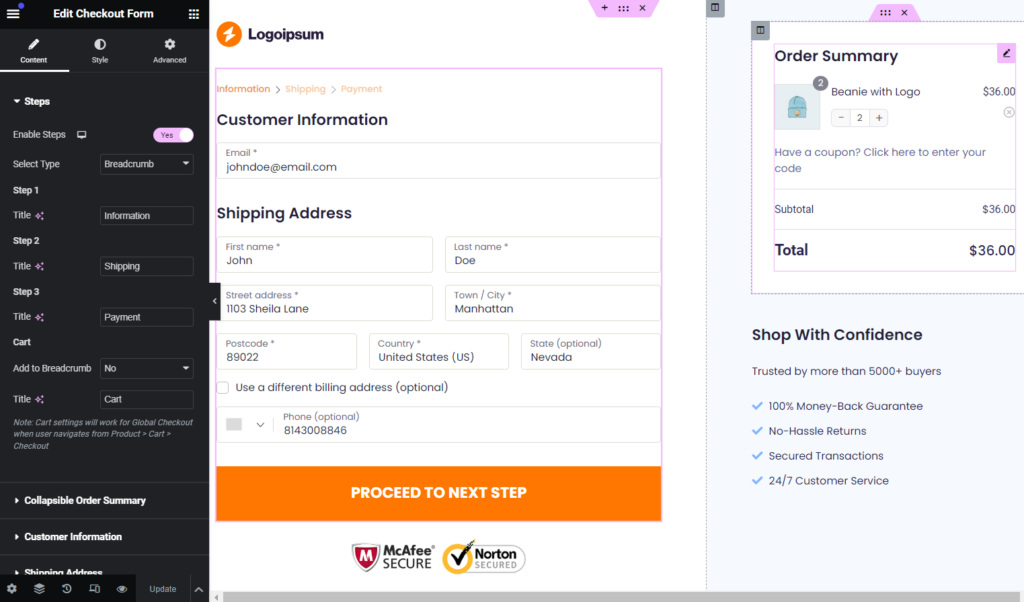
FunnelKit offers you two custom built widgets to optimize your checkout pages - Checkout Form and Mini Cart.
Design the page as you want - adjust the form field widths, enable the progress bar at the top, and more.
👉 Check out our post on customizing the WooCommerce checkout page design with FunnelKit and Elementor.
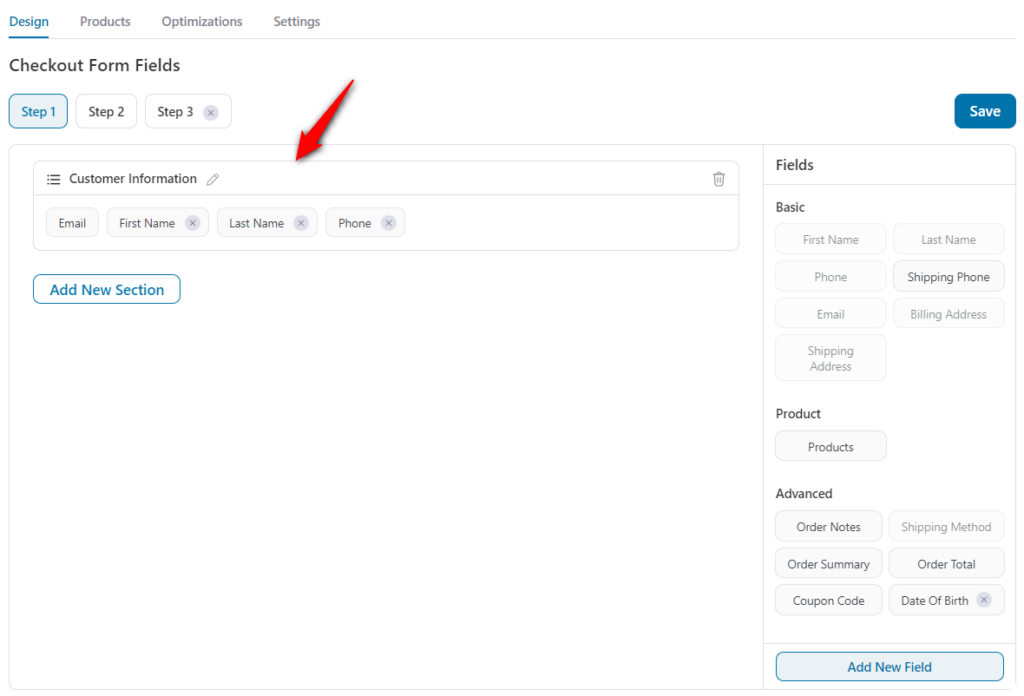
In case you wish to add or delete any of the default checkout form fields, you can do that in FunnelKit.
FunnelKit’s built-in checkout field editor allows you to add, edit, rearrange and delete any fields or sections on your checkout form.
To rearrange the fields and sections to your liking, drag & drop them around the page, go to the Design tab.
After that, click on 'Save' once you’re happy with the structure of the global checkout form.
👉 Refer to our detailed post on customizing the WooCommerce checkout form fields with FunnelKit’s built-in editor.
Optimizing your checkout form would ensure a smoother checkout experience for your customers.
Add checkout page optimizations like Google Address Autocomplete, Auto Apply Coupon, Express Checkout buttons such as Apple Pay and Google Pay, etc.
First, click on the Optimization tab.
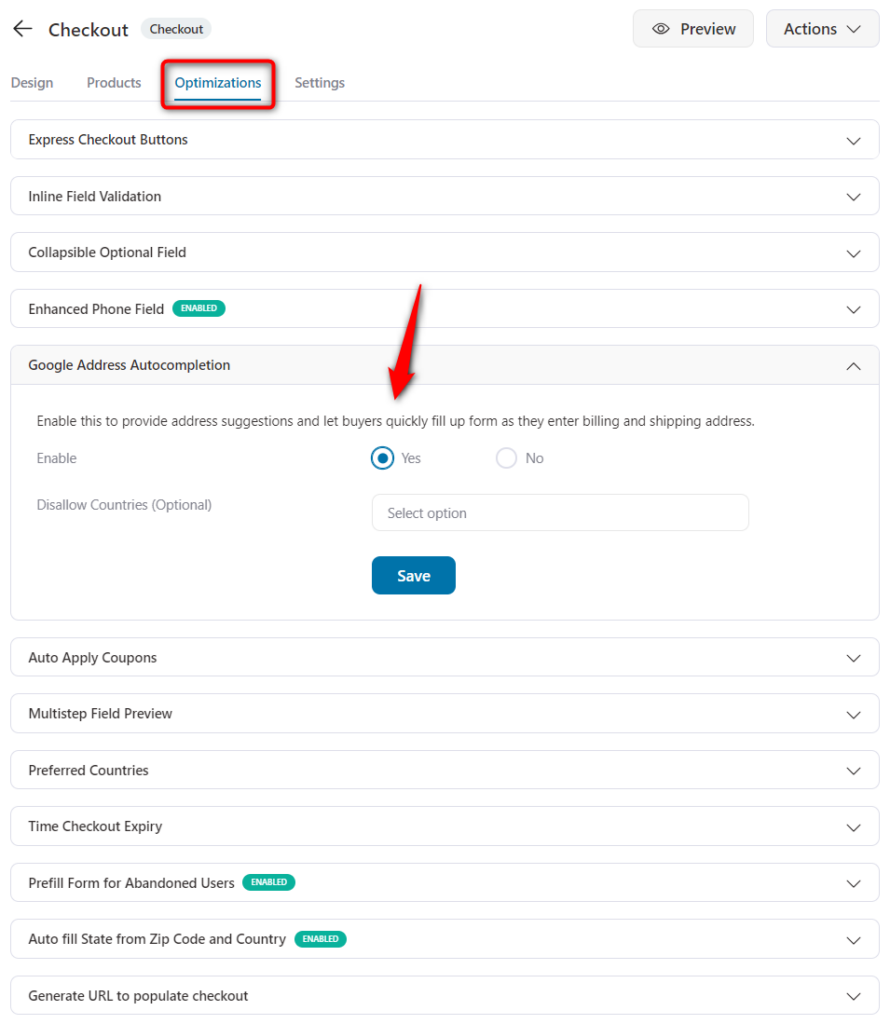
Enable all the optimizations you wish to add to your checkout page and click on ‘Save Changes’ when done.
Once you're done with your global checkout page, you can customize the design of your thank you page as well.
👉 Check out our guide on customizing the thank you page here.
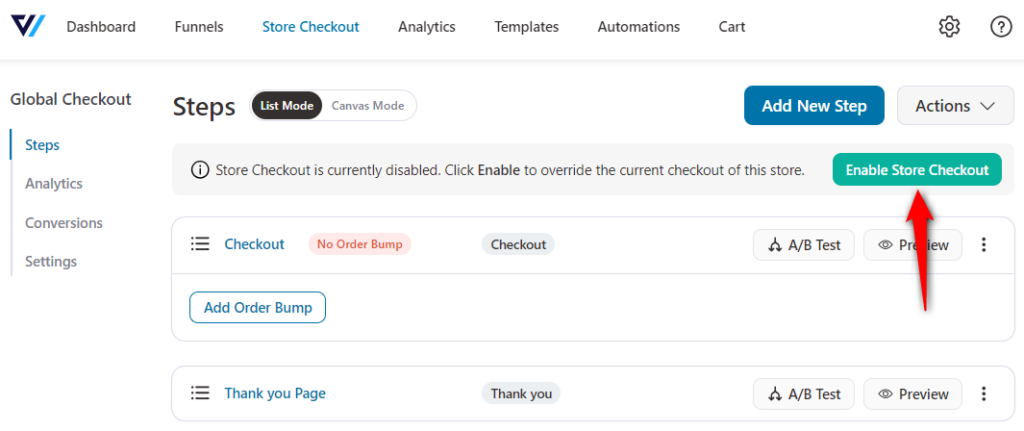
Now, make sure to activate your store checkout. To do that, go back to your funnel.
Next, turn the toggle to enable your store checkout.
That's it! You have successfully created your store checkout or global checkout funnel with the FunnelKit Funnel Builder.
With FunnelKit, you can add multiple complimentary offers: Order Bumps and One-Click Upsells - that would help you increase the AOV on every purchase.
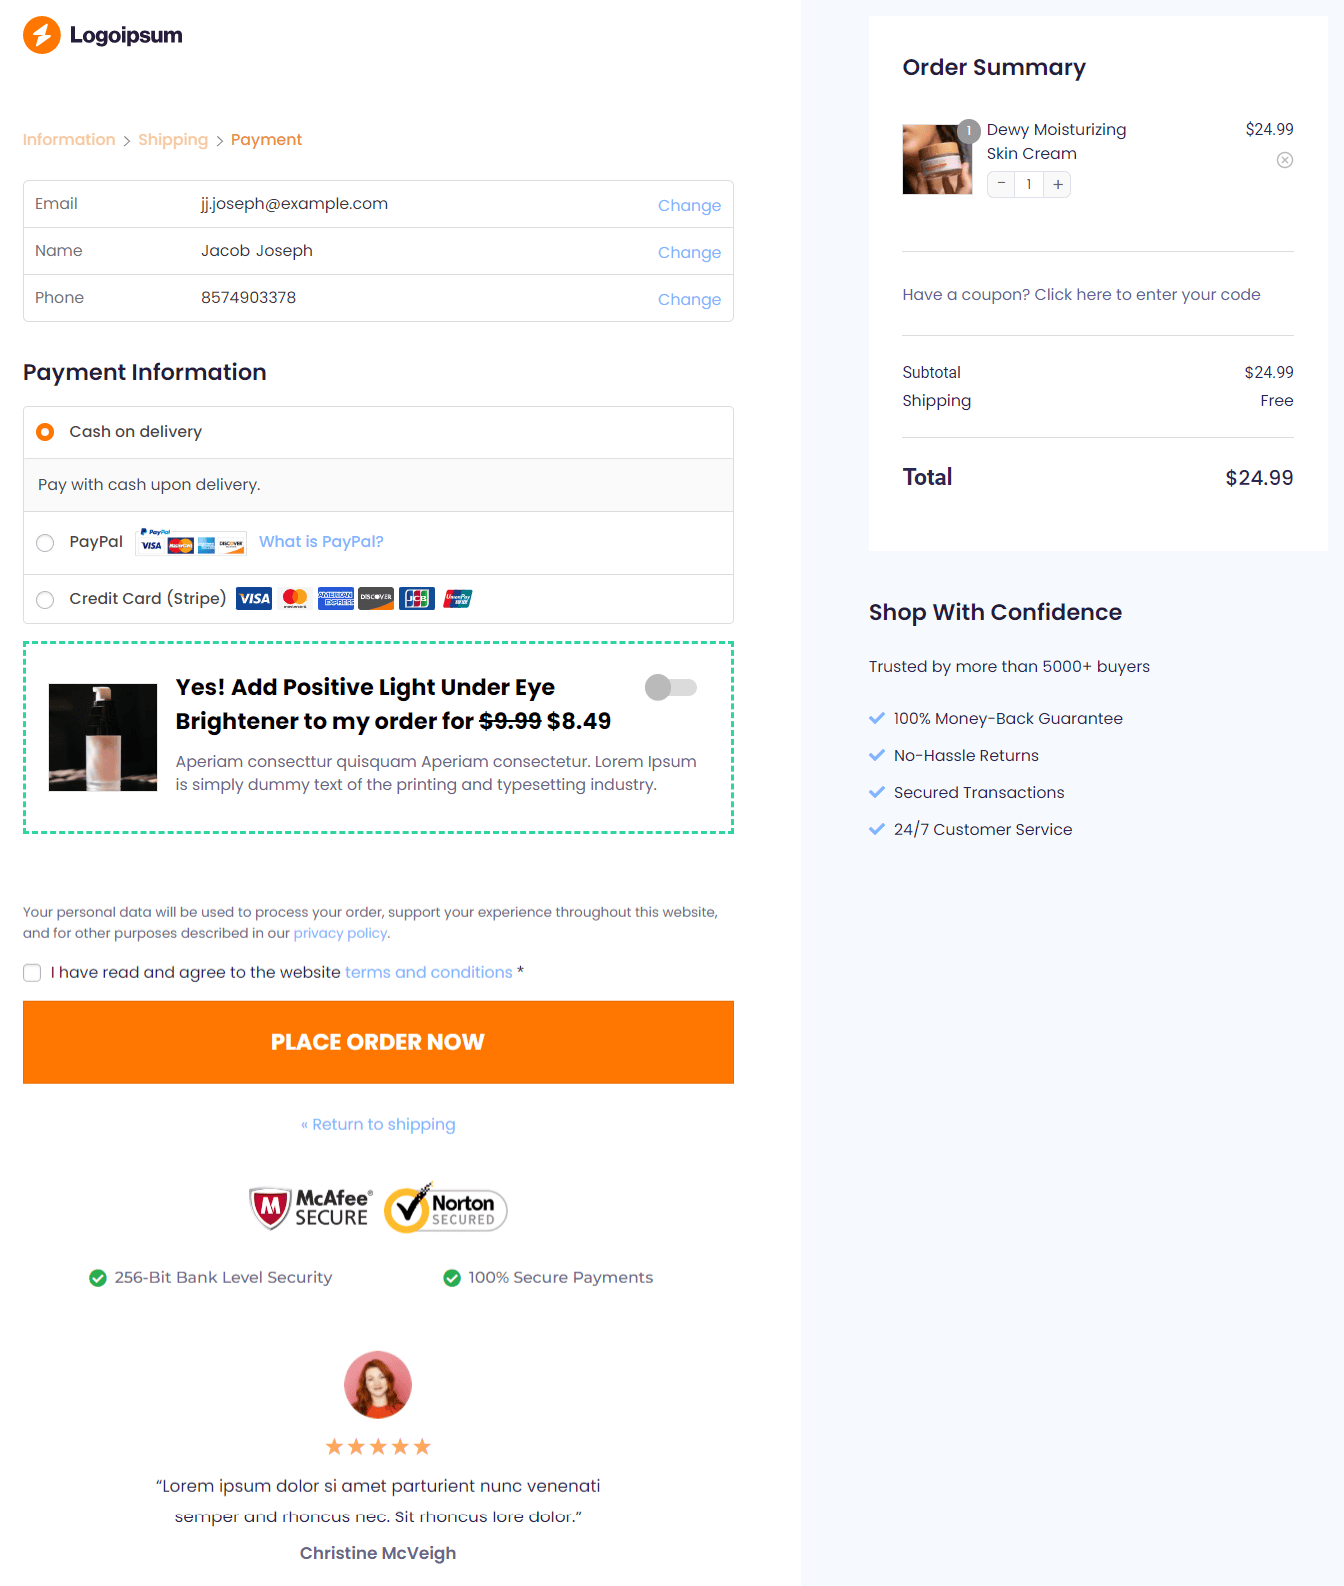
An order bump is an offer presented on the checkout page. It is often a low-dollar impulse purchase that doesn't require a lot of explanation.
You can add more than one order bump on the same checkout page. And customers can add whichever bump they like to their cart by clicking on the checkbox.
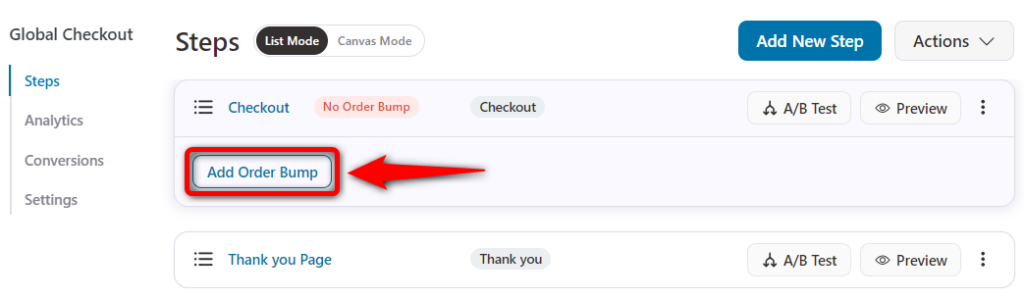
Adding order bumps with FunnelKit is quite easy. All you have to do is click on ‘Add Order Bump’ next to your checkout page step and name it.
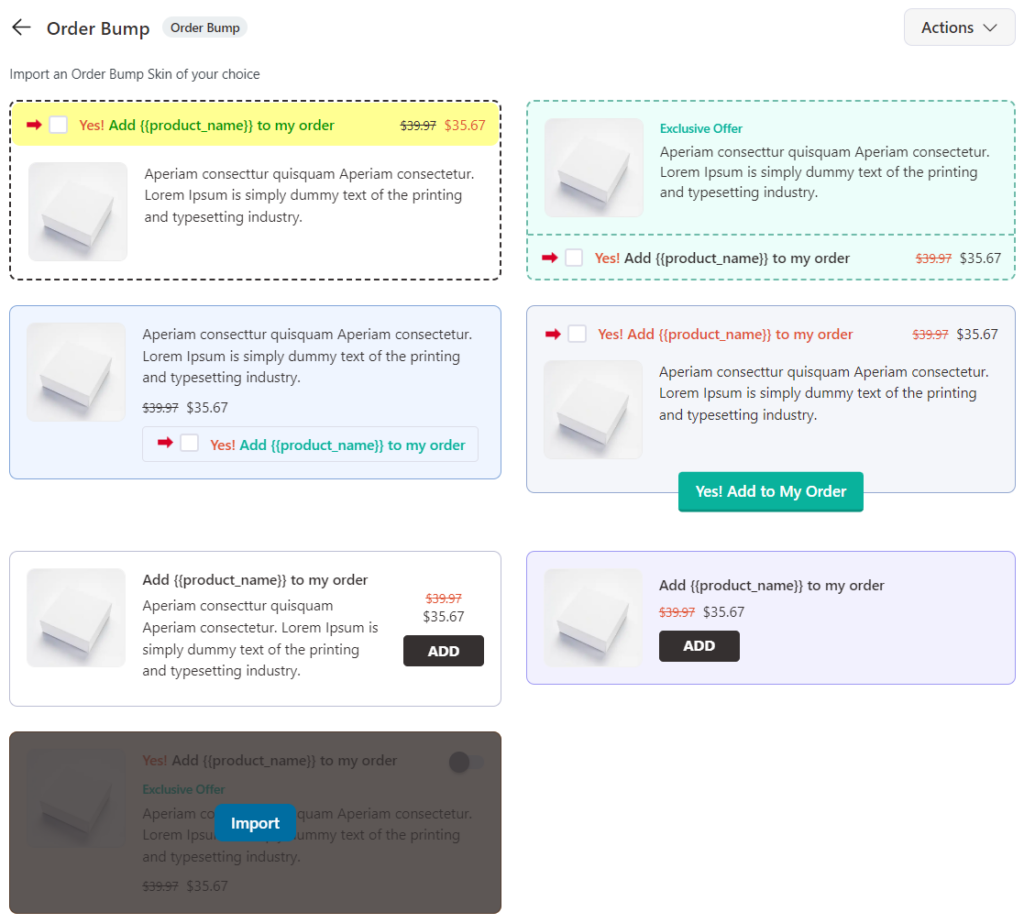
Next, choose the order bump skin and click on 'Import'.
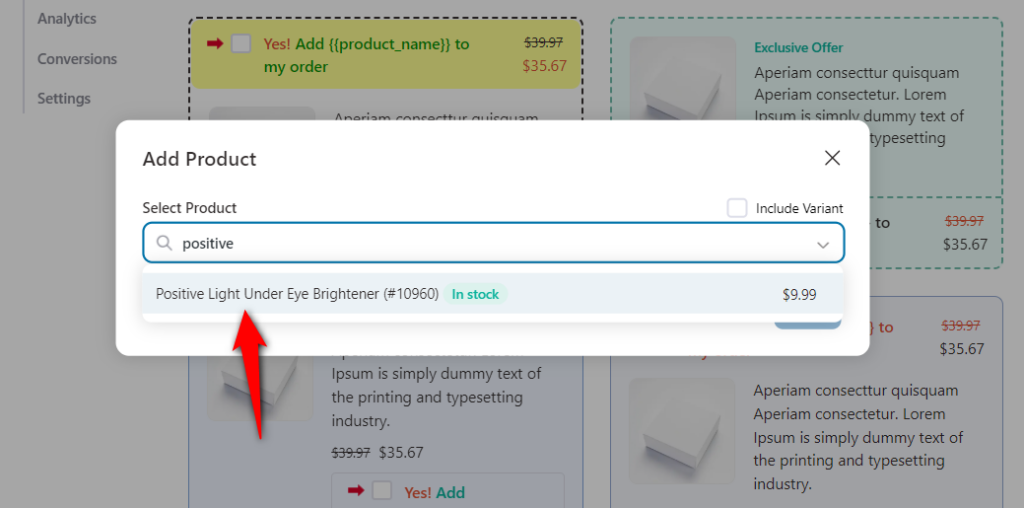
After that, add offers by adding the products to your order bump.
Just search for the products and add them as your order bump offers.
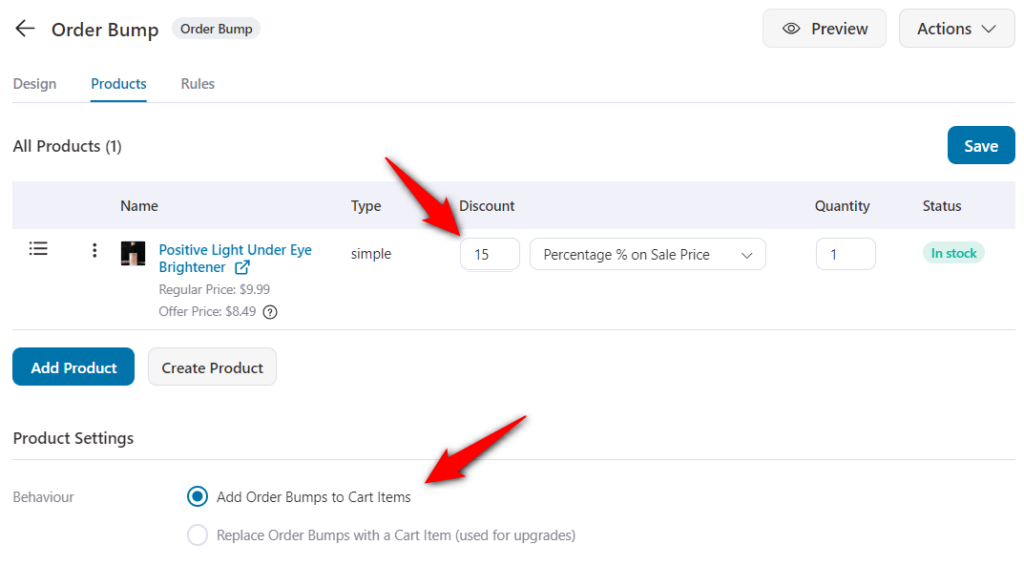
You can even order discounts or change the quantities to create a compelling order bump for your shoppers. Plus, you can also configure the order bump behavior and its display position.
In the case of global checkouts, you can add rules to trigger your order bumps.
You can define when a particular order bump is shown on the checkout page. Be it based on the order total, a specific product added to the cart, or something else.
This ensures that the additional offers are in line with the products being purchased.
You do this by going to the Rules tab and setting the condition the way you want.
Let’s say you want to show a particular order bump only when shoppers add items of a specific category to their cart, you can do that easily here:
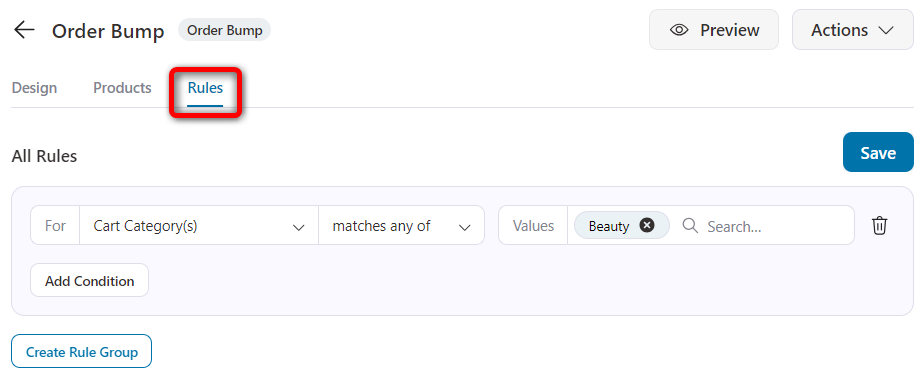
This is how simple it is to set up attractive order bumps on your global checkout:
👉 Check out our detailed post on setting up order bumps on your checkout page.
One-click Upsells are the offers a customer sees after making the payment and before landing on the Thank You Page.
The users can accept the offers made on these pages with just one click. They don't even need to enter their payment details again.
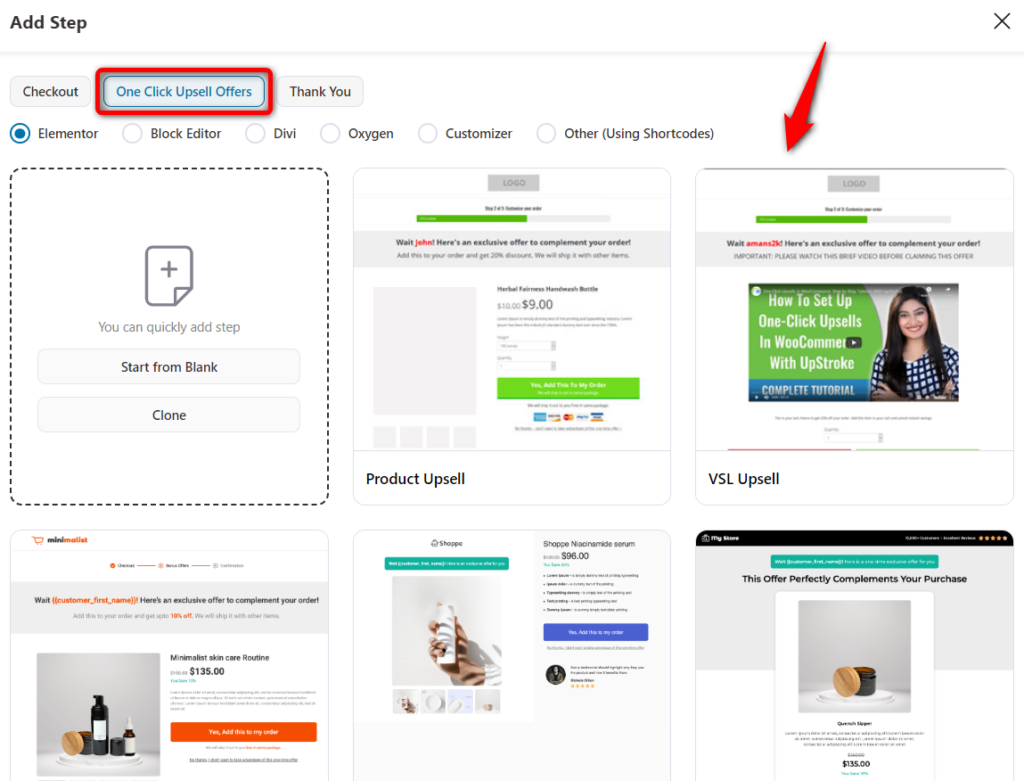
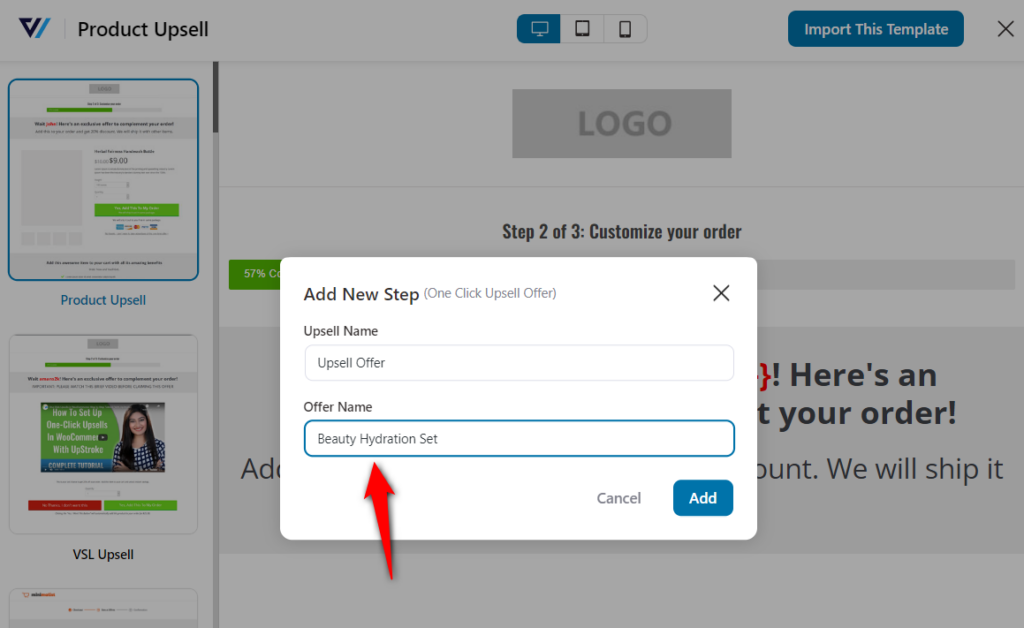
You can add one-click upsells as a new step to your global checkout funnel. Just import any template like you did when importing your checkout funnel.
Once you’ve named your step, it’ll get added to your funnel.
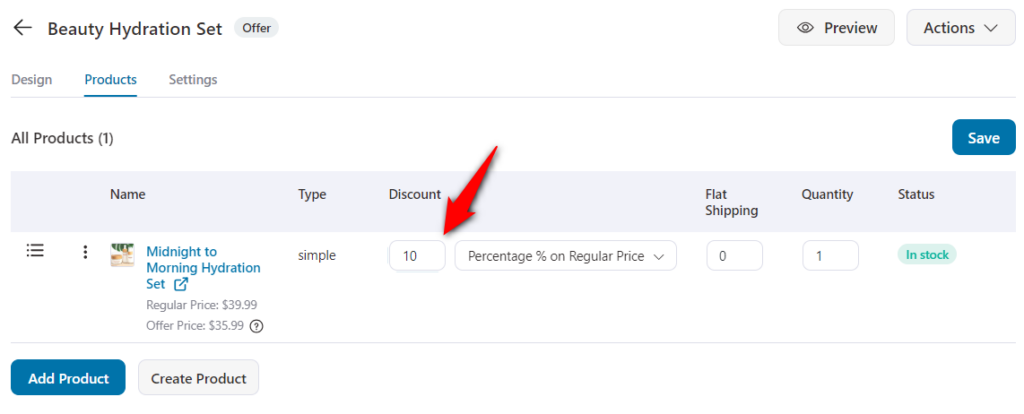
You can now go through the same process of adding products as your upsells as you did with order bumps.
Moreover, you can set rules to trigger your one-click upsells after your global checkout.
👉 Want us to demonstrate the entire process? Check out our detailed post on setting up one-click upsells here.
Is a single-step global checkout better than a multi-step one? This question is part of an age-old debate.
The answer to this question depends on your online store’s requirements. Choosing either of the checkouts has its own advantages and disadvantages.
A single-step checkout has all the required information for users to scan in one glance. Whereas a multi-step checkout breaks down the information into digestible chunks, making it easier for shoppers to navigate.
If you’re selling digital products, one-page checkouts are better simply because there are quite a few form fields. You don’t need a shipping method and address from the user.
However, a multi-step checkout may convert higher for physical products.
To ensure which one will work best for your store, we recommend you to A/B test different elements on your global checkout page.
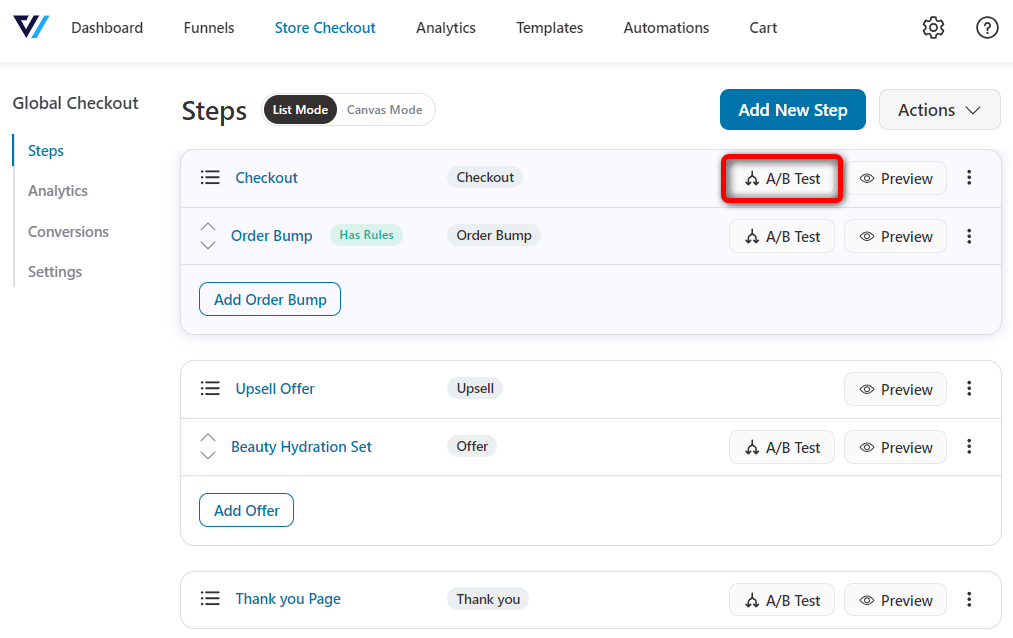
FunnelKit has a built-in A/B testing feature that lets you A/B test your single-step and multi-step checkouts. This way, you’ll be in a better situation to declare your winning variant and improve your conversions.
You can find this option under each step in your sales funnel:
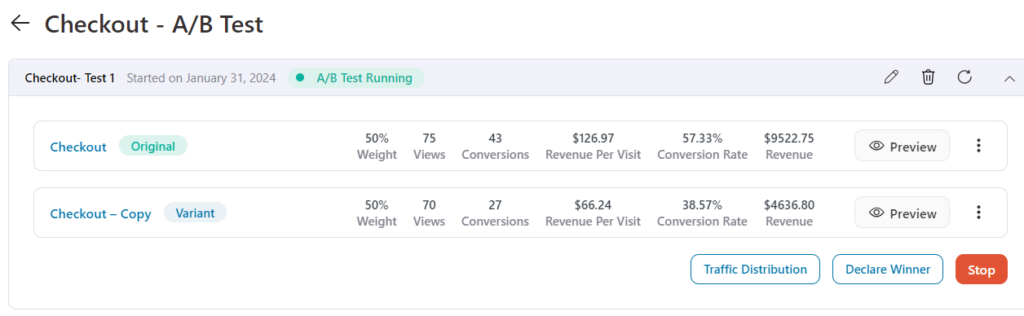
Create two variants of your checkout page, i.e., single-step and multi-step checkouts. You can allocate 50-50% traffic to each variant and run your A/B test.
You’ll be able to see the real-time data of how your A/B test is performing. Once you have enough data, you can declare a winner and it’ll transfer 100% of the future traffic to your winning variant.
👉 Learn the complete A/B testing process to test your single-step and multi-step checkout pages here.
A custom high-converting global checkout can be a real game changer for your business.
A custom page works great to reassure and convince the customers of their purchase and make the process easier for them to navigate.
We saw how you could design a checkout page and apply it to all the products as a Global Checkout.
We also showed you how you could add additional offers that would help boost the AOV with every sale.
With FunnelKit, you can easily create and customize checkout pages for a seamless buying process.
You get a library of customizable templates, a checkout form field editor, optimization options, and tons of other features to create a high-converting global checkout.
It’s the best plugin you can have for your WooCommerce store!
Check out the FunnelKit Funnel Builder to learn more and grow your business now!