You're here! This means you have already set up your LearnDash course and now want to automate the email notifications.
Bingo!
According to research, the global online learning industry will be worth $350 billion+ by 2026.
That’s why platforms like LearnDash have made it easier for course creators to set up their courses in minutes.
But what really breaks the ice is the strategy you’ll follow once a student opts for your course!
For that, you need to provide value and engage with your students so that it interests them by building retention simultaneously.
And all of this is possible through setting up LearnDash email automations!
Wanna know how?
In this post, we will be looking at how you can automate your LearnDash notifications and start interacting with your students.
Contents
The average open rate in the education and training industry stands around 28.5%, which says enough about using email marketing as a potential tool.
You can use it to nurture your users and drive engagement, contributing to a positive learning environment.
An email sequence is an automated series of emails you can send to your contacts based on defined triggers delivered over a time period of usually 5-7 days.
These triggers could be anything from users enrolling in your course, completing a lesson, taking a quiz, and more.
Let’s understand why you should automate your LearnDash email notifications:
You can automate your website even when you sleep by setting up personalized email sequences through LearnDash notifications.
LearnDash, the WordPress LMS plugin, allows you to create visually impressive course content, create quizzes, groups, award grades, and do so much more.
To set up automated email notifications, you need a separate add-on (extension plugin).
However, it lacks the ability to automate your communication with students.
So while creating well-structured courses and presenting them beautifully on your website is a breeze in LearnDash, it doesn’t let you carry the conversation forward as effectively over mediums such as emails and SMS.
To make this experience seamless, you’ve got to look for another solution.
FunnelKit Automations is the most powerful WordPress-based email marketing and automation engine.
It integrates with LearnDash to help you automate your LD notifications as well as effectively communicate with your audience.
Here’s how you can engage with your students perfectly by setting up LearnDash notifications in FunnelKit Automations:
FunnelKit Automations has well-thought event notification triggers and actions that let you set up automatic email notifications.
Let’s say, you want to add your users who have enrolled in a course to the study group.
All you have to do is select the ‘User enrolls into a course’ trigger and specify them to a group with the help of actions.
You can easily set up these automated sequences within minutes in FunnelKit Automations.
As a group leader, you can successfully add your students to a study group and better guide them.
With FunnelKit Automations, setting up rule-based conditions is a cakewalk.
These conditions make way for a much more targeted, positive learning experience.
For example, if you want to send a congratulatory email to your students who have passed a quiz, you can easily do that in FunnelKit Automations.
You just have to define a condition and add an email to your workflow.
Merge tags are the codes that are used to bring in dynamic data values.
FunnelKit Automations goes beyond the usual name, LearnDash courses, and email addresses merge tags to personalize emails for your students.
It has a range of dynamic merge tags, such as the one-time password for logging in, displaying quiz scores, user’s enrolled courses, and so many more.
Plus, using these merge tags is as easy as you want it to be.
FunnelKit Automations gives you three modes of creating an email: Rich Text, Raw HTML and Visual Builder.
Its visual email builder comes with drag-and-drop content blocks that let you design beautiful, professional-looking emails.
The best part is that you don't need any coding or designing skills.
All you have to select the 'Visual Builder' and click on 'Start' to load the email editor of FunnelKit Automations.
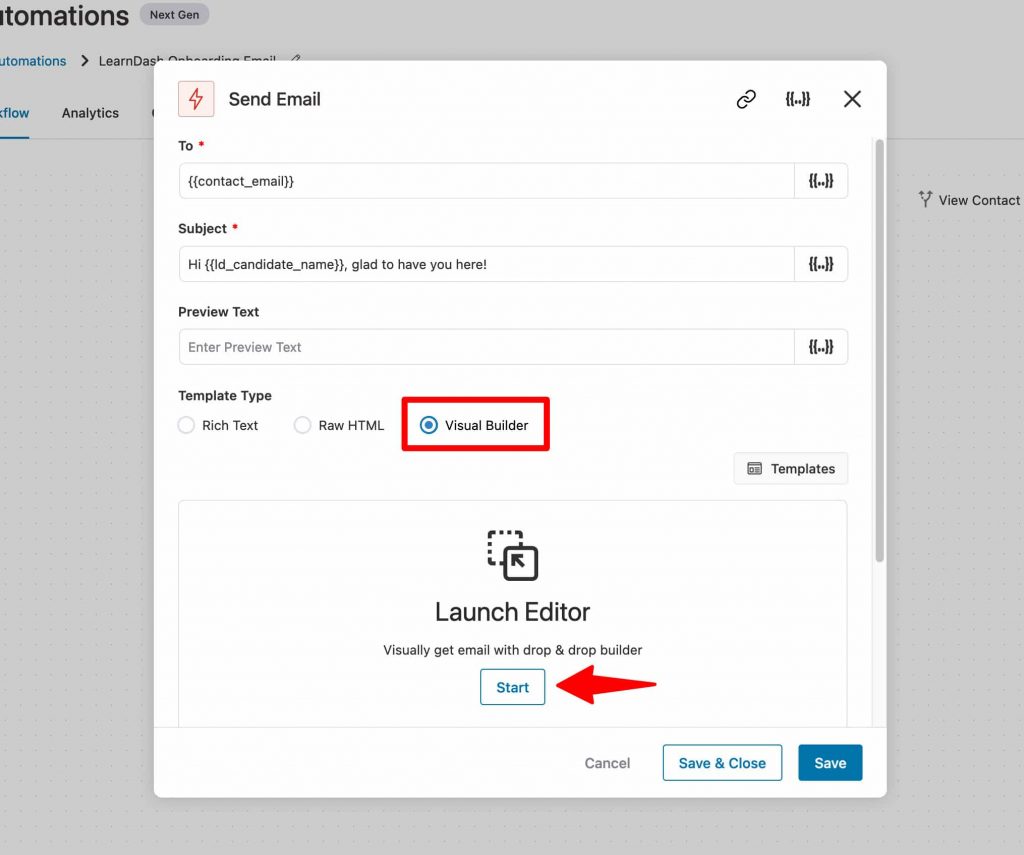
You'll get directed to the email builder screen.
From here, you can design your emails with the help of content blocks.
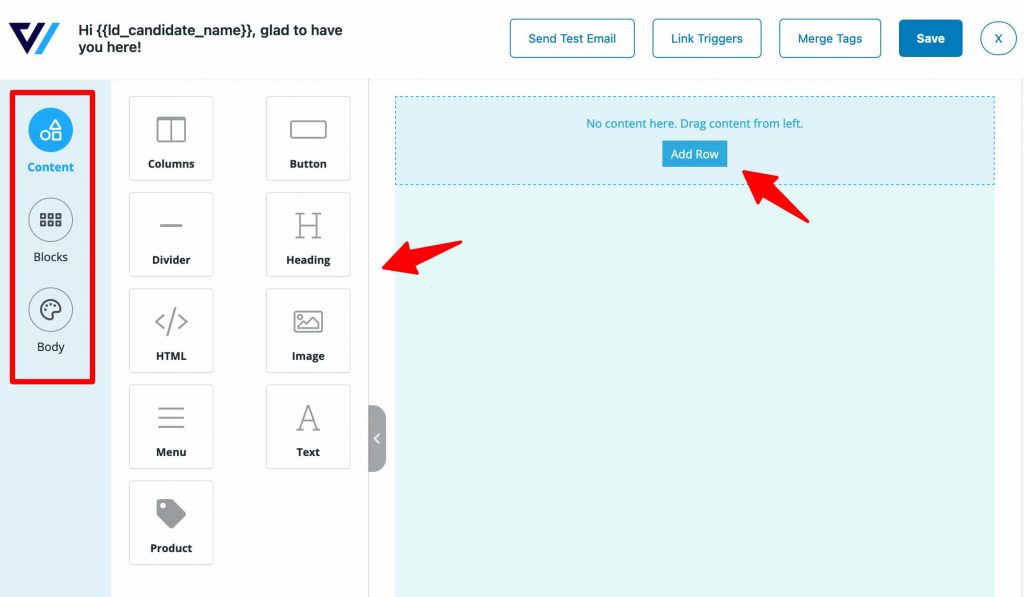
Take a look:
Now that you’ve got the best solution, let’s quickly learn how to automate your LearnDash emails.
Let’s look at the step-by-step process of how you can add LearnDash notifications and automate your emails with FunnelKit Automations.
Let’s try the following use case with our automation.
Use case: Send users a welcome email guiding them as soon as they enroll in a course.
Follow the steps below.
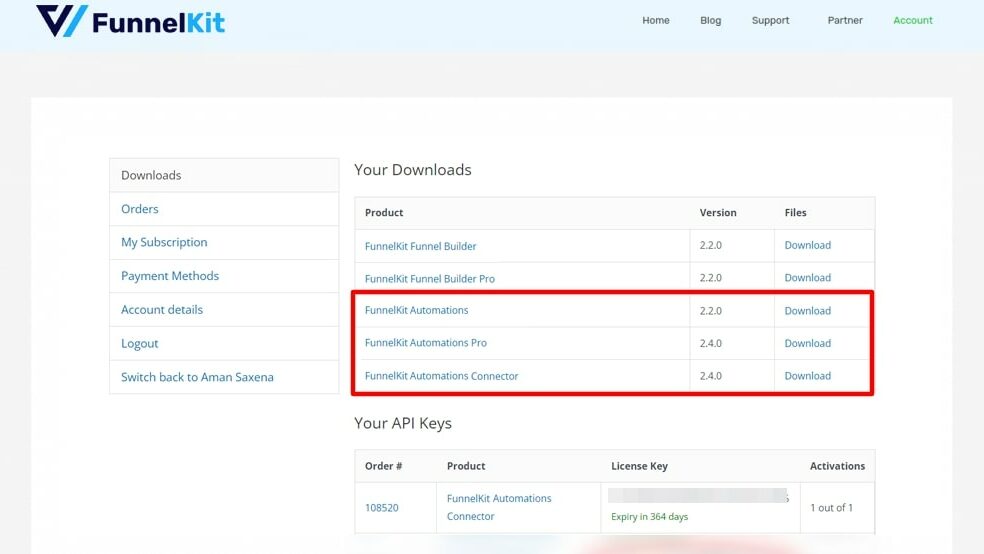
Get a copy of FunnelKit Automations here.
Once you’ve purchased its license, go over to the FunnelKit (formerly WooFunnels) accounts page and download the plugin files:
1. FunnelKit Automations (base plugin)
2. FunnelKit Automations Pro
Install and activate both of the plugin files by uploading them to your WordPress website.
Next, go to your account and copy the activation code of the FunnelKit Automations Pro plugin.
Paste the copied license code in the settings section to activate the plugin.
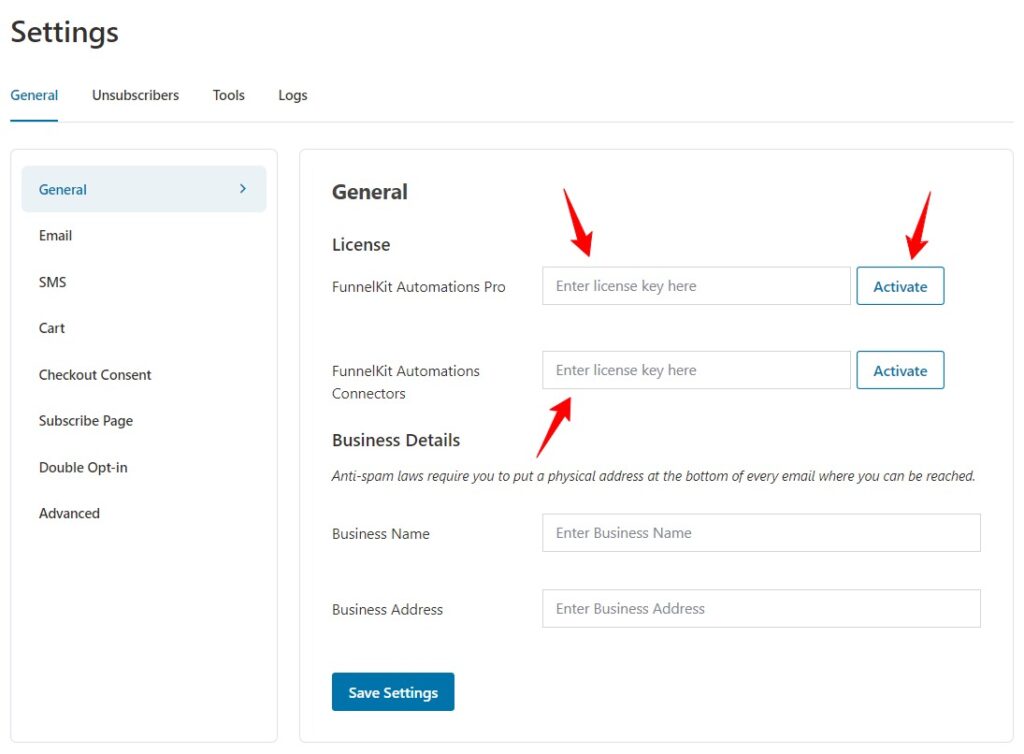
Click on ‘Save Settings’ when done.
Go to ‘Automations (Next Gen)’ under Campaigns.
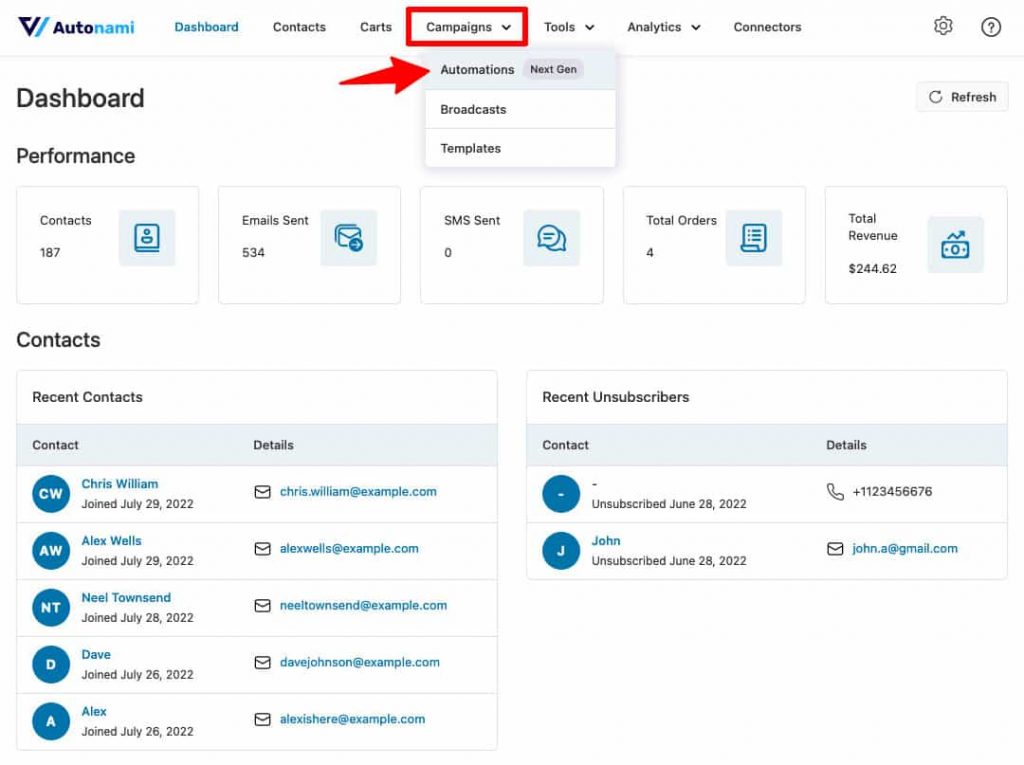
Click on ‘Add New Automation’.

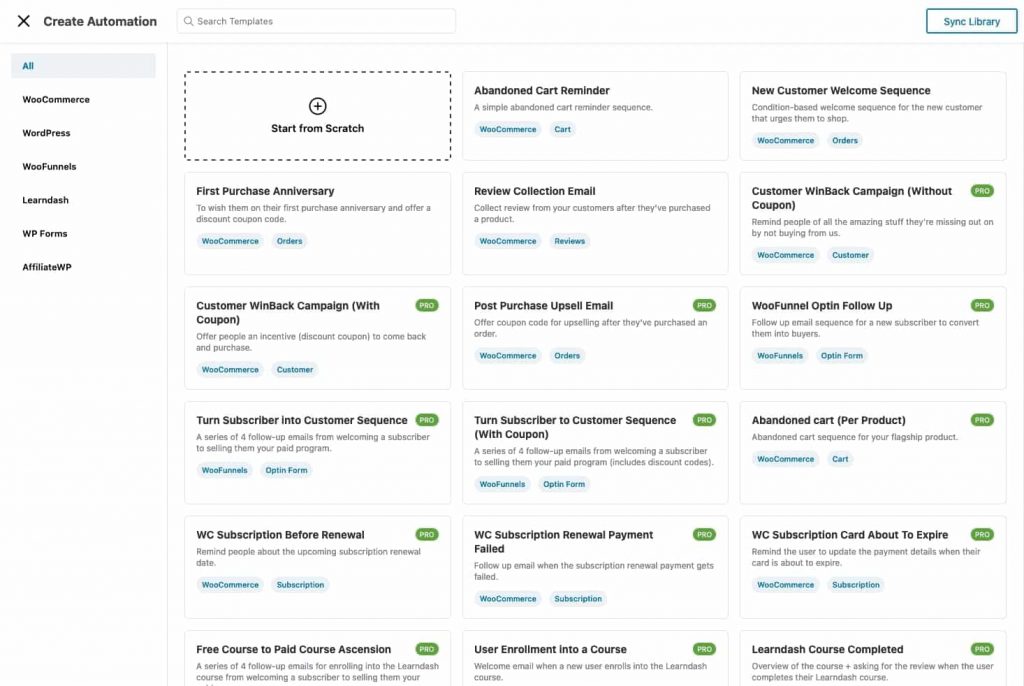
Here, you can see all the pre-built automated recipes covering different use cases (including LearnDash) that can be imported and used on the go.
For creating a fresh automation, hit the ‘Start from Scratch’ button.
Name your automation and click on ‘Create’.
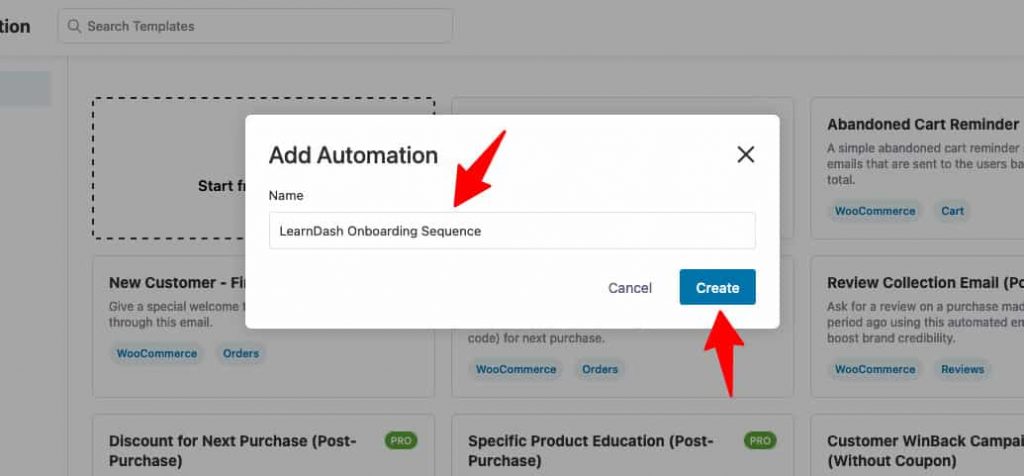
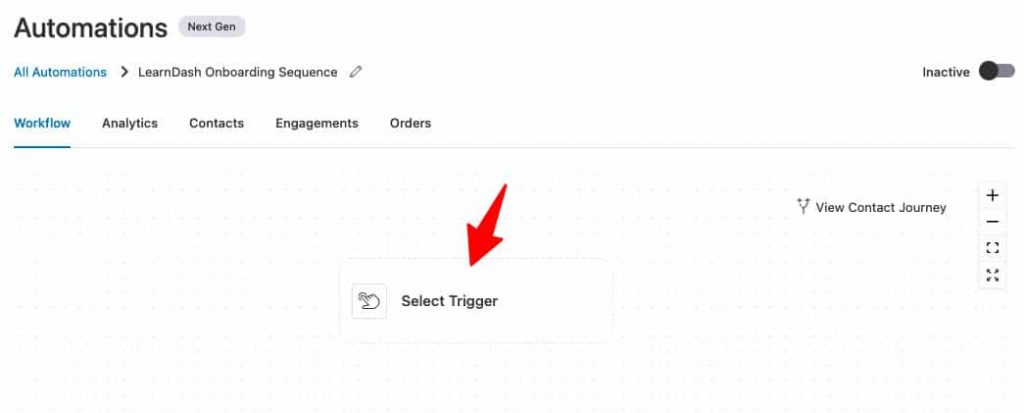
Your automation will be created and you’ll be directed to the workflow screen. This is where you can send email notifications to your LearnDash students.
Click on ‘Select Trigger’.
Select the ‘User Enrolled into a Course’ event under LMS and click on ‘Done’.
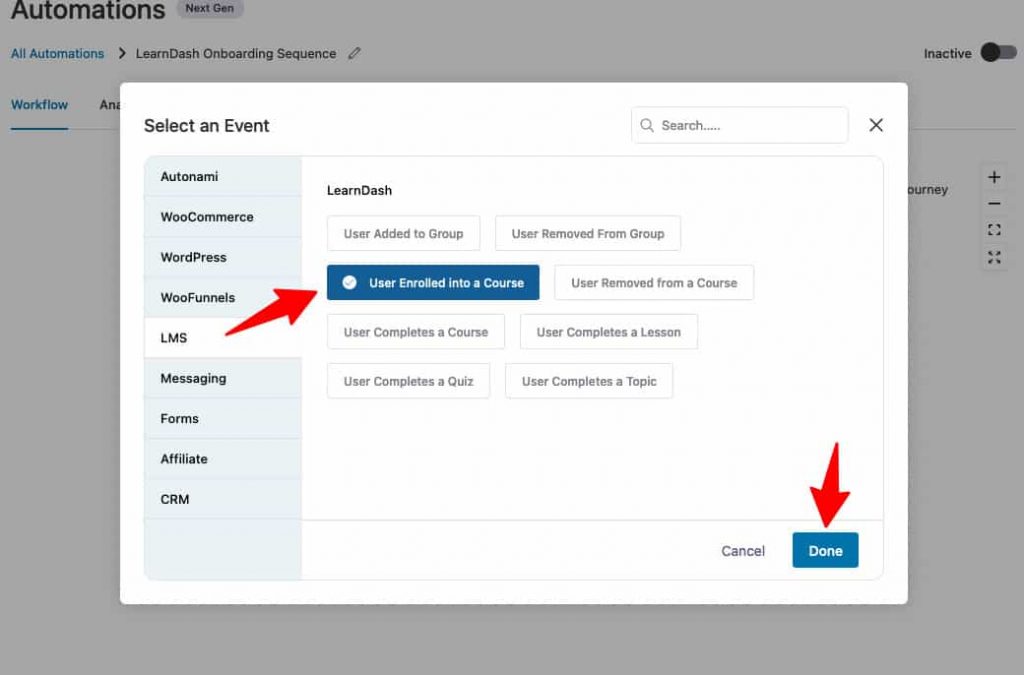
Your event trigger will get added to your workflow.
Next, click on the event node to configure it.
Select the course name under Specific Course and enable it to run ‘Multiple Times’.
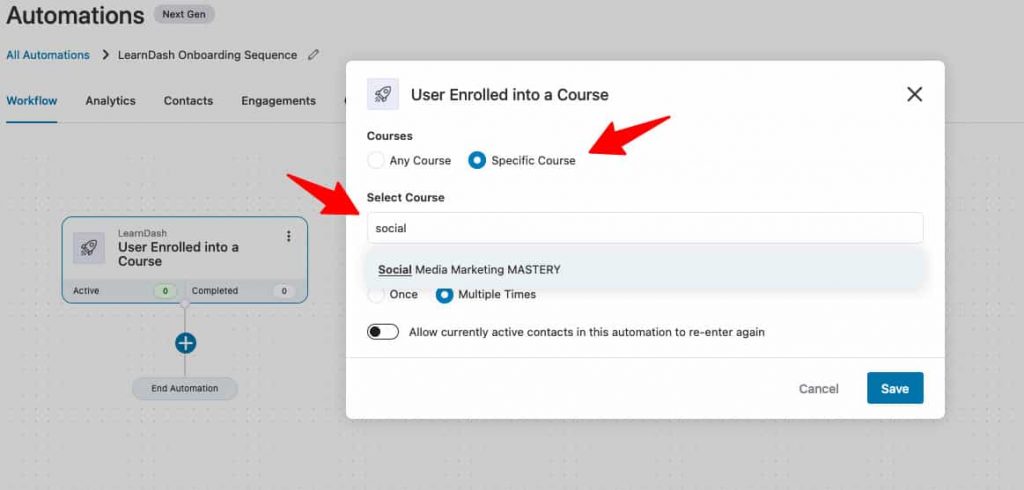
Click on ‘Save’ when done.
Here, we will add the ‘email’ action that will be sent to the user who triggers this automation.
Click on the (+) icon and hit ‘Action’.
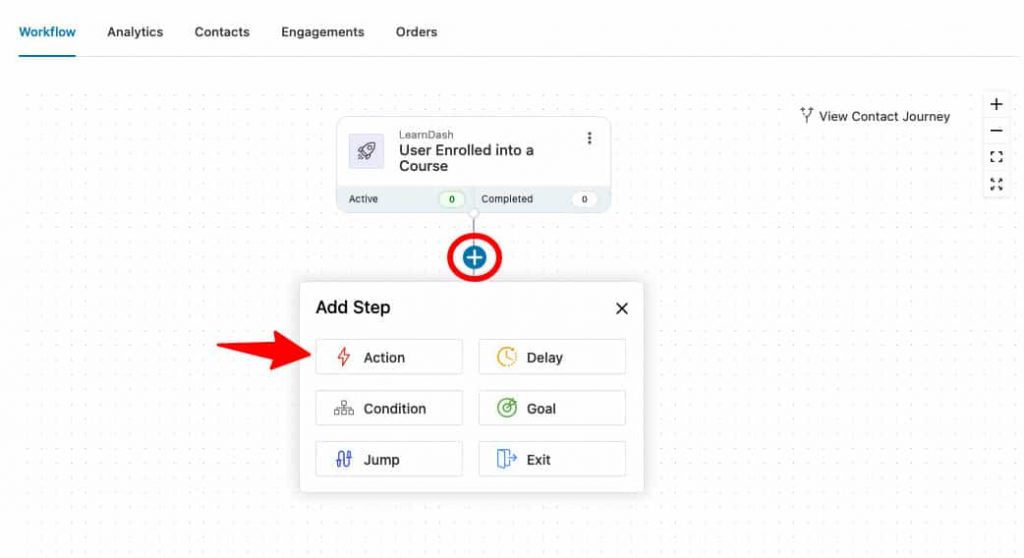
Select the ‘Send Email’ action under Messaging and click on ‘Save’.
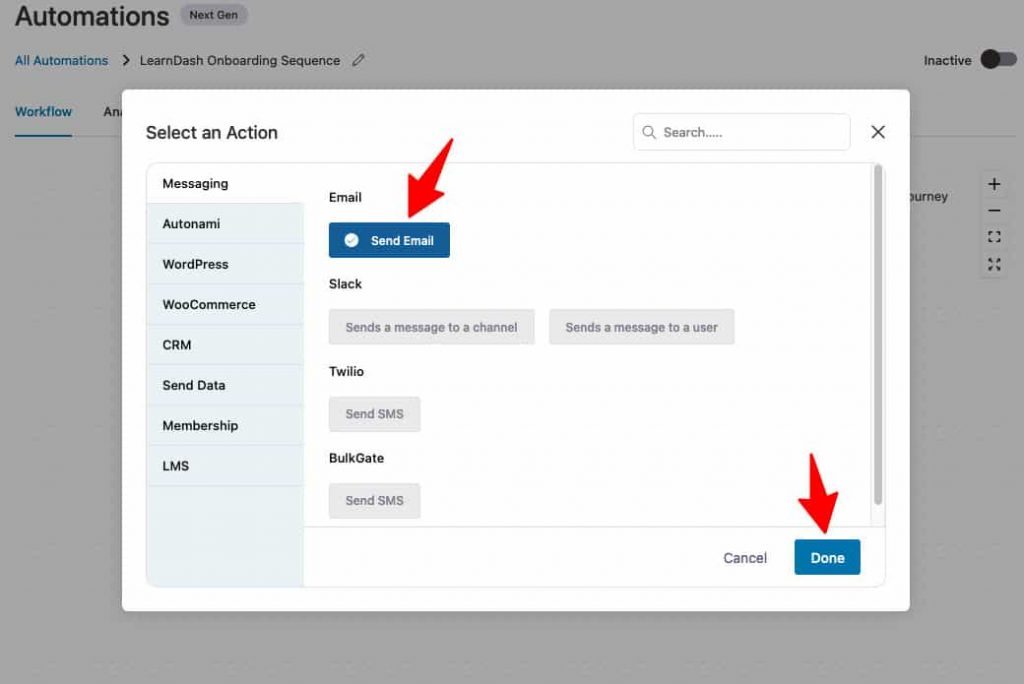
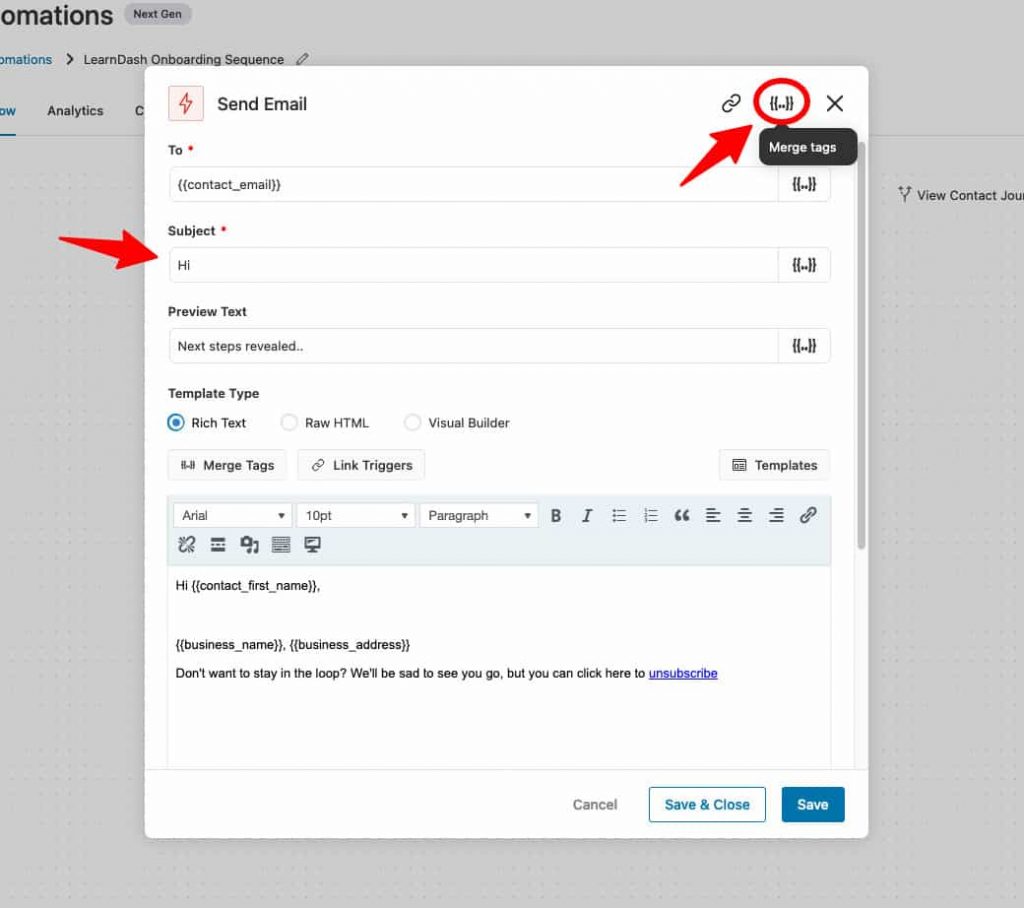
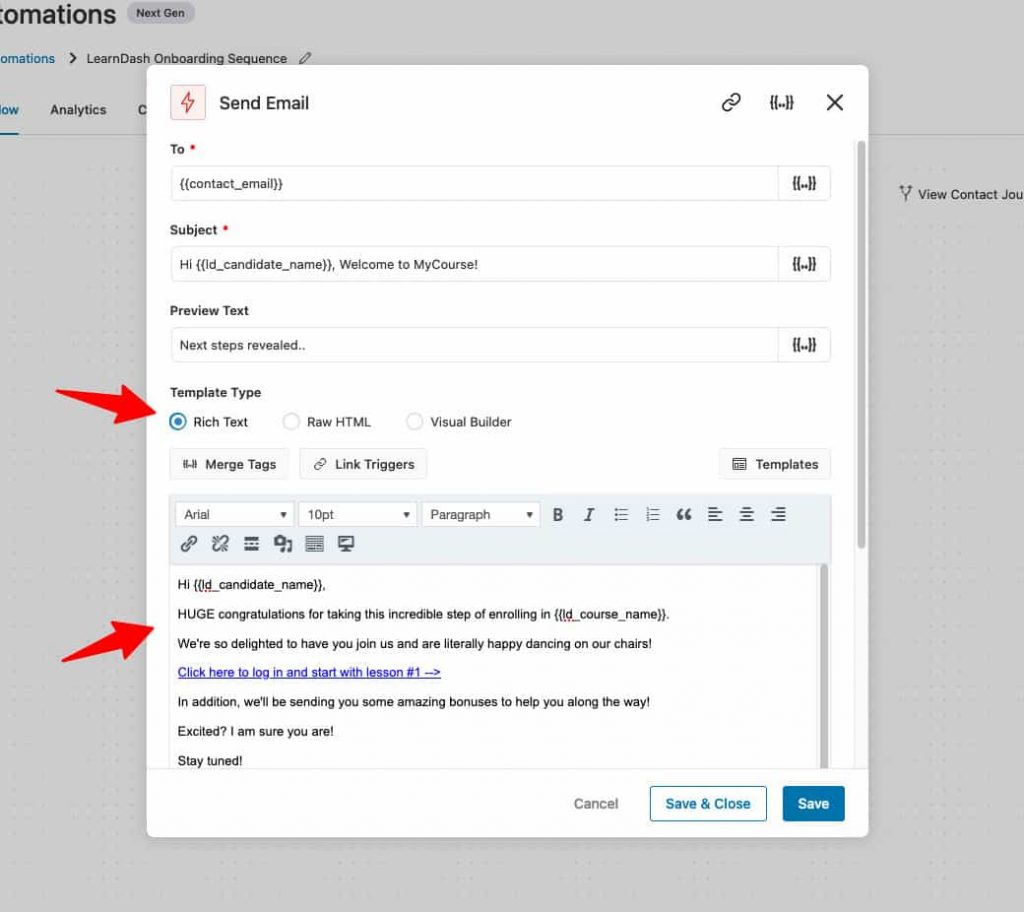
You’ll see a popup window for writing your email content.
By default, you’ll the ‘contact’s email’ merge tag assigned there.
Write the subject lines and preview text for your email.
Use merge tags to personalize your emails - click on the ‘Merge Tags’.
Copy the ‘Candidate Name’ merge tag from here.
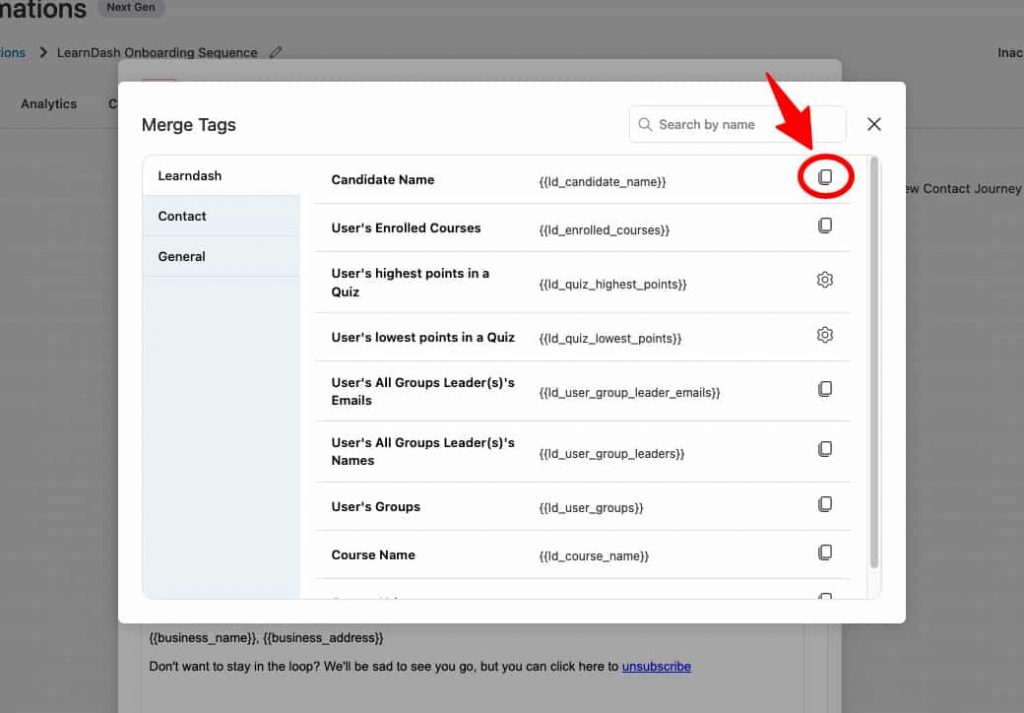
Paste it into your subject line or preview text.
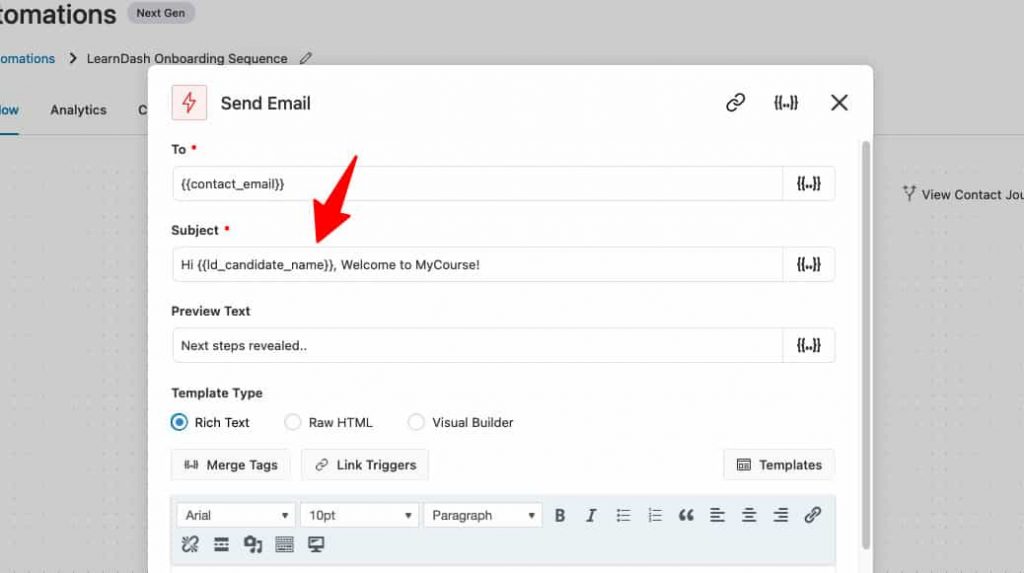
Next, write your email body content.
As you can see we have welcomed our students and guided them on the next step.
For that, we have used different merge tags as well.
Once you’re happy with your content, click on the ‘Save & Close’ button. It’ll take you back to your workflow screen.
Turn the automation toggle to ‘Active’ to make it live.
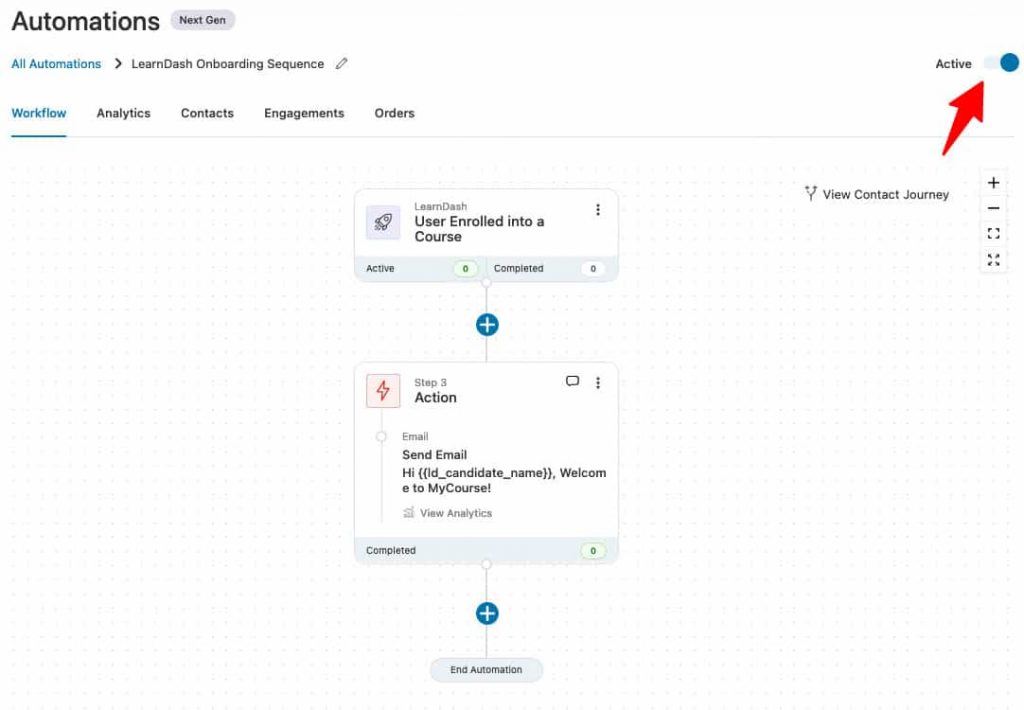
Perfect! Setting up your first LearnDash notification took just 4 steps!
Now whenever a fresh course enrollment happens, this email will be sent to your students.
In the next section, we'll look at some must-have automated workflows on your LearnDash website.
Here are the 4 essential LearnDash email automations you must set up on your website.
You can generate one-time passwords for users to log in to their course content.
This process is recommended to all the creators who are selling virtual courses online.
Make sure to install the WooCommerce Integration add-on provided by LearnDash and add your course to your online store.
Then, select the ‘Order Created’ event trigger.
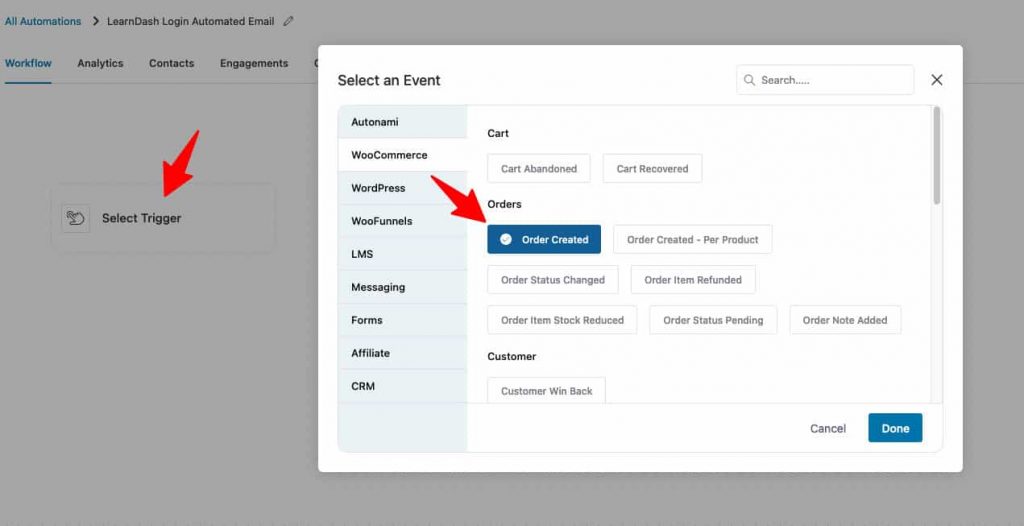
Next, configure your event.

Next, add the ‘Create WordPress user’ action to your workflow.
Enter the contact’s email, first name and last name with the help of merge tags.
Then, specify the role as ‘Student’ and enable the save password in plain text for one-time use.
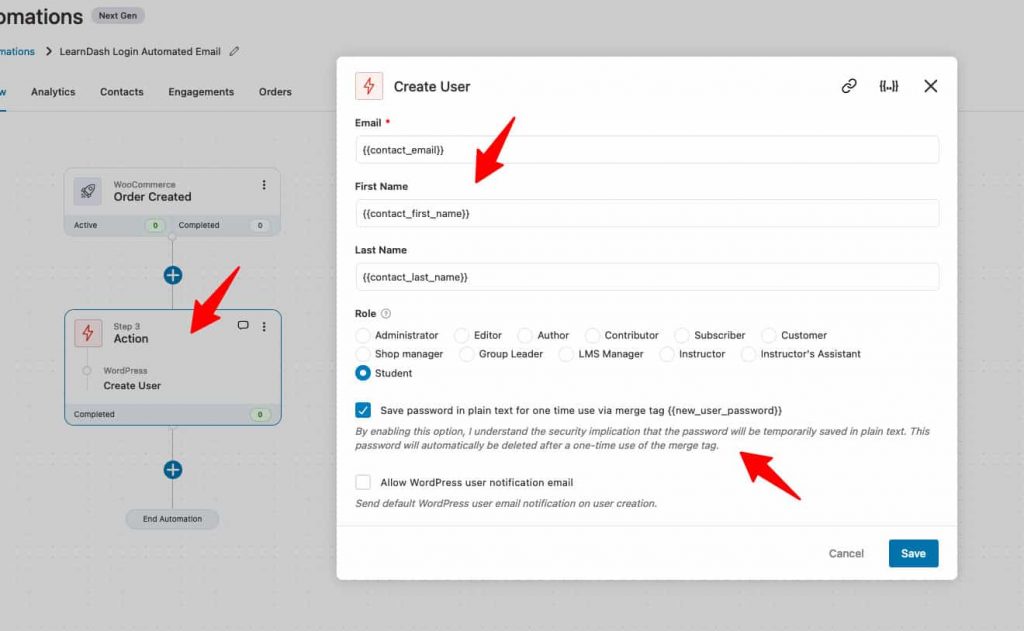
Then, add the ‘Send Email’ and copy the ‘New User Password’ merge tag.
Paste it to your email body content and click on ‘Save & Close’.
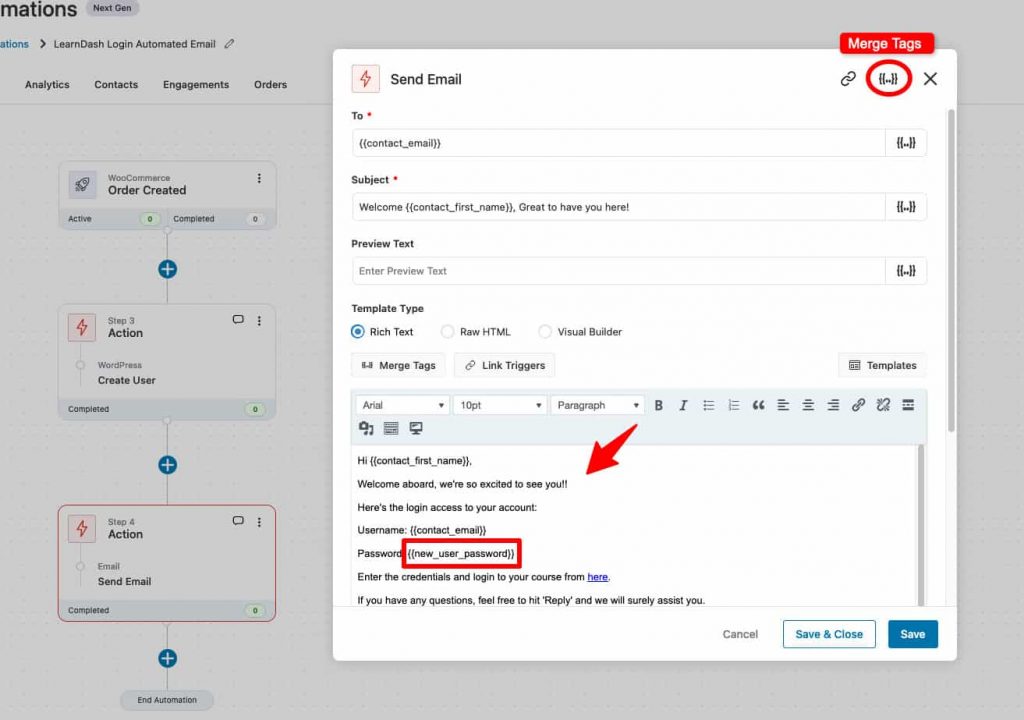
Now when a user purchases a course from your LearnDash website, this sequence will create an account and send an email with an automatically generated password to log in to their course content.
Take some time to appreciate the efforts of your students when they complete a lesson of the course.
Select the ‘User Completes a Lesson’ event and configure it by assigning the name of this lesson.
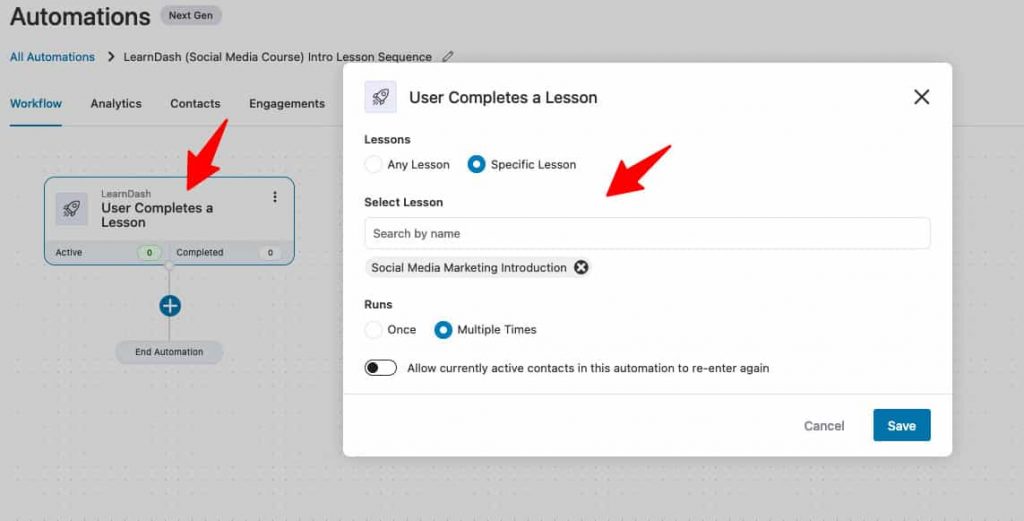
Then, add the ‘send email’ action and write your content.
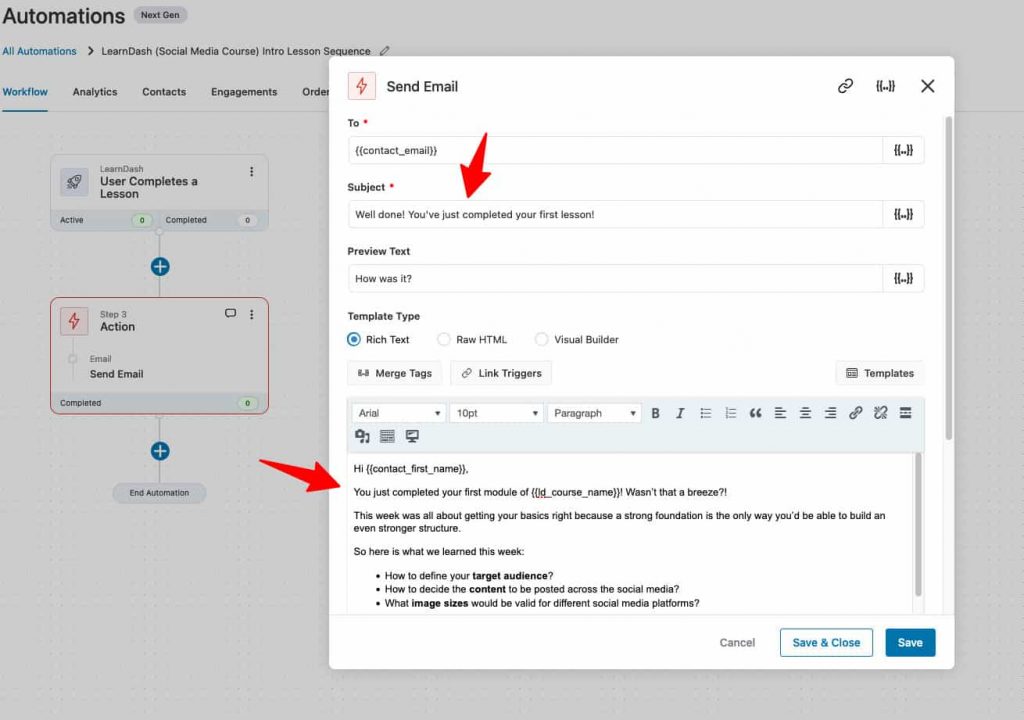
Here we wrote the bullets about what they have learned so far by giving them a sense of accomplishment. Plus, we built anticipation about the lesson for next week which would give them something to feel excited about and look forward to.
Emails such as these not only encourage the user to begin their next lesson right away but also reinforce the learning made so far.
Be sure to encourage them to join your Facebook Community, if you have one. It is a great method to take the conversation forward and build a stronger bond.
You can also send them emails and SMSs after they take a test or a quiz.
Use conditions in FunnelKit Automations to segment users based on the scores they get and set up emails for when someone clears or fails a quiz.
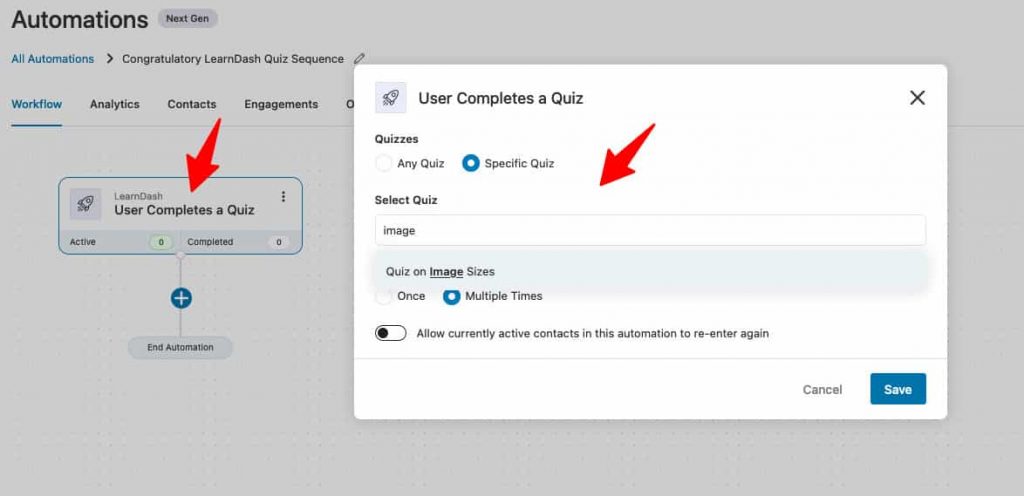
To send a congratulatory email to high scorers in a quiz, select the ‘User completes a quiz’ event trigger.
Configure your event node by specifying the name of the quiz.
Next, click on the (+) icon and select ‘Condition’.
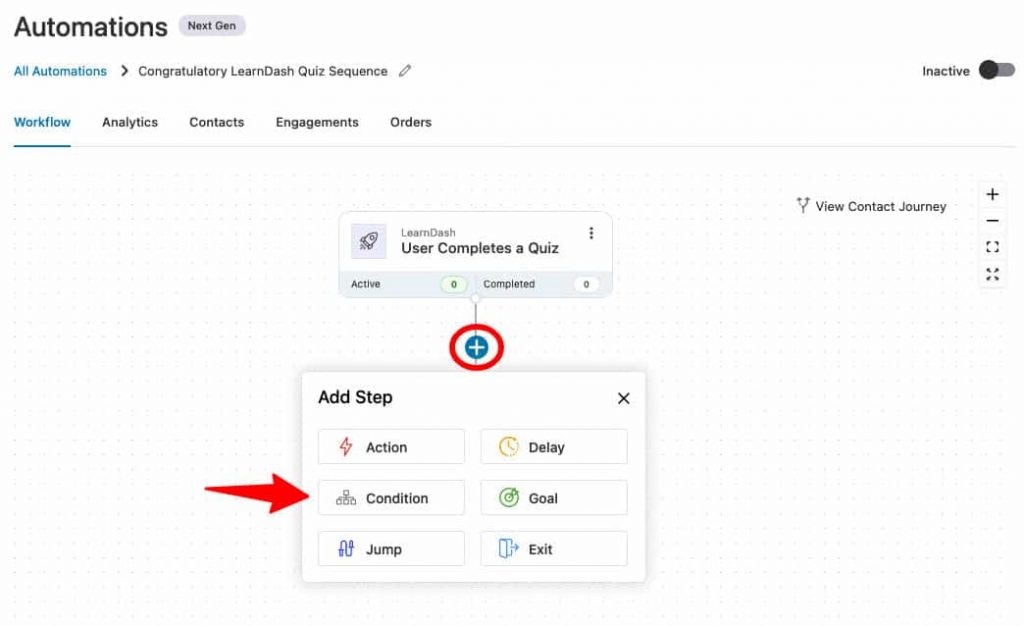
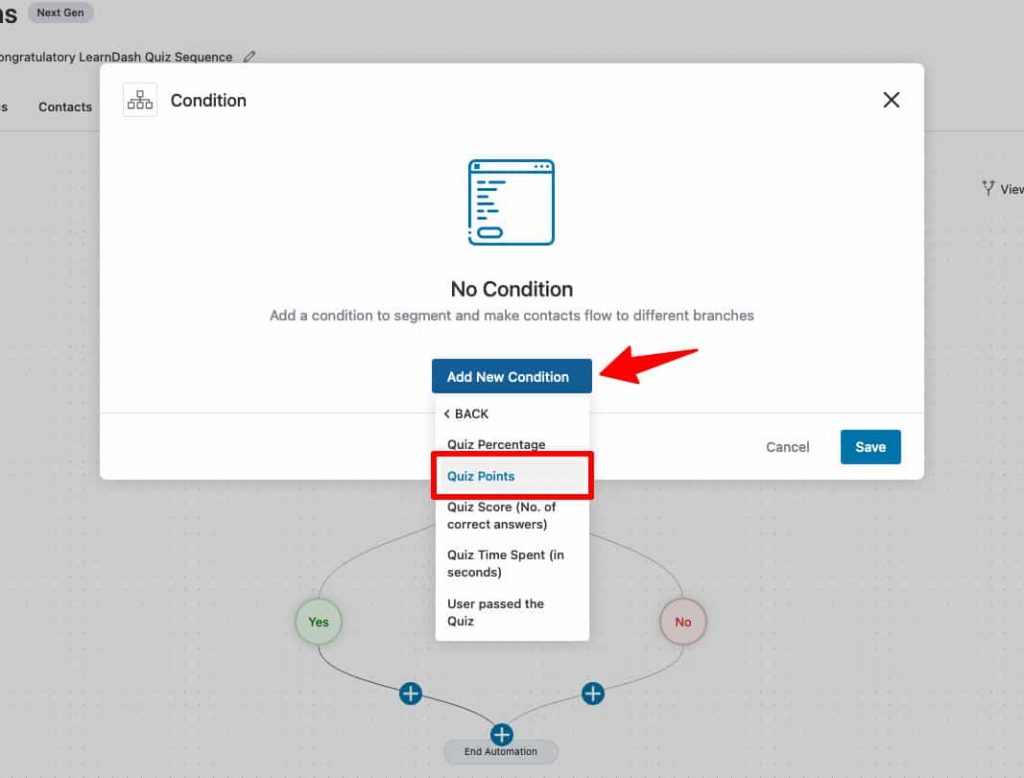
Click on ‘Add New Condition’ - under ‘LearnDash Quiz Result’, select ‘Quiz Points’.
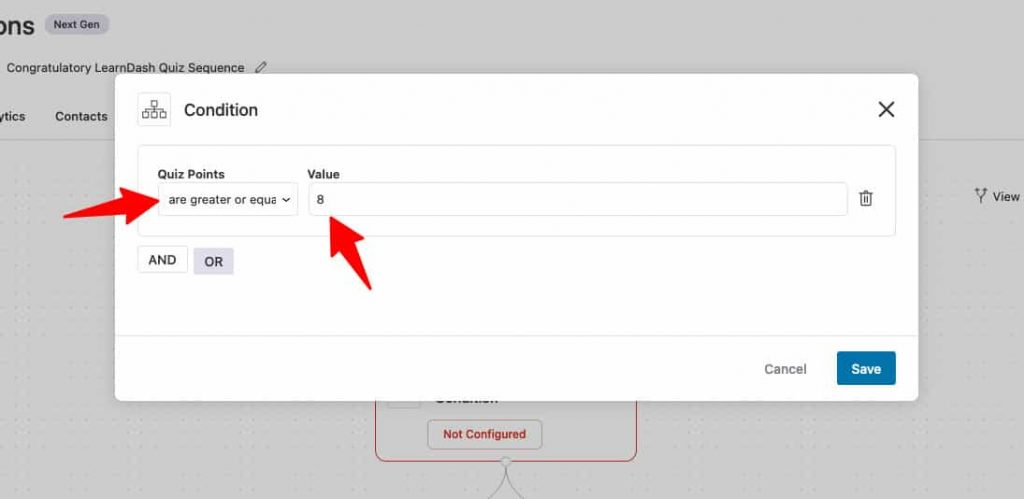
Assign 'greater or equal to' under Quiz Points and enter the value ‘8’.
Now, under the ‘Yes’ branch, add a ‘send email’ action.
Write down your congratulatory email there.
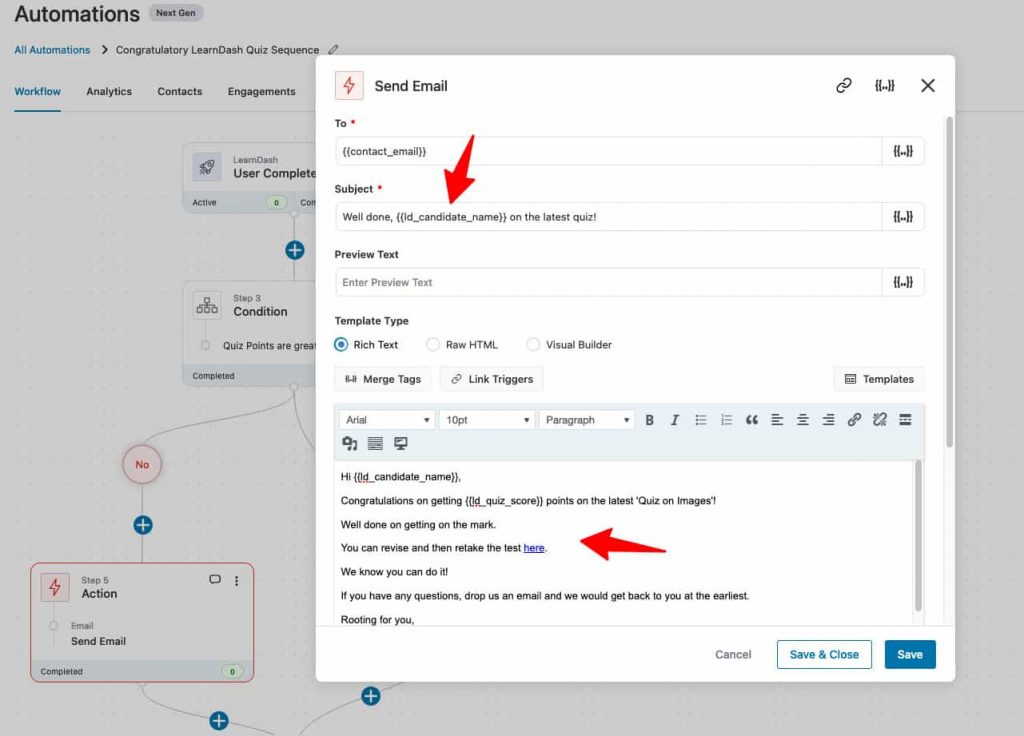
You can even add multiple branches and send segmented emails to your students based on the marks they got.
Each of the emails sent, need to be affable, and encouraging. Making your course takers feel important, smart, and capable is what will work the most in your favor.
You should always send an email at the end to congratulate them on finishing your course. Use this opportunity to upsell other related courses to the consumer.
Any course completion should be encouraged and celebrated in the online world to bridge the physical distance.
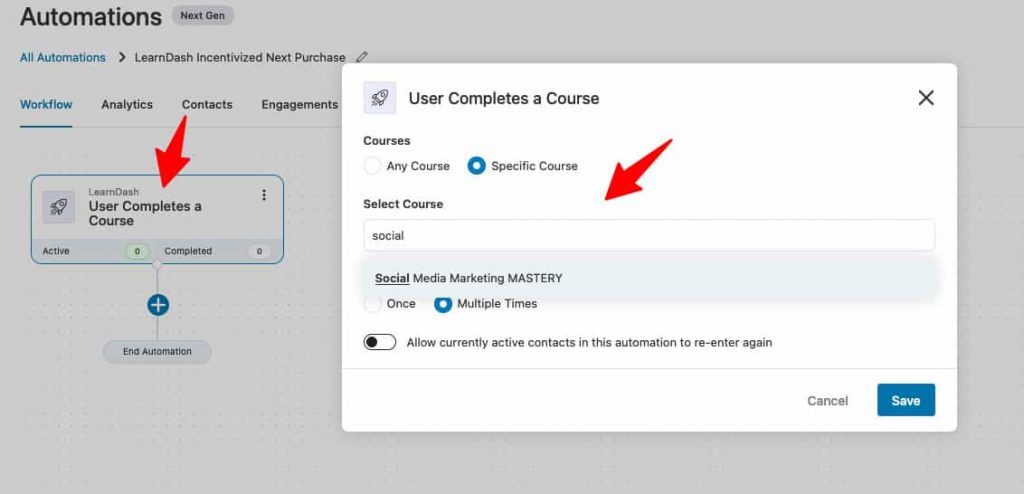
Select the ‘User completes a course’ event trigger and configure it.
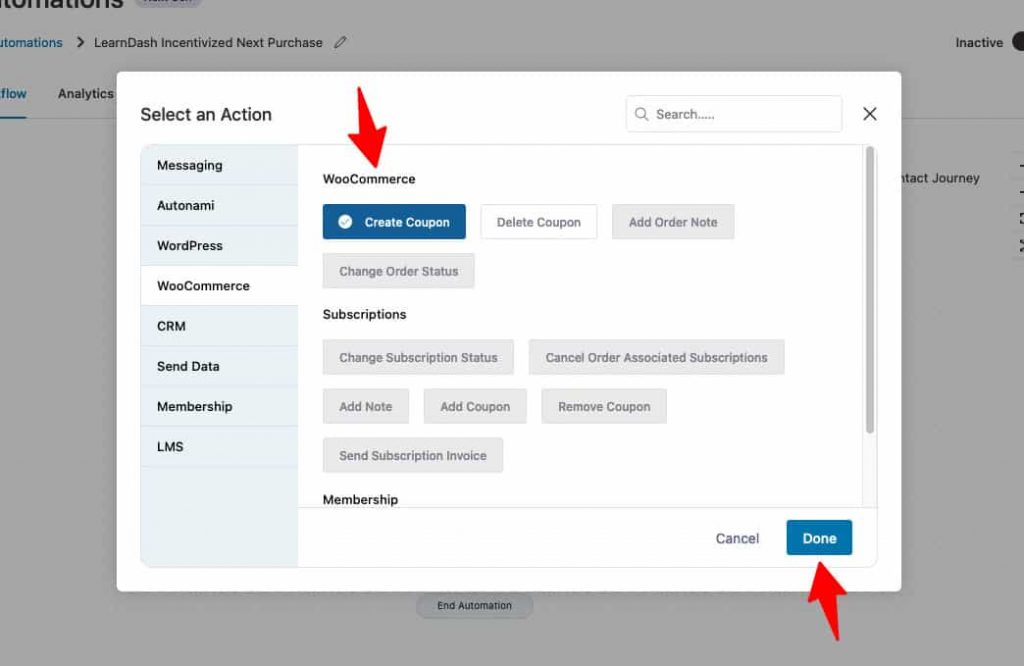
Offer them discount coupons on their next purchase.
You just have to add a ‘Create Coupon’ action to your workflow.
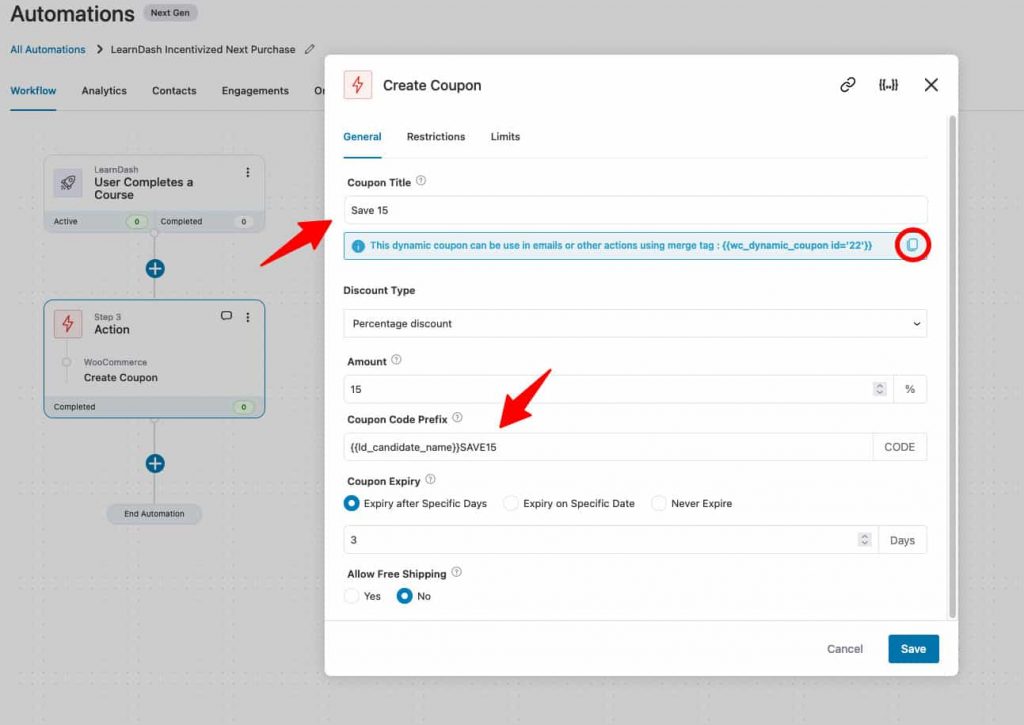
Then, enter your coupon details to be created in FunnelKit Automations such as coupon name, type, dynamic code prefix, validity, etc.
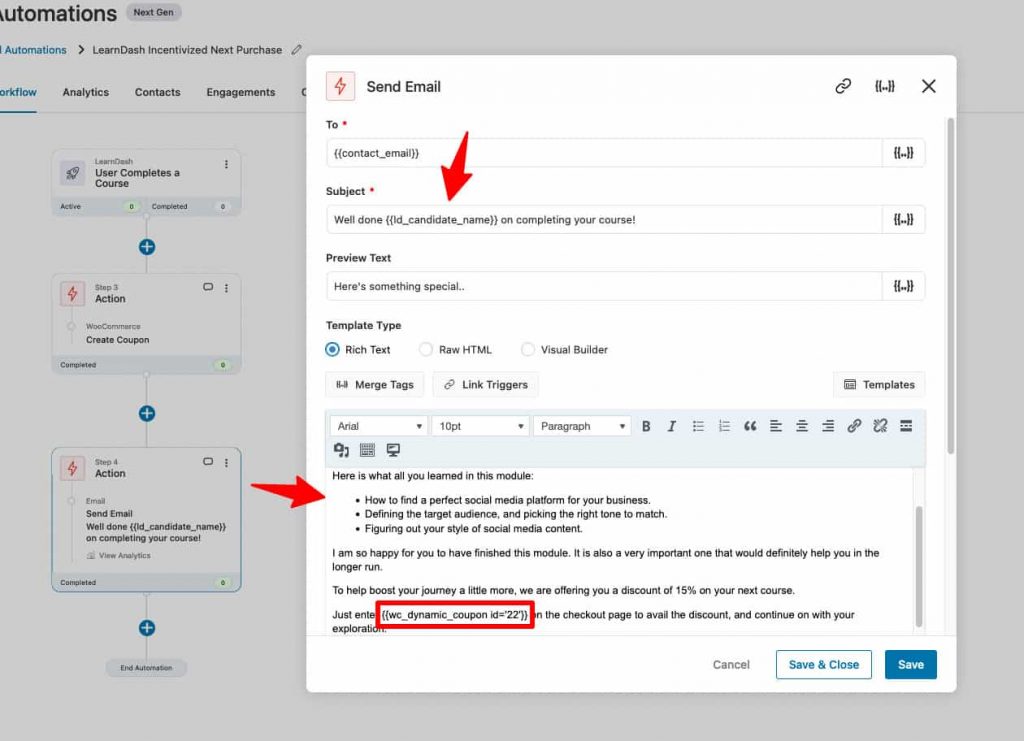
Add the ‘Send Email’ action to your workflow.
Make sure to include this dynamic coupon code in your email through which you can offer discounts to your customers on their next purchase.
So simple, isn’t it?
LearnDash is an amazing learning management system tool to set up online courses on WordPress in minutes.
However, it put some serious limitations if you want to automate your communication through emails or SMS.
On the other hand, FunnelKit Automations is a full-fledged CRM that is compatible with LearnDash.
Not just setting up different triggers and well-timed actions, FunnelKit Automations further allows you to design attractive emails that are too hard to take your eyes off and send to your users.
It eases the way one can connect with the users and create a strong bond with them - all through automated LearnDash notifications!
Again, maintaining a casual, warm tone will help your students feel connected to you, and they would be more likely to continue taking courses from you.
Here’s to building interactive learning and getting repeat sales through LearnDash automated emails!
Explore FunnelKit Automations and set up your first LearnDash email notification today >>